Table of Contents
Advertisement
Quick Links
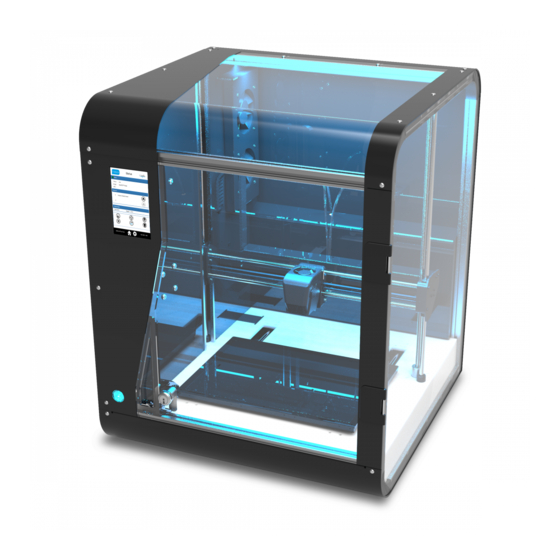
Getting Started Guide for the RoboxPRO
Getting Started with the RoboxPRO
Thank you for purchasing a RoboxPRO FFF 3D Printer. This information will help you get started using your new
printer. Please follow the unboxing and setup guide to get your printer out of the box and set up for use.
Installing AutoMaker
AutoMaker is the software that allows you to load models, slices those models, and sends the resulting file to the
printer. The file is then stored on the printer so that the printer can be disconnected for the remainder of the print if
you so desire.
You will need to download AutoMaker from the following website: www.cel-robox.com/downloads
Please select the appropriate version for your computer. Once the file is downloaded, you will need to install the
software by running the installation program. You can run the program just as any other program on your
computer.
Connecting RoboxPRO
The 3D printer will require two connections: one AC power connection and one network connection. Please note
that the power supply on the 3D printer is non-switching so please make sure the power supply is set to the proper
voltage value to avoid damaging the printer. 3D printers sold in Europe are preset to 230 VAC. Those sold in the USA
or shipped to the USA from a European provider are preset to 115 VAC and will need to be changed. The power
supply is on the bottom of the printer; a small switch inset in the side of the power supply will allow you to select
the proper voltage.
Plug the power cable into the socket on the back of the RoboxPRO next to the power switch. Plug the other end
into a high quality surge protector or battery backup unit. Please note that 3D printer damage caused by power
problems is not covered under warranty.
If you will use the RoboxPRO on a wired network, plug the CAT5e network cable into the network jack on the back
of the 3D printer. Plug the other end into your network outlet.
For WiFi operation, see the WiFi setup section.
Choose the print head you would like to use and install it. RoboxPRO comes with three print heads: the single
material QuickFill V2 print head (black), the DualMaterial print head (gray), and the SingleX with Olsson Ruby nozzle
print head (clear). Install the print head by inserting its tail into the opening in the X-Carriage and tightening the
retaining screw on the back of the X-Carriage until the screw can't be turned, usually 4-5 full turns. Please
remember to turn off the printer before changing the print head. See the section on Print Heads to help choose the
print head appropriate for the project you are running.
Once the RoboxPRO is connected to power, and a print head is installed, you can turn the 3D printer on with the
switch on the back of the printer. Please note that this is also the emergency shutoff, which will immediately cancel
any operation in progress. The printer will not retain the current status of any running operation and will have to be
restarted.
The printer will take about 4-5 minutes to boot and be completely ready for operation.
Page 1 of 7
Advertisement
Table of Contents

Related Manuals for CEL RoboxPRO

Summary of Contents for CEL RoboxPRO
- Page 1 Plug the power cable into the socket on the back of the RoboxPRO next to the power switch. Plug the other end into a high quality surge protector or battery backup unit. Please note that 3D printer damage caused by power problems is not covered under warranty.
- Page 2 Before loading, cut the end of the filament flat and square to prevent a sharp end from damaging the RoboxPRO. Insert the cut end into the filament inlet on the front face of the filament reel housing (it is easiest to feed with one hand while holding the reel of filament in the other).
- Page 3 Main Status Screen This screen shows the status of the RoboxPRO at the given time. It has a picture of the 3D printer which will change if a different colour of filament is loaded, if the head is installed or removed, or if the printer door is open. It will also show the selected colour of the internal lighting on the printer.
- Page 4 The lower box profiles the custom profile selection and additional print settings options: Raft: This option creates a later of material under the model. It is usually not required with the RoboxPRO, but is often used with other 3D printers to reduce warping.
- Page 5 There is also a link to the AutoMaker version Readme file. The “i” button opens your default web browser to the latest CEL information articles.
- Page 6 Device Manager. Remote Access The RoboxPRO can be accessed from any web-enabled device on the same local area network by going to a browser and entering the following address, where XXX.XXX.XXX.XXX is the IP address of the printer as displayed on the front panel of the printer: http://XXX.XXX.XXX.XXX:8080/home.html...
- Page 7 The print bed surface is a flexible steel plate with either a LokBuild™ polycarbonate print bed or ThermoSurface™ polyetherimide print bed, depending on when your RoboxPRO was purchased. To preserve the life of either surface, please wait until the bed temperature has dropped below 40°C to remove the print. When using the LokBuild surface, we suggest carefully sliding a thin tool between the edge of the print and the print surface of the to loosen it first.
Need help?
Do you have a question about the RoboxPRO and is the answer not in the manual?
Questions and answers