
Subscribe to Our Youtube Channel
Related Manuals for Codex Onboard S

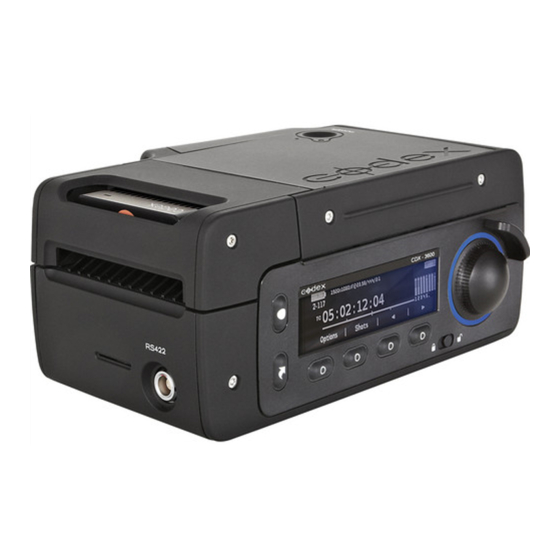
Summary of Contents for Codex Onboard S
- Page 1 USER GUIDE ONBOARD S RECORDER RECORDING ARRIRAW 4:3 REVISION 11.22.2012 CODEX ONBOARD S RECORDER - RECORDING ARRIRAW 4:3 REV 11.22.12 PAGE 1...
-
Page 2: Safety Warnings
Disclaimer Codex products are continually developed to remain at the forefront of the industry, and as such the information in this guide is subject to change without notice. Whilst Codex endeavour to ensure that all documentation provided is correct at the time of writing, this document is not guaranteed to be error-free. -
Page 3: Software Versions
3. Connecting the Alexa to the Onboard S Connect a BNC cable from the REC OUT 1 connector on the Alexa to IN 1 on the Onboard S, and from the REC OUT 2 connector on the Alexa to IN 2 on the Onboard S. - Page 4 5. Menu settings for the Onboard S The majority of menu settings on the Onboard S can be set at the start of a shoot and kept for the duration of the project. We will cover these menu items first, then move on to the settings that a camera crew might change on a day-to-day basis.
- Page 5 Shot Naming Rule: “{Scene}-{Take}_{r}” Roll Naming Rule: “{SourceId}{Datapack}” If recording to Onboard S and in-camera SxS you may want the naming to match on the two systems. In this case these naming rules may be used: } Shot Naming Rule: “{AlexaSxSName}”...
- Page 6 Main ring bright: The Onboard S recorder can take an input voltage from 10.5-34V (24V or above is normally used). By default it will shut down if the voltage drops below 10V. You can increase the voltage level at which the recorder shuts down in order to protect some types of battery, but this is not...
- Page 7 If you do not require that ARRIRAW timecode matches SxS recordings, then choose any “TC source” or “AUX source”. The Onboard S can capture Focus, Iris, and Zoom data (if an LDS compatible lens is used) as well as Tilt and Roll data from the Alexa.
- Page 8 It is possible to force a particular Tc/Play rate. It is recommended to set this to the correct rate for your project, which will mean that: 1. The Timecode displayed on the Onboard S matches the timecode displayed on the Alexa when shooting off-speed.
- Page 9 TEL +44 207 292 6918 CODEXDIGITAL.COM INFO@CODEXDIGITAL.COM CODEX ONBOARD S RECORDER - RECORDING ARRIRAW 4:3 REV 11.22.12 Codex Digital Limited reserve the right to alter the specification at any time and without prior notice. © Copyright Codex Digitial Limited November 2012. PAGE 9...
Need help?
Do you have a question about the Onboard S and is the answer not in the manual?
Questions and answers