Advertisement
Quick Links
Instruction Manual
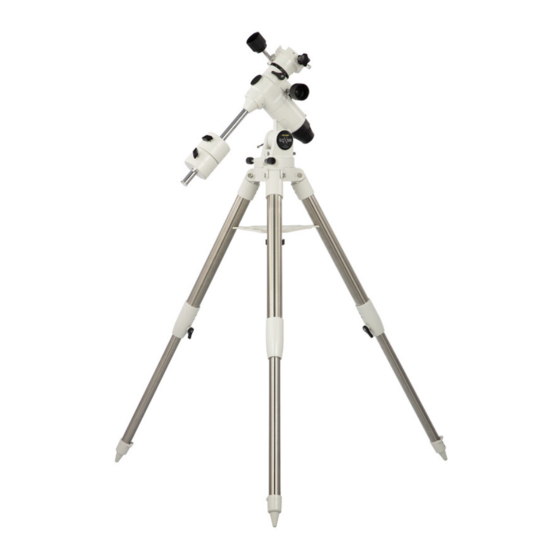
Omegon® EQ-500 X
English Version 8.2019 Rev. A, Art.-Nr. 62783
Reproduction of part or all of the contents of this document in any form is expressly prohibited other than for individual use only. All text, images and labels are property of Nimax Gmbh.
Advertisement

Related Manuals for Omegon EQ-500 X


Summary of Contents for Omegon EQ-500 X
- Page 1 Instruction Manual Omegon® EQ-500 X English Version 8.2019 Rev. A, Art.-Nr. 62783 Reproduction of part or all of the contents of this document in any form is expressly prohibited other than for individual use only. All text, images and labels are property of Nimax Gmbh.
- Page 2 At the same time, it allows you to easily point the telescope in any direction. The Omegon® EQ-500 X is an equatorial mount and hence offers even further convenience for observing the night sky. It is designed to compensate for the Earth’s rotation.
- Page 3 What is what? To properly follow this manual and successfully operate the telescope mount, it is helpful to know how all the different parts and features of the mount are called. a- Slow motion knob (RA-axis) b- RA-axis clamp c- Polar scope cover (back) d- Altitude clamp e- Altitude adjustment handle f- Slow motion knob (DEC-axis)
- Page 4 How to assemble the mount? 1. Preparing the tripod 1.1 Loosen the clamps for the tripod legs. Slide out the leg extensions and re-tighten the clamps. 1.2 Spread the three tripod legs to give it a wide and stable stance. 1.3 Remove the black spreader knob from the central rod.
- Page 5 3. Attaching miscellaneous parts 3.1 Insert the spreader plate onto the central rod. Slide it up as far as possible while positioning it tightly between the three legs. 3.2 Screw the black knob onto the central rod to tighten and hold the spreader plate into position.
- Page 6 4 Installing your telescope 4.1 Unscrew the telescope saddle knob and the saddle security screw. They need to be extended far enough to not obstruct the telescope’s dovetail bar in the next step. 4.2 Slide the telescope’s dovetail bar into the saddle. 4.3 Tighten the saddle knob against the dovetail bar, to securely fix the fix the telescope in place on the mount head.
- Page 7 Balancing the equatorial mount 1. The telescope must be balanced along the RA-axis and the DEC-axis. Get familiar with the clamps for both axes. The clamp for the RA-axis is further back on the mount, while the clamp for the DEC-axis is at the front, closer to the telescope saddle.
- Page 8 Polar alignment The polar alignment ensures, that the RA-axis of the telescope is parallel to the Earth’s axis of rotation. This makes tracking of objects in the night sky much more comfortable and allows the use of setting circles to centre on dark and hard to find objects. For visual observation, an approximate polar alignment is often enough.
- Page 9 1.4 Remove the front and back polar scope covers. For an exact polar alignment, an optical polar scope can be installed here. For the approximate polar alignment, the naked view through the polar tube is enough. 1.5 The approximate polar alignment is finished, when Polaris is visible in the centre of your field of view while looking through the empty polar tube.
- Page 10 How to use Setting Circles? Setting circles are a very useful tool for operating equatorial mounts, especially for finding faint objects without a GoTo function. They are best used in combination with a physical or digital star atlas, because you need to know the RA and DEC coordinates of stars and nebulas. There are setting circles on both the RA and DEC axis, marked with celestial coordinates.
Need help?
Do you have a question about the EQ-500 X and is the answer not in the manual?
Questions and answers