Table of Contents
Advertisement
Quick Links
Advertisement
Table of Contents

Related Manuals for Briggs & Stratton NAX 950V


Summary of Contents for Briggs & Stratton NAX 950V
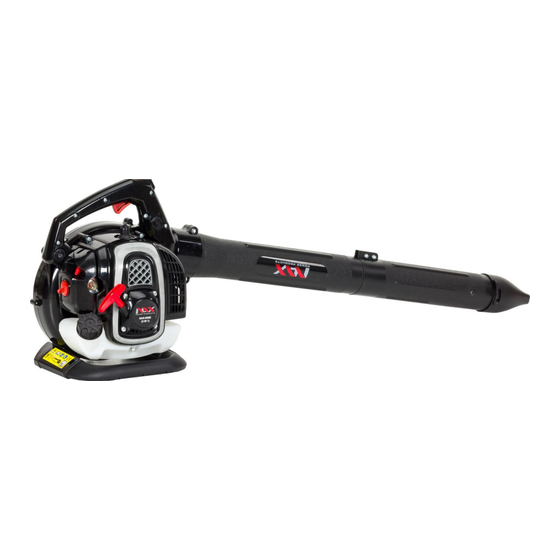
- Page 3 PETROL GARDEN VACUUM CLEANER / BLOWER Model: NAX 950V...
-
Page 4: Vacuum Cleaner Construction And Overview Drawings
CONSTRUCTION OF GARDEN VACUUM CLEANER AND VIEW DRAWINGS Fig. 1... - Page 5 Fig. 2 Fig. 3 Fig. 4 Fig. 5 Fig. 6 Fig. 7 Fig. 8...
- Page 6 Fig. 9...
- Page 7 Fig. 10...
-
Page 8: Table Of Contents
Original operation manual, edition 1/2020 Translation of the original operation manual from polish language This manual should be treated as an integral part of the device. It should be stored in the place provided for it so that it is easily accessible. -
Page 9: Technical Data
TECHNICAL DATA GARDEN VACUUM CLEANER / BLOWER Type, model NAX 950V Engine TT-1E34F- G1 series BS Fuel mix 40: 1 (4 l of gasoline for every 100 ml of two-stroke oil) Fuel tank capacity 0.45 l Engine capacity 230 cm Mix oil (recommended) Briggs &... -
Page 10: Safety Rules For Machines And Devices With Internal Combustion Engine
It is prohibited to work in the rain. Do not dispose of used equipment. It is the user's responsibility to hand over used equipment to a designated collection point for waste recycling. OTHER MARKINGS ON THE MACHINE 1.Name plate (page 2.B) 2. - Page 11 Before starting the engine, check the tightness of the entire fuel system, especially the fuel tank, fuel lines, connectors, filler cap and carburetor area. Do not start the engine if you detect a leaking fuel system as it may cause a fire.
-
Page 12: Detailed Safety Regulations
OPERATION AND EXPLOITATION OF TOOLS EQUIPPED WITH A BATTERY Before inserting batteries into the tool, make sure that its on / off switch is in the "off" position. Inserting the batteries into the device when the on / off switch is in the "on" position can cause serious injury. ... - Page 13 – after hitting with a foreign object, – before you clean, – in the event of abnormal vibrations. PREPARATION When using the device, always wear solid footwear and long pants, do not operate the device without shoes or wearing sandals. ...
-
Page 14: Safety And Producer's Liability
MAINTENANCE AND STORAGE WARNING! Before attempting any repair or maintenance, make sure the vacuum cleaner. engine has stopped and is cold. Disconnect the high voltage cable from the spark plug to prevent accidental starting of the engine. Remember that there may be fuel in the machine's tank. Safety rules for handling fuel are described in this manual in the section "Safety in handling fuel". -
Page 15: Application
When observing the instructions in the operating manual, the residual hazards of using the machine may be eliminated. There is a risk in case of failure to comply with the above recommendations. USAGE Correct, reliable and safe operation using a garden vacuum cleaner depends mainly on proper operation. Non-compliance with the instructions in this manual excludes the manufacturer and the service from any liability resulting from this. - Page 16 APPLIANCE ASSEMBLY VACUUM ASSEMBLY INSTALLATION Before starting work, connect the main part of the vacuum cleaner containing the motor with the suction pipe and the bag for collecting leaves. Insert the discharge pipe elbow 23 (Fig. 1) deep into the collecting bag with the latch 19 (Fig. 1). ...
-
Page 17: Maintenance
START UP CAUTION! For safety reasons, the device cannot work without pipes installed. To activate the device: Make sure that the vacuum cleaner stands firmly on the ground. Always hold the device. Switch 2 (Fig. 6) set to "I" position. ... -
Page 18: Cleaning And Storage
- wash the filter sponge element 9B (Fig. 7) water with detergent, - squeeze the foam element into a clean cloth, - wet the filter sponge with a few drops of clean engine oil, then squeeze out excess oil. If the 9A pre-filter (Fig. 7) it is dirty, clean it with a soft brush. If the filter is damaged or damaged, replace the filter with a new one. -
Page 19: Transportation
Cleaning agents and solvents such as gasoline, carbon tetrachloride, chlorinated cleaning solvents, ammonia and household detergents that contain ammonia can damage plastic components. Lubrication is not required because the motor is equipped with bearings that are lubricated throughout its life. LOCK REMOVAL Leaves and fresh plant parts can clog the garden vacuum cleaner. -
Page 20: Problems Review And Diagnosis
PROBLEMS REVIEW AND DIAGNOSIS INSPECTIONS In case of Prior to After each Inspections Monthly damage or If required each use refueling malfunction visually check (condition, leaks) Entire Machine and cracks clean Switch, starter, test throttle inspect Fuel filter in the replace clean / replace fuel tank. - Page 21 TROUBLESHOOTING Problem Possible cause Solution Low fuel. Check the fuel level and add fuel if necessary. Spark plug flooded or damaged. Check, clean or replace the spark plug. No spark on the spark plug. Replace the spark plug with a new one. Difficulties in No choke attached.
-
Page 22: Device Assembly Diagrams
DEVICE ASSEMBLY DIAGRAMS The assembly diagram of the device is available on the website 6 and 7 (Fig. 9 and 10). WARRANTY AND SERVICE The product purchased by you is intended for amateur (hobby) use only. If the equipment is used for other purposes (commercial, professional), it will lose the guarantor's liability for the purchased equipment. -
Page 24: Declaration Of Conformity
DECLARATION OF CONFORMITY ... - Page 25 WARRANTY Dear Sir or Madam, Thank you for purchasing our product and congratulations on your right choice. The device that you bought was designed and manufactured according to the latest technologies and represents global standards of quality and reliability, while being environmentally friendly. We remind you to carefully read the commissioning and operation procedures before using the device;...
-
Page 26: Warranty Conditions
WARRANTY CONDITIONS 1. NAX guarantees smooth operation of the device in accordance with the technical and operational conditions described in the User Manual. 2. The device is granted a 36-month warranty to the consumer (i.e. a natural person making a legal transaction with the entrepreneur not directly related to its business or professional activity) and a 12-month warranty when purchased by the entrepreneur (i.e. -
Page 27: Warranty Card
Warranty card ………………………………………………………………….. ………………………………………………………………………….. Equipment name * Model * …………………………….…… ………………………………………… ………………………………………… Date of sale * Device serial number * Engine serial number I declare that I have read the User Manual and the Warranty Card. I received the purchased equipment in working order, complete, along with the proof of purchase.
Need help?
Do you have a question about the NAX 950V and is the answer not in the manual?
Questions and answers