Advertisement
Available languages
Available languages
Quick Links
Advertisement

Subscribe to Our Youtube Channel
Related Manuals for Muller licht 404015

Summary of Contents for Muller licht 404015
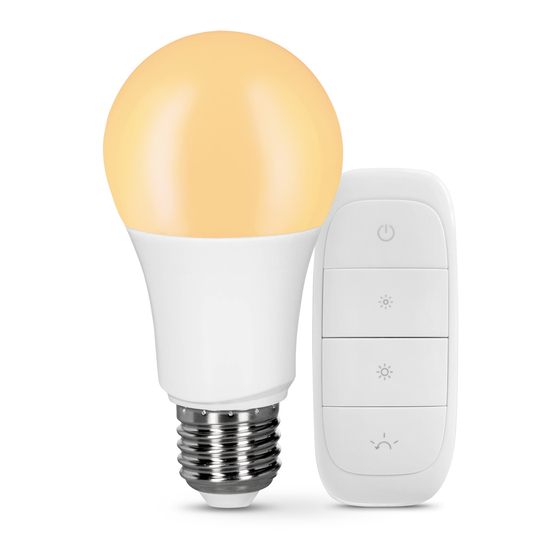
- Page 1 . s o s i m p l e . Simple via mobile switch. Smart home ready. BULB + MOBILE SWITCH 404015 Bedienungs- und Montageanleitung BEDIENUNGSANLEITUNG ab Seite 2 MODE D‘EMPLOI à partir de la page 13...
-
Page 2: Bestimmungsgemäßer Gebrauch
BEDIENUNGSANLEITUNG Bestimmungsgemäßer Gebrauch • Dieser Artikel ist für Beleuchtungszwecke in trockenen Innenräumen konzipiert. Für die gewerbliche Nutzung ist der Artikel ungeeignet. Sicherheitshinweise Wichtige Hinweise • Dieser Artikel kann von Kindern ab 8 Jahren und darüber sowie von Personen mit verringerten physischen, sensorischen oder mentalen Fähigkeiten oder Mangel an Erfahrung und Wissen benutzt werden, wenn sie beaufsichtigt oder bezüglich des sicheren Gebrauchs des Artikels unterwiesen wurden und die daraus resultierenden Gefahren verstehen. - Page 3 Explosions- und Auslaufgefahr, außerdem können Gase entweichen! • Vermeiden Sie Kontakt der Batterieflüssigkeit mit Haut, Augen und Schleimhäuten. Bei Kontakt spülen Sie die betroffenen Stellen sofort mit reichlich klarem Wasser und suchen Sie umgehend einen Arzt auf. VORSICHT vor Sachschäden •...
- Page 4 tint-mobile switch 2 Resonanzanzeige 1 Standby-Taste 5 Batterie- fachdeckel 3 Helligkeits- steuerung 4 Favoriten- Taste Inbetriebnahme Leuchtmittel einsetzen Sie können das mitgelieferte Leuchtmittel in unterschiedliche Leuchten einsetzen, z.B. in eine Deckenleuchte und eine Stehleuchte oder in eine Schreibtischleuchte. Einzige Voraussetzung ist, dass die Leuchten über eine passende Fassung verfügen.
- Page 5 Batterien einlegen 6 Reset-Taste 1. Öffnen Sie das Batteriefach auf der Rückseite der mobile switch Fernbedienung. 7 Batterie- 2. Legen Sie eine Batterie des fach für Typs CR 2450 / 3 V so ein, 1 Batterie wie auf dem Boden des CR 2450 / 3 V Batteriefachs abgebildet.
- Page 6 Wandhalterung anschrauben ACHTUNG Vergewissern Sie sich, dass sich keine Rohre oder Leitungen an der Bohrstelle befinden. Je nach Untergrund können Sie die Wandhalterung auch mit Schrauben und ggf. Dübeln an eine Wand schrauben. Schrauben und Dübel gehören zum Lieferumfang. 1. Trennen Sie die beiden Hälften der Halterung. 2.
- Page 7 Grundfunktionen Ein- /Ausschalten Drücken Sie die Standby-Taste, um die Lampen ein- und wieder auszuschalten. Die Memory-Funktion merkt sich den letzten „Beleuchtungszustand“ und startet damit beim nächsten Einschalten automatisch. Helligkeit einstellen Durch langes Drücken stellen Sie die gewünschte Helligkeitsstufe stufenlos selbst ein. Favoriten einstellen Stellen Sie die gewünschte Helligkeit ein.
- Page 8 Neues Leuchtmittel einbinden Achten Sie beim Kauf neuer Leuchtmittel auf dessen technische Spezifikationen. Wir empfehlen tint-Leuchtmittel der Firma Müller-Licht. Bei der Verwendung von Leuchtmittel anderer Hersteller ist nicht sichergestellt, dass alle Funktionen unterstützt werden bzw. einwandfrei funktionieren. 1. Ziehen Sie den Netzstecker, entfernen Sie das alte Leuchtmittel und drehen Sie das neue tint-Leuchtmittel in die Fassung.
- Page 9 mobile switch mit einem weiteren mobile switch kombinieren Um mehrere mobile switch Fernbedienungen miteinander zu kombinieren, benötigen Sie dafür einen bereits programmierten und einen unprogrammierten mobile switch. 1. Legen Sie beide Fernbedienungen nebeneinander hin. 2. Drücken Sie nun zeitgleich die Tasten ON/OFF und die Helligkeitstaste (große Sonne) auf beiden Fernbedienungen.
- Page 10 Reset des tint-Leuchtmittels Ein reset des tint-Leuchtmittels ist nur im Ausnahmefall erforderlich, z.B. wenn die Fernbedienung zurückgesetzt werden musste. 1. Schalten Sie das tint-Leuchtmittel 5x ein und aus 2. Schalten Sie das tint-Leuchtmittel wieder ein. Es startet nun ein Blinksignal. Der gewünschte Reset ist erfolgt und Sie können das tint-Leuchtmittel wie gewohnt in Ihre Fernbedienung oder anderweitige Zigbee-Systeme einbinden.
- Page 11 Problem Mögliche Ursache Das Leuchtmittel lässt sich nicht in ein Bitte prüfen Sie, ob sich das Leuchtmittel fremdes System einbinden im Kopplungsmodus befindet. Die Standby-Taste muss mehrfach gedrückt Wenn die Leuchtmittel vorher über den werden. Lichtschalter ausgeschaltet wurden, muss sich die Fernbedienung neu synchroni- sieren.
- Page 12 Entsorgen Altgeräte dürfen nicht im normalen Hausmüll entsorgt werden. Entsprechend Richtlinie 2012/19/EU ist das Gerät am Ende seiner Lebensdauer einer geordneten Entsorgung zuzu- führen. Dabei werden im Gerät enthaltene Wertstoffe der Wiederverwertung zugeführt und die Belastung der Umwelt vermieden. Geben Sie das Altgerät kostenlos an einer Sammelstelle für Elektroschrott oder einem Wertstoffhof ab.
-
Page 13: Consignes De Sécurité
MODE D‘EMPLOI Utilisation conforme • Le présent article est conçu afin d’assurer l‘éclairage dans des espaces intérieurs secs. L‘article ne convient pas pour un usage industriel. Consignes de sécurité Consignes importantes • Le présent article peut être utilisé par des enfants à partir de 8 ans, ainsi que par des personnes présentant des capacités physiques, sensorielles ou mentales diminuées, ou un manque d’expérience et de connaissances si elles sont sous surveillance ou ont été... - Page 14 • Évitez tout contact du fluide de la pile avec la peau, les yeux et les muqueuses. En cas de contact, rincez immédiatement et abondamment les zones concernées à l‘eau claire et consultez tout de suite un médecin. ATTENTION aux dommages matériels •...
-
Page 15: Mise En Service
tint-mobile switch 2 Affichage de la 1 Touche de résonance mise en veille 5 Compar- timent pour 3 Commande pile de la luminosité 4 Favorit-clé Mise en service Insérer l‘ampoule Vous pouvez insérer utiliser l‘ampoule fournie dans différentes lampes, par exemple, dans un plafonnier ou un lampadaire ou encore une lampe de bureau. - Page 16 Insérer les piles 6 Touche de remise à zéro 1. Ouvrez le compartiment pour piles au dos de la télécom- mande mobile switch. 7 Comparti- 2. Insérez les 1 pile de type ment CR 2450 / 3 V comme l‘indique pour pile l‘illustration figurant sur le CR 2450 / 3 V...
- Page 17 Vissage du support mural ATTENTION Assurez-vous que l’emplacement prévu ne comporte ni tuyaux, ni conduites. Selon le socle, vous pouvez également visser le support mural sur un mur au moyen de vis et, si nécessaire, de chevilles. Les vis et chevilles sont fournies. 1.
-
Page 18: Fonctions De Base
Fonctions de base Activation/désactivation Appuyez sur la touche de veille pour activer et redésactiver les lampes. La fonction Mémoire mémorise le dernier « état de l‘éclairage » et démarre automatiquement à l’activation suivante. Réglage de la luminosité Par une pression longue, réglez vous-même le niveau de luminosité souhaité. Définir les favoris Réglez la luminosité... - Page 19 Raccordement d‘une nouvelle ampoule Au moment d’acheter de nouvelles ampoules, faites attention à leurs caractéristiques techniques. Nous recommandons d’opter pour les ampoules tint de la société Müller-Licht. Si vous utilisez des ampoules d‘autres fabricants, rien ne garantit que toutes les fonctions seront prises en charge ou fonctionneront correctement.
- Page 20 Combiner mobile switch avec un autre mobile switch Pour combiner plusieurs télécommandes mobile switch, il vous faut un mobile switch déjà programmé et un autre qui n’est pas programmé. 1. Posez les deux télécommandes l’une à côté de l’autre. 2. Appuyez simultanément sur la touche ON/OFF et sur la touche de luminosité (grand soleil) des deux télécommandes.
- Page 21 Réinitialiser la luminosité à 100% Une réinitialisation de la luminosité de la lumière peut être nécessaire si vous avez déjà attribué les lampes à une autre fonction, par exemple 5% grisé. L‘appareil de commande correspondant n‘est pas accessible ou les piles sont déchargées. En règle générale, cette fonction peut également être utilisée si la télécommande n’est pas à...
- Page 22 Problème Cause possible Impossible d‘intégrer l’ampoule à un groupe Veuillez vérifier si l‘ampoule est en mode tiers. de couplage. Impossible d’ajouter l‘ampoule. L‘ampoule est déjà attribuée à une télé- commande ou à une passerelle. Veuillez la retirer du réseau existant. Rapprochez la télécommande.
- Page 23 Élimination Les appareils usagés ne peuvent pas être éliminés avec les ordures ménagères. Selon la directive 2012/19/UE, l‘appareil en fin de durée de vie doit être soumis à une élimination con- trôlée. Les matériaux contenus dans l‘appareil sont soumis à un recyclage et l‘environnement n‘est pas pollué.
-
Page 24: Safety Information
INSTRUCTION MANUAL Intended use • This item is designed for lighting purposes in dry interiors. The item is unsuitable for commercial use. Safety information Important information • This item may be used by children over the age of 8 and persons with reduced physical, sensory or mental abilities or lack of experience and knowledge if they have been super vised or instructed in the safe use of the item and understand the resulting dangers. - Page 25 CAUTION against damage to property • Remove the batteries from the remote control when they are drained or if you are not using the item for a long time. In this way, you avoid damage that can result from leakage. •...
- Page 26 tint-mobile switch 2 Feedback display 1 Standby button 5 Battery compart- 3 Brightness ment control 4 Favorite button Setup Fitting the bulbs You can insert the supplied bulb into different fittings, e.g. into a ceiling light and a free-standing lamp or a desk lamp. The only requirement is that the lights each have a suitable E27 socket.
- Page 27 Inserting the batteries 6 Reset button 1. Open the battery compartment at the rear of the mobile switch remote control. 7 Battery 2. Insert 1 CR 2450 / 3 V battery compartment as shown on the bottom of the for 1 battery battery compartment.
- Page 28 Screwing in the wall bracket ATTENTION Make sure there are no pipes or wires in the wall where you intend to drill. Depending on the surface, the wall bracket can be attached to the wall with screws and wall plugs if required. Screws and wall plugs are included with the bracket. 1.
-
Page 29: Basic Functions
Basic functions Switching on/off Press the standby button to switch the bulbs on and off again. The memory function will store the last “illumination state” and will start again automatically the next time the bulb is switched on. Set brightness Long-press to set the desired brightness on a continuous scale. - Page 30 Remove a bulb from the mobile switch remote control 1. Switch the bulb off (i.e. to standby) with the mobile switch remote control if necessary. 2. Use the remote control to go extremely close to the bulb (<10cm) that you wish to remove.
-
Page 31: Troubleshooting
Resetting the tint bulb Resetting the tint bulb is only required in exceptional cases, such as when the remote control has had to be reset. 1. Switch the tint bulb on and off 5 times 2. Switch the tint bulb on again. It will now begin to be flashing. The reset has occurred as desired and you can now use the tint bulb as normal using your remote control or other Zigbee system. - Page 32 Problem Possible causes You want to add a new bulb, but the ones Switch off the bulbs that are already added or remove them from the product that has that are already added are blinking. already been connected. I cannot add a bulb to a new system Please check whether the bulb is in coupling mode.
- Page 33 Dispose Old appliances must not be disposed of with normal household waste. In accordance with Directive 2012/19/EU, the device must be disposed of properly at the end of its service life. The recyclable materials contained in the device are recycled and pollution of the environment is avoided.Return the old device free of charge to a collection point for electrical waste or a recycling yard.
- Page 34 3.0 white 404013 2x LED bulb white+color & tint 1800-6500 + color 60x120 remote control 404015 LED bulb dimming 2700 60x120 incl. mobile switch Energieeffizienzklasse A+ (Spektrum A++ - E) • dimmbar nur mit Fernbedienung • Box-Verpackung • 25.000 h Lebensdauer Catégories d’efficacité...
- Page 35 Discover the whole world of tint... 404013 ... www.mueller-licht.de/tint 404010 404005 404011 404015 404006 404019 404000 404001 404008...
- Page 36 www.mueller-licht.de/tint MÜLLER-LICHT International GmbH Goebelstr. 61/63 D-28865 Lilienthal Tel. +800 44003311 service@mueller-licht.de Nachdruck, auch auszugsweise, nur mit schriftlicher Genehmigung des Urhebers. • Irrtum und Änderung vorbehalten. Reproduction, en tout ou en partie, uniquement avec la permission écrite de l‘auteur. • Sauf erreur ou omission. Full or partial reproduction subject to prior written approval.
Need help?
Do you have a question about the 404015 and is the answer not in the manual?
Questions and answers