Advertisement
Quick Links
Advertisement

Related Manuals for Geum Technology Decolt Grand

Summary of Contents for Geum Technology Decolt Grand
- Page 1 Decolt Grand Benutzerhandbuch User manual Uživatelský manuál Gebruikershandleiding...
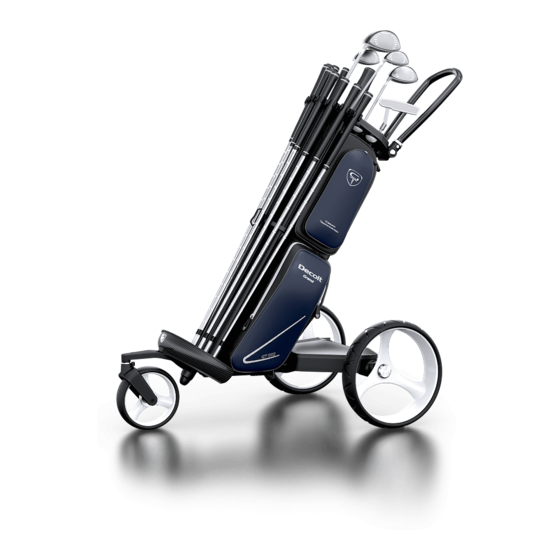
- Page 2 ARRANGEMENT OF GOLFING EQUIPMENT ANORDNUNG DES GOLFZUBEHÖRS ROZMÍSTĚNÍ GOLFOVÉHO NÁČINÍ POSITIES VAN DE GOLFATTRIBUTEN Latch for clubs 5 pcs Halterung für Schläger 5x Umbrella holder Schirmhalter Golf ball holders Ballhalterung Axle lock Achsenarretierung Score card holder Schutzhülle für Scorekarte Holder for tees Tee-Halter Pocket for rain cover Tasche für Schutzhülle...
- Page 3 Longest clubs Medium length clubs Shortest clubs Längste Schläger Schläger mittlerer Länge Kürzeste Schläger Nejdelší hole Střední hole Nejkratší hole Laagste ijzers Middenijzers Wedges Arrangement of golfing equipment Anordnung des Golfzubehörs Rozmístění golfového náčiní Posities van de golfattributen...
- Page 4 Long clubs go into small locks, short clubs go into larger locks. Arrange irons from largest to smallest. Die langen Schläger gehören in die kleineren Halterungen, die kurzen Schläger in die größeren Halterungen. Die Eisen werden der Größe nach von den größten zu den kleinsten sortiert.
- Page 5 TROLLEY DESCRIPTION BESCHREIBUNG DES TROLLEYS POPIS VOZÍKU TROLLEY BESCHRIJVING Axle or electric drive lock Halterung der Achse, ggf. des Elektroantriebs Wheels Räder Arretierung der Räder Wheel lock Befestigung der Höhenverstellung des Bügels Handle position lock Opening for inserting axle shaft Öffnung zum Einstecken des Achsenkolbens Axle shaft Achsenkolben...
- Page 6 BAG WITH STAND AND STRAP BAG MIT STÄNDER UND GURT BAG SE STOJANEM A POPRUHEM DE TAS IN VASTE STAND EN DRAAGBAND...
- Page 7 Turn the axle by 180 degrees. The symbol in the middle of the axle will show as “\/”. Unlatch the axle lock and insert the axle fully into the bag. Release the lock and verify, that the axle is firmly attached to the bag. Handle is foldable.
- Page 8 Attach each end of the strap to the openings n.1 and n.2 as marked on the picture. Use opening n.1 for the end of the strap that contains the adjustable buckle. The bag is ready to be carried on the strap over your shoulder. Befestigen Sie den Gurt mit beiden Enden an den gekennzeichneten ovalen Öffnungen Nr.
- Page 9 TWO-WHEEL VERSION - ASSEMBLY ZWEIRAD TROLLEY – ZUSAMMENBAU DVOUKOLKA - SESTAVENÍ 2-WIEL UITVOERING - MONTAGE...
- Page 10 Symbol in the middle of the axle shows as “/ \”. Brake is to the right and the wheel lock is at the top. Leave the wheel lock in closed position. Insert the wheels into the axle until the wheel lock clicks in. Verify that the wheels are correctly locked-in.
- Page 11 Insert axle into the opening for axle shaft. Unlatch axle lock. Fully insert axle shaft into the opening. Latch axle lock. Verify thet the axle is correctly latched and firmly attached to the bag. Schieben Sie die Achse in die für den Achsenkolben vorgesehene Öffnung hinein.
- Page 12 Fit the bag with golf clubs and other equipment. To ensure stability during the process, we recommend starting with the irons. Put the handle into the highest position. Ensure the handle is locked in position. Trolley can be pushed or pulled. Brake needs to be disengaged = in lower position.
- Page 13 THREE-WHEEL VERSION – ASSEMBLY DREIRAD TROLLEY– ZUSAMMENBAU TŘÍKOLKA - SESTAVENÍ MONTEREN 3-WIEL VERSIE...
- Page 14 Disengage axle lock. Lean the whole trolley forward so that the wheels do not touch the ground. Pull the axle with wheels slightly outward towards yourself. Release axle lock and continue pulling the axle outwards until it locks into the second position. Verify that the axle is firmly attached to the bag.
- Page 15 Hold the trolley with one hand at the fan-shaped bottom part and lean it backwards. Using your other hand, insert the third wheel at the bottom into the wheel holder. Greifen Sie den Trolley mit einer Hand am vorderen fächerförmigen Teil und kippen Sie ihn nach hinten.
- Page 16 With the palm of your hand, firmly push the shoulder of the third wheel in the direction of the arrow so that the parts fully lock together. Drücken Sie mit der Handfläche den Radarm in Pfeilrichtung, sodass alle Teile ineinander einrasten. Dlaní...
- Page 17 THREE-WHEEL VERSION – DISASSEMBLY DREIRAD TROLLEY – ZERLEGUNG TŘÍKOLKA - ROZLOŽENÍ 3-WIEL VERSIE UIT ELKAAR HALEN...
- Page 18 Hold the trolley with one hand at the fan-shaped bottom part and lean it backwards. Using your other hand, apply downward pressure on the top the wheel shoulder. Pull the whole shoulder with the wheel outwards. Greifen Sie den Trolley mit einer Hand am vorderen fächerförmigen teil und kippen Sie ihn nach hinten.
- Page 19 We recommend preparing the space for the bag storage beforehand (such as the back of your car) as the bag cannot stand independently. Fold the handle. Unlatch the axle lock and using your other hand take the axle with wheels fully out. Unlatch the wheel lock and pull out the wheels.
- Page 20 Transfer the bag to the desired storing space using the strap loop at the front. Store the wheels in the containers with lids. There is space for storing the third wheel at the bottom of the container. Befördern Sie das Bag an den gewünschten Aufbewahrungsort, indem Sie es an der vorderen Schlaufe fassen.
- Page 21 UMBRELLA HOLDER optional extra SCHIRMHALTER wählbares Zubehör DRŽÁK DEŠTNÍKU volitelné příslušenství PARAPLUHOUDER optioneel...
- Page 22 Umbrella holder can be attached to either left or right side of the handle. The adjustable clasp needs to point towards the middle of the handle. Den Schirmhalter können Sie an der rechten oder linken Seite des Bügels befestigen. Die verstellbare Klammer muss zur Mitte des Bügels zeigen. Držák deštníku můžete připnout na pravou i levou stranu madla.
- Page 23 Fit the clasp of the umbrella holder so that the groove on the clasp locks into the hole on the trolley handle. Setzen Sie die Klammer des Schirmhalters so auf, dass die Nut der Klammer in die Öffnung auf dem Bügel des Trolleys einschnappt. Matici držáku deštníku nasaďte tak, aby drážka na matici zapadla do otvoru na madle rukojeti vozíku.
- Page 24 Once the groove on the holder is locked into the hole on the trolley handle, you can close the lever towards the handle. This will ensure firm attachment of the umbrella holder. Nachdem die Nut der Klammer in die Öffnung auf dem Griff des Bügels eingeschnappt ist, können Sie den Klammerverschluss in Richtung des Griffs drücken.
- Page 25 RAIN COVER optional extra SCHUTZHÜLLE wählbares Zubehör OCHRANNÝ PLÁŠŤ volitelné příslušenství REGENKAP optioneel...
- Page 26 Pull the cover over the clubs. Stretch the rubber over plastic flap located under the axle lock. Ziehen Sie die Schutzhülle über die Schläger. Ziehen Sie das Gummiband über die Plastiklasche unter der Achsenarretierung. Cover převlékněte přes hole. Gumičku přetáhněte přes plastovou patku pod páčkou aretace nápravy. Trek de kap over de clubs.
- Page 27 Bitte halten Sie Ihre Seriennummer bereit – diese ist auf der unteren Seite des Moduls EDM01 aufgeführt. Připravte si prosím sériové číslo - je uvedeno na spodní straně modulu EDM01 Vermeldt het serienummer (op de onderkant van de EDM01). Graphic by Golf Geum Technology s.r.o. 2019/08...
- Page 28 www.golfgeum.com...
Need help?
Do you have a question about the Decolt Grand and is the answer not in the manual?
Questions and answers