Table of Contents
Advertisement
Available languages
Available languages
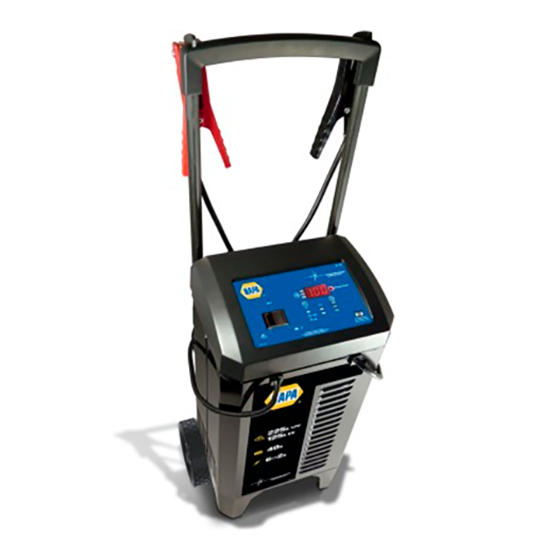
MODEL / MODELO / MODÈLE :
90-150
Automatic
Battery Charger
Cargador de baterías
automático
Chargeur de batterie
automatique
OWNERS MANUAL
MANUAL DEL USUARIO
MANUEL D'UTILISATION
PLEASE SAVE THIS OWNERS MANUAL AND READ BEFORE EACH USE.
This manual will explain how to use the battery charger safely and effectively.
Please read and follow these instructions and precautions carefully.
POR FAVOR CONSERVE ESTE MANUAL DEL USUARIO Y LEALO ANTES
DE CADA USO. En este manual le explica cómo utilizar el cargador de batería
de manera segura y confiable. Por favor, lea y siga las siguientes instrucciones
y precauciones.
GARDER LE MANUEL D'INSTRUCTION ET LISEZ LE AVANT CHAQUE
UTILISATION. Ce manuel explique comment utiliser le chargeur de batterie
d'une façon securitaire et efficace. S'il vous plaît lisez et suivez ces instructions
et precautions.
0099002219-00
Advertisement
Table of Contents

Related Manuals for Napa 90-150

Summary of Contents for Napa 90-150
- Page 1 MODEL / MODELO / MODÈLE : 90-150 Automatic Battery Charger Cargador de baterías automático Chargeur de batterie automatique OWNERS MANUAL MANUAL DEL USUARIO MANUEL D’UTILISATION PLEASE SAVE THIS OWNERS MANUAL AND READ BEFORE EACH USE. This manual will explain how to use the battery charger safely and effectively.
-
Page 2: Table Of Contents
CONTENTS IMPORTANT SAFETY INSTRUCTIONS ..................4 PERSONAL SAFETY PRECAUTIONS ..................4 PREPARING TO CHARGE ......................5 CHARGER LOCATION .........................5 DC CONNECTION PRECAUTIONS ....................5 FOLLOW THESE STEPS WHEN BATTERY IS INSTALLED IN VEHICLE ........5 FOLLOW THESE STEPS WHEN BATTERY IS OUTSIDE VEHICLE ........6 GROUNDING AND AC POWER CORD CONNECTIONS ............6 ASSEMBLY INSTRUCTIONS ......................6 CONTROL PANEL ........................7 OPERATING INSTRUCTIONS .....................8... - Page 3 TABLE DES MATIÈRES CONSIGNES DE SÉCURITÉ IMPORTANTES................23 MESURES DE SÉCURITÉ PERSONNELLE ................23 PRÉPARATION POUR LE CHARGEMENT ................24 EMPLACEMENT DU CHARGEUR ....................24 PRÉCAUTIONS SUR LA CONNEXION C.C................24 ÉTAPES À SUIVRE QUAND LA BATTERIE EST INSTALLÉE DANS UN VÉHCULE .....24 ÉTAPES À SUIVRE QUAND LA BATTERIE EST INSTALLÉE HORS DU VÉHICULE ....25 MISE À...
-
Page 4: Important Safety Instructions
1. IMPORTANT SAFETY INSTRUCTIONS SAVE THESE INSTRUCTIONS. 1.1 SAVE THESE INSTRUCTIONS – 1.8 Do not operate charger if it has received This manual contains important safety a sharp blow, been dropped, or otherwise and operating instructions. damaged in any way; take it to a qualified serviceman. -
Page 5: Preparing To Charge
3. PREPARING TO CHARGE 3.1 If necessary to remove battery from battery without removable cell caps, such vehicle to charge, always remove as valve regulated lead acid batteries, grounded terminal from battery first. Make carefully follow manufacturer’s recharging sure all accessories in the vehicle are off, instructions. -
Page 6: Follow These Steps When Battery Is Outside Vehicle
7. FOLLOW THESE STEPS WHEN BATTERY IS OUTSIDE VEHICLE WARNING: A SPARK NEAR THE 7.4 Position yourself and free end of cable as BATTERY MAY CAUSE A BATTERY far away from battery as possible – then EXPLOSION. TO REDUCE THE RISK OF connect NEGATIVE (BLACK) charger clip A SPARK NEAR THE BATTERY: to free end of cable. -
Page 7: Control Panel
10. CONTROL PANEL DIGITAL DISPLAY LED INDICATORS The Digital Display gives a digital indication LEDs light to indicate the following: of voltage, amperage, and battery %. It – The Digital Display shows the always starts in Voltage mode, but can be percentage of the battery. -
Page 8: Operating Instructions
batteries are best used in VERY DEEP – The electrolyte in a GEL cell has a cycle application and may last a bit longer silica additive that causes it to set up or in hot weather applications. If the wrong stiffen. - Page 9 MAINTAIN MODE to select either the 12V Engine (FLOAT MODE MONITORING) Start or 6V Engine Start rate. If When the Charged/Maintaining the battery is properly connected, the (green) LED is lit, the charger has yellow/orange Boosting/Charging started maintain mode. In this mode, the LED will light solid and the display charger keeps the battery fully charged will show the current voltage of the...
-
Page 10: Maintenance And Care
at 180 and counts down to 0. After 3 seconds, the unit will search for a battery. minutes, the digital display will change If the unit detects a battery that is properly from displaying the countdown to connected, the unit will set the rate to displaying rdy. -
Page 11: Before Returning For Repairs
14. BEFORE RETURNING FOR REPAIRS If these solutions do not eliminate the problem, or for more information about troubleshooting, call: Schumacher Electric Corporation Customer Service 1-800-621-5485 Return products under warranty to your local NAPA Auto Parts Store. • 11 •... -
Page 12: Specifications
15. SPECIFICATIONS Input ...........120V AC @ 60Hz, 11A continuous, 50A intermittent Output ........6/12V DC, 6A; 40A int., 60 sec. max on, 180 sec. min off 6/12V DC, 125/225A int., 5 sec. max. on, 180 sec. min. off Input ...........120V AC @ 60Hz, 11A continuous, 50A intermittent Output ........ -
Page 13: Instrucciones Importantes De Seguridad
1. INSTRUCCIONES IMPORTANTES DE SEGURIDAD GUARDE ESTAS INSTRUCCIONES. 1.1 GUARDE ESTAS INSTRUCCIONES – 1.8 No utilice el cargador si el mismo recibió Este manual contiene instrucciones un golpe fuerte, si se cayó o si sufrió operativas y de seguridad de importancia. daños de cualquier otra forma;... -
Page 14: Preparación Para La Carga
como para soldar un anillo o provocar de baja tensión más que en una aplicación efectos similares sobre el metal, de un motor de arranque. No utilice este causando una quemadura de gravedad. cargador de batería para cargar baterías de pila seca que por lo general se utilizan 2.8 Utilice este cargador solamente para con artefactos domésticos. -
Page 15: Siga Estos Pasos Cuando La Batería Se Encuentre Fuera Del Vehículo
conectado) con el chasis. Si el borne 6.6 En un vehículo con descarga a tierra negativo hace descarga a tierra con el por borne positivo, conecte el gancho chasis (como en la mayor parte de los NEGATIVO (NEGRO) del cargador de vehículos), ver el paso (6.5). -
Page 16: Instrucciones De Montaje
8.3 USO DE UN CABLE DE EXTENSIÓN • El tamaño del cable debe ser lo El uso de una extensión no se suficientemente extenso para el calibre recomienda. Si debe usar una extensión, de amperios del cargador de CA, como siga estas pautas: se especifica a continuación: •... - Page 17 BOTÓN DE START/STOP Pinzas invertidas Utilice este interruptor para comenzar o (LED rojo parpadea) – detener el proceso de Impulsar o Carga, Las conexiones están inversas. después de que la batería está conectada Batería Defectuosa (LED rojo correctamente y se ha seleccionado una encendido) –...
-
Page 18: Instrucciones De Operación
11. INSTRUCCIONES DE OPERACIÓN CARGA DE LA BATERÍA automáticamente a la velocidad de Tenga en cuenta que cuando carga una Carga/Mantenimiento para completar batería, mientras más descargada esté, la carga. absorberá de forma más rápida la carga 6. Pulse el botón START. del cargador. - Page 19 MODO DE MANTENIMIENTO 1. Conecte el cargador a la batería y la (MONITOREO A MODO DE FLOTE) fuente de alimentación CA, como se Cuando la luz LED Cargado / explica en las secciones 6 y 7. Mantenimiento (verde) está 2. Con el cargador enchufado y encendido, quiere decir que pasó...
-
Page 20: Mantenimiento Y Cuidado
digital aparecerá On y podrá hacer Después de 2 horas del arranque del arrancar el motor. Para baterías muy motor, la unidad saldrá automáticamente descargadas, no se recomienda el del modo de carga, tal como se hubiese arranque en este momento. presionado el botón STOP;... - Page 21 CÓDIGO DESCRIPCIÓN RAZÓN/SOLUCIÓN Las conexiones a la batería La batería está conectada en forma inversa. están invertidas. Desconecte el cargador y haga la conexión en forma correcta. El cargador no puede alimentar La batería no mantiene la carga. Podría ser la batería cargada el el modo de causado por un escape en la batería o la batería mantenimiento.
-
Page 22: Antes De Devolver A Reparaciones
Servicio de atención al cliente de Schumacher Electric Corporation 1-800-621-5485 Devuelva producto para reparación bajo garantía a su NAPA Auto Parts Store local. 15. ESPECIFICACIONES Entrada ..........120V AC @ 60Hz, 11A continuo, 50A intermitente Salida ......... 6/12V CC, 6A; 40A int, 60 seg. max en, 180 seg. min off 6/12V CC, 125/225A int., 5 seg. -
Page 23: Consignes De Sécurité Importantes
1. CONSIGNES DE SÉCURITÉ IMPORTANTES CONSERVER CES INSTRUCTIONS. 1.1 CONSERVER CES INSTRUCTIONS – 1.8 Ne pas faire fonctionner le chargeur s’il a Ce manuel contient des instructions reçu un choc violent, est tombé par terre importantes concernant la sécurité et le ou a été... -
Page 24: Préparation Pour Le Chargement
pas conçu pour alimenter un système utilisées en électroménager. Ces piles électrique à basse tension autre que peuvent exploser et causer des blessures dans une application d’un démarreur. et des dommages matériels. Ne pas utiliser ce chargeur de batterie 2.9 NE JAMAIS charger une batterie gelée. pour recharger des piles sèches qui sont 3. -
Page 25: Étapes À Suivre Quand La Batterie Est Installée Hors Du Véhicule
loin de la batterie. Ne pas raccorder la pince au carburateur, aux canalisations pince au carburateur, aux canalisations d’essence ni aux pièces de la carrosserie d’essence ni aux pièces de la carrosserie en tôle. Raccorder à une pièce du cadre en tôle. -
Page 26: Directives D'assemblage
9. DIRECTIVES D’ASSEMBLAGE 9.1 C’est important d’entièrement monter 9.2 Fixation des pieds : Sortir le chargeur de votre chargeur avant de l’utiliser. Enlever son d’emballage et l’adosser sur un établi tous les cordon dérouler sur les câbles ou sur le plancher. Mettre les pieds en avant d’utiliser le chargeur de batterie. -
Page 27: Consignes D'utilisation
entretien ». Ce type de batterie est conçu – L’écran numérique montre la pour rapidement offrir de l’énergie (par tension de la batterie. exemple, le démarrage des moteurs) et Charge / Maintenir – Le chargeur est a une plus grande teneur en germes. en mode Charge / Maintenir 6 <>... - Page 28 Lorsque le mode Boost automatique MODE DE DÉSULFATATION est terminé, l’appareil changera Desulfation pourrait prendre 8 à 10 heures. automatiquement en débit Charge / En cas d’échec de la désulfuration, l’écran Maintenir et terminera la charge. affiche « F02 », la recharge est annulée et le témoin DEL (rouge) de batterie •...
- Page 29 NOTE : Si le moteur tourne, mais ne NOTES DE DEMARRAGE MOTEUR démarre jamais, ca veut dire qu’il y a un Pendant la séquence de démarrage autre problème avec le véhicule. Arrêter indiquée ci-dessus, le chargeur est fixé à de tourner le moteur jusqu’à ce que l’autre l’un des quatre états suivants : problème est identifié...
-
Page 30: Maintenance Et Entretien
12. MAINTENANCE ET ENTRETIEN Un minimum d’entretien peut garder • Mettez les cordons proprement lors du le chargeur de batterie fonctionne stockage du chargeur. Cela aidera à correctement pendant des années. prévenir les dommages accidentels aux cordons et du chargeur. •... -
Page 31: Avant De Retourner Pour Les Réparations
Schumacher Electric Corporation Customer Service 1-800-621-5485 Tous les retours de produits en rapport avec la garantie doivent être effectués à votre magasin de pièces d’auto NAPA. 15. SPÉCIFICATIONS Tension d’entrée........120V CA @ 60Hz, 11A continu, 50A intermittent Tension de sortie ....... 6/12V CC, 6A; 40A int., 60 sec. max on, 180 sec. min off 6/12V CC, 125/225A int., 5 sec. -
Page 32: Garantie Limitée
16. GARANTIE LIMITÉE SCHUMACHER ELECTRIC CORPORATION, 801 BUSINESS CENTER DRIVE, MOUNT PROSPECT, IL 60056-2179, DONNE CETTE GARANTIE LIMITÉE POUR PREMIER ACHETEUR DE CE PRODUIT. CETTE GARANTIE LIMITÉE N’EST PAS TRANS- FÉRABLES NI CESSIBLES. Schumacher Electric Corporation (le « Fabricant ») garantit ce unité pour deux (2) ans à...
Need help?
Do you have a question about the 90-150 and is the answer not in the manual?
Questions and answers