Table of Contents
Advertisement
Quick Links
Advertisement
Table of Contents

Related Manuals for SeeedStudio WifiMETRIX


Summary of Contents for SeeedStudio WifiMETRIX
- Page 1 WifiMETRIX HANDHELD CHANNEL ANALYZER USER MANUAL Last Updated: December 2017...
-
Page 2: Table Of Contents
Contents Introduction: WifiMETRIX Handheld Channel Analyzer..................2 Main Features ..............................3 Menus ................................. 5 Short-cut Keys ..............................6 Operational Modes .............................. 7 Additional Features And Notes ........................... 12 Interpreting Results ............................15 Calibration ................................. 20 Firmware Updates ............................. 22 Diagnostics ................................ 26 Acknowledgements ............................ -
Page 3: Introduction: Wifimetrix Handheld Channel Analyzer
WifiMETRIX has been designed to be intuitive and easy to use — no need to study large user manuals. The best way to become familiar with the device and its capabilities is by experimenting — so, power it on and give it a go. -
Page 4: Main Features
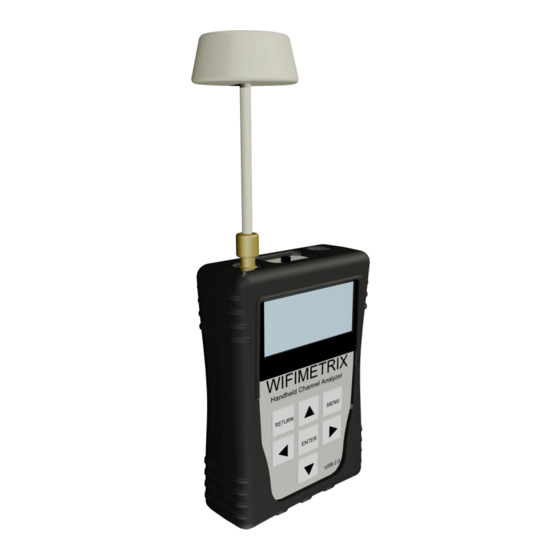
Wi-Fi diagnostics. This is a huge advantage because it frees the user from having to interpret RF data or metrics. Instead, WifiMETRIX’s 802.11 chip reports what it thinks about the health of each channel. WifiMETRIX uses a metric based on IMMI — a... - Page 5 The unit includes a 50 ohm impedance RF connector (standard female SMA format). This is used for attaching the dual-band antenna that we include with the device. Feel free to substitute your own antenna — the only constraints are you adhere to the 50 ohm requirement and your antenna includes a standard male SMA connector.
-
Page 6: Menus
Menus WifiMETRIX uses the LCD screen and keyboard to access menus and features. It’s really pretty simple to use, though we’ve summarized a few of the menus below. In general, you would use the UP / DOWN arrow keys to highlight a menu option and then press the ENTER key to move to the next screen. -
Page 7: Short-Cut Keys
Short-cut Keys Below is a list of “short-cut” keys. However, due to the small keyboard, please be aware that certain key-presses behave differently depending on the context menu. Feel free to experiment a bit and familiarize yourself with the keyboard’s layout. [MENU] Key Return to the main menu —... -
Page 8: Operational Modes
Operational Modes WifiMETRIX features two “operational” modes — AirHORN and WifiPROBE. In AirHORN mode the device is used as an RF channel / signal generator. Using 802.11 packet injection, AirHORN transmits stable and accurate RF signals for each of the 802.11 (Wi-Fi) channels. In WifiPROBE mode the device provides unprecedented visibility into the performance of a wireless network. - Page 9 This is the primary menu for AirHORN. Here you can select which Wi-Fi band to use, output power and which AirHORN mode to use. To change which Wi-Fi band to use, use the UP / DOWN arrow keys to select ‘WiFi Band’ and press the ENTER key to toggle between the 2.4x GHz and 5x GHz ISM bands.
- Page 10 Traverse Mode Here is an example of using ‘Traverse’ mode — where you can automatically scan through the set of 2.4x GHz or 5x GHz channels. When using the 2.4x GHz radio module this mode will automatically traverse channels 1 – 13. When using the 5x GHz radio module this mode with automatically traverse Wi-Fi channels 36, 40, 44, 48, 52, 56, 60, 64, 149, 153, 157, 161, 165.
- Page 11 WifiPROBE Mode (Channel Analyzer) When the device is powered-on it will display the main menu. Use the UP / DOWN arrow keys to highlight the ‘WifiPROBE’ option and then press the ENTER key to move to the next screen. This is the primary menu for WifiPROBE. Here you can select which Wi-Fi band to use and how the channel analysis results will be displayed.
- Page 12 Traverse Channel Table Here is an example of using ‘Traverse Channel Table’. This is similar to ‘Traverse Channel Bars’ above, except the results are presented in the form of a table (as compared to a bar graph). Selected Channels Here is an example of using ‘Selected Channels’. This mode differs from ‘Traverse Channel Bars’...
-
Page 13: Additional Features And Notes
Additional Features And Notes AirHORN Single Mode — Two TX Modes: When using the AirHORN feature in Single Mode there are two types of TX modes you can choose from: RAW and Packets. ‘RAW’ TX mode does not actually transmit 802.11 packets but, rather, a modulated, continuous, 22 MHz-wide channel shape. - Page 14 To demonstrate this feature we used two WifiMETRIX devices — one transmitting in AirHORN mode (packets on channel 6) and the other performing channel analysis in WifiPROBE mode. The image above comes from the WifiPROBE screen. It shows Co-Channel Congestion (CCC) on channel 6 and Adjacent Channel Interference (ACI) on adjacent channels.
- Page 15 WifiPROBE — Bar Decorations: When WifiPROBE cycles through all the channels, the channel that is currently being measured is filled-in (e.g. channel 2, in this case). Also, the High and Low values are shown for each bar for the current session. PAGE 14...
-
Page 16: Interpreting Results
Interpreting Results AirHORN When operating in AirHORN mode, WifiMETRIX uses its 802.11 chip to promiscuously transmit without having to first associate with an access point. Furthermore, when transmitting in Single mode, the transmission can be in the form of 802.11 packets or RAW energy (a modulated, continuous, 22 MHz-wide channel shape). When transmitting in Traverse and Pulse modes, the transmission is always in the form of 802.11 packets. - Page 17 The above image shows AirHORN transmitting in Traverse Mode. The above image shows AirHORN transmitting in Pulse Mode — where Duration is 5 seconds, and Interval is 10 seconds. PAGE 16...
- Page 18 WifiPROBE The WifiPROBE function traverses each channel, measuring its available transmit (TX) time. This is reported as ‘% Available TX’, compared to a baseline reference. This metric — % Available TX — is a measure of a channel’s “health”. The higher this value then the more bandwidth is available for transmitting data packets. Using this metric, WifiPROBE can be used to rank channels from best-to-worst.
- Page 19 In the image above we’ve used another WifiMETRIX in AirHORN mode transmitting on channel 6. As you can see, the AirHORN transmission significantly affects channel 6, along with adjacent channels. In this scenario or similar ones, it would then be best to use either channel 1 or 11.
- Page 20 In the image above we’ve again used another WifiMETRIX in AirHORN mode transmitting on channel 6. In this Selected Channels view you can again see that channel 6 is severely affected by the congestion caused by AirHORN transmitting on channel 6.
-
Page 21: Calibration
Calibration The metric that WifiPROBE uses to compute the best channel requires that ‘% Available TX’ be compared against a baseline reference measurement for each channel. This baseline represents 100% Available TX — that is, no RF interference (or, as close as possible). To achieve this we’ve included a 50 ohm SMA terminator to be attached to the antenna connector. - Page 22 For the next step, the menu reminds you to ATTACH THE 50-OHM SMA TERMINATOR (“DUMMY LOAD”). Also, if you have a microwave oven available, we suggest you place the unit in the microwave oven during the duration of the calibration procedure (approximately 1 minute). The goal of the calibration step is to approximate 100% Available TX time, and the combination of dummy load plus microwave oven serves as a “poor man’s”...
-
Page 23: Firmware Updates
(http://nutsaboutnets-downloads.s3.amazonaws.com/WifiMetrix_Firmware_v1_05.bin) • Your WifiMETRIX device and a micro-USB cable. As a general rule, please use a quality USB cable (e.g. the one that shipped with the device) and attach it directly to the PC (and not through a USB hub). - Page 24 2. Select the second CheckBox that begins: “If you have a WifiMetrix Unit running…”. 3. Select the third CheckBox that begins: “In WifiMetrix press buttons…”. 4. With the power switch in the OFF position, use the micro-USB cable to attach the device to your Windows PC.
- Page 25 RF Explorer devices. Click the button that says ‘Device OK. Click to Upgrade’. 7. Using WifiMETRIX’s keyboard, press the [UP] arrow key to begin the update. You should see the message “Writing block” and the block numbers increasing.
- Page 26 9. And finally, after updating the firmware and resetting the device, it is necessary to run the calibration procedure again. Performing the calibration is a simple process — here is the link: Calibration (http://wifimetrix.com/document/calibration-wifimetrix) PAGE 25...
-
Page 27: Diagnostics
Diagnostics There is a hidden diagnostic screen that is only accessible using a special key combination. We suggest you ignore this for now. However, in the event you need to contact our technical support, they may request this additional information. So, we present the procedure here. Just to be clear, in case you are curious there is no harm in accessing this hidden screen, but the results are intended solely for the technical support team. -
Page 28: Acknowledgements
This product would not be possible without the SeeedStudio Team who manufactures and tests WifiMETRIX devices. The WifiMETRIX device is a reality due to the engineering excellence of Ariel Rocholl and his team in Spain. As with the development of most products of this complexity, there were many pitfalls and unexpected technical hurdles that we encountered along the way. -
Page 29: Fcc And Ce Regulation
FCC and CE Regulation WifiMETRIX is a Test and Measurement device, compatible with US FCC regulation 47 CFR Part 15.103(c). WifiMETRIX is certified for CE compliance under regulations EN/IEC61236 and EN/IEC61000. PAGE 28... -
Page 30: Licensing
Licensing WifiMETRIX’s embedded firmware is copyrighted © by Ariel Rocholl, 2010-2017. WifiMETRIX and WifiPROBE are registered trademarks in the USA and all EU Countries. PAGE 29...
Need help?
Do you have a question about the WifiMETRIX and is the answer not in the manual?
Questions and answers