Table of Contents
Advertisement
Advertisement
Table of Contents

Related Manuals for Inova Maxi Climber XL


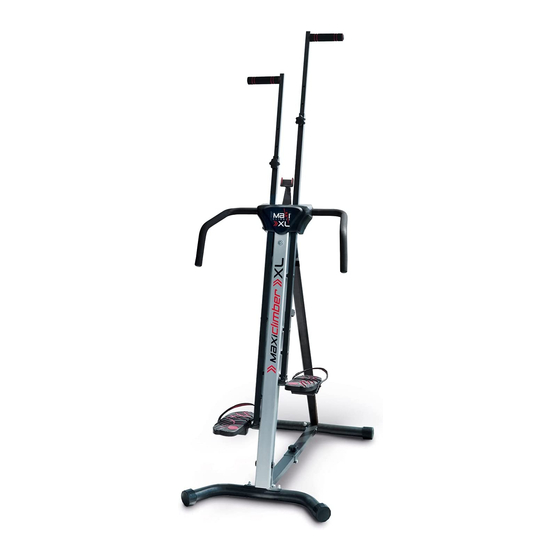
Summary of Contents for Inova Maxi Climber XL
- Page 3 SAFETY INSTRUCTIONS ¡IMPORTANT! READ THIS MANUAL CAREFULLY BEFORE USING THIS PRODUCT. THE MANUFACTURER ASSUMES NO RESPONSIBILITY FOR DAMAGE OR INJURY TO THE USER OR PROPERTY BY THE USE OF THIS EQUIPMENT. SAFETY INSTRUCTIONS AND MAINTENANCE • The owner of the equipment is responsible to •...
- Page 4 PARTS LIST...
- Page 5 PARTS LIST...
- Page 6 EXPLODED DIAGRAM...
- Page 7 ASSEMBLY DIAGRAM 20 19 Be sure the curved part is in the frontal direction...
- Page 8 ASSEMBLY INSTRUCTIONS PREPARATION STEP 1 A. Remove the knob (25) onto the front support tube • Before the assembly, make sure you have plenty of space around the product. (8) by turning it counterclockwise. B. Fully unfold the item. Be careful not to pinch your •...
- Page 9 ASSEMBLY INSTRUCTIONS STEP 2 A. Remove both knobs (25) at each side of the cylinder C. Attach the loose wire (*) passing through position A bracket (45) by turning them counterclockwise. to the interior welded bolt and tighten it with the B.
- Page 10 ASSEMBLY INSTRUCTIONS STEP 3 A. Attach front stabilizer (2) to the base of front support B. Attach rear stabilizer in U (1) to the base of aluminum tube (8) and fasten with two large bolts (72) two track (15) and fasten with two large bolts (72) two curved washers (17) and two dome nuts (18).
- Page 11 ASSEMBLY INSTRUCTIONS B. Attach the left pedal (30L) to the left adjusting STEP 4 tube (9) and tighten by turning it clockwise using A. Attach the left pedal strap (30A) onto the left pedal the wrench provided (75). C. Repeat the procedure with the right pedal strap (30L).
- Page 12 ASSEMBLY INSTRUCTIONS STEP 5 A. Attach the left middle handlebar (12) to the roller the upper side. Bolts and washers are pre-assembled. support part (7) and tighten with one washer (19) Use the Allen key provided (74). and one Allen bolt (20) on the front side and one B.
- Page 13 ASSEMBLY INSTRUCTIONS STEP 6 knob (49) by turning it clockwise to adjust in the A. Release the knob (49) of the right adjusting tube desired position. (10) by turning it counterclockwise. C. Repeat the procedure with the left upper handlebar B.
- Page 14 ASSEMBLY INSTRUCTIONS STEP 7 clamp (70). Attach the cellphone clamp (70) to the cellphone support frame (14) and tighten with the A. Attach the cellphone support frame (14) to the flat washer (67) and the cross head bolt (66). Use roller support part (7) and tighten it with two flat the Allen key (74) provided.
- Page 15 To adjust the pressure of the resistance pistons, turn the knob and align the number (1 low - 12 high) with the READY TO large arrow. Repeat in both USE! pistons. Floor Detach the hydraulic cylinder from the adjusted tubes (8) stabilizers can and put back into the cylinder rotate to avoid...
- Page 16 ELECTRONIC FITNESS MONITOR KEYS -If the monitor doesn´t display clearly or only partial segments appear, remove the battery and wait fifteen MODE/RESET: For selecting desired function. Hold seconds before reinstalling. -The batteries life is approximately 3 months under down the key for 4 seconds and all values are reset normal use.
- Page 17 HOW TO MOUNT THE UNIT 1. Grab the right fixed handle with your right hand. 2. Without letting go the fixed handle, put your right leg over the right pedal. 3. Climb and grab the left upper handle with your 4.
- Page 18 HOW TO STORAGE 1. Pull out the knob (25) of the base tube. 3. Fold up the base tubes, be careful to not pinch 2. Loosen and pull the knob (25) from each side of your fingers at the middle of the foldable tubes. 4.
- Page 19 RECOMMENDED EXERCISES The use of this equipment will provide several ben- 3. THE COOL DOWN PHASE efits, improve your physical condition and muscle tone and combined with a controlled diet, will help At this stage, the cardiovascular system and muscles you lose weight.
- Page 20 Product that may be found to be made shall be limited to the duration of the express warranty set forth above. In no event shall Inova be liable for any loss, inconvenience,...
- Page 21 DISPUTE RESOLUTION BY BINDING ARBITRATION. PLEASE READ THIS CAREFULLY. IT AFFECTS YOUR RIGHTS. Summary: Most customer concerns can be resolved quickly and to the customer’s satisfaction by calling our customer service department at (888) 433-9083 In the unlikely event that MaxiClimber® XL’s customer service department is unable to resolve a complaint to your satisfaction (or if MaxiClimber®...
- Page 22 to the scope and enforceability of the arbitration provision are for the court to decide. Unless MaxiClimber® XL and you agree otherwise, or the arbitrator directs otherwise, any arbitration hearings will take place in the county of your billing address. If your claim is for $10,000 or less, we agree that you may choose whether the arbitration will be conducted solely on the basis of documents submitted to the arbitrator, through a telephonic hearing, or by an in-person hearing as established by the AAA Rules.
- Page 24 Already assembled Height is adjustable DY TO Floor bilizers can te to avoid vement on the floor. YOUR PERSONAL FITNESS COACH ON DEMAND MAXIMIZE YOUR ROUTINE AND BURN MORE CALORIES...
Need help?
Do you have a question about the Maxi Climber XL and is the answer not in the manual?
Questions and answers