Advertisement
Quick Links
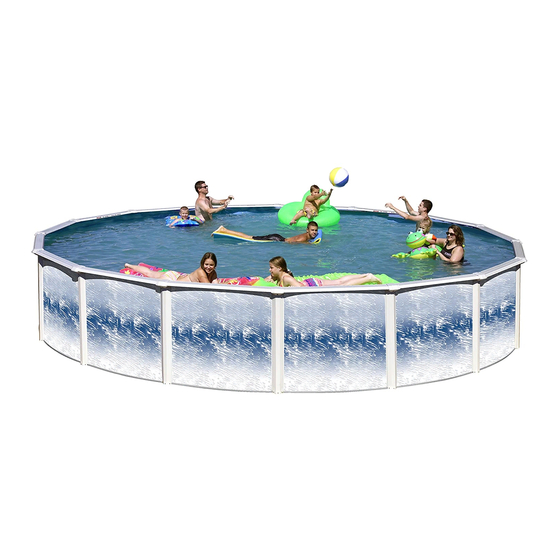
RIGID FRAMEWORK ROUND
GB
SWIMMING POOLS
PISCINES RIGIDES RONDE
F
D
STARRE SCHWIMMBECKEN RUND
E
PISCINAS RIGIDAS REDONDA
I
PISCINA RIGIDE ROTONDA
Installation videos for reference only
Read instructions carefully in their entirely before setting up and using the swimming pool.
Vidéo d'installation pour référence seulement
Bien lire toutes les instructions avant le montage et l'utilisation.
Video-Installation nur als Referenz
Lesen Sie sämtliche Anweisungen sorgfältig durch, bevor Sie das Schwimmbecken aufstellen
und benutzen.
Videos de instalación sólo para referencia
Lea todas las instrucciones cuidadosamente antes de la instalación y el uso de la piscina.
Video di installazione solo per riferimento
Leggere con la massima attenzione tutte le istruzioni prima del montaggio e prima
dell'utilizzazione.
www.swimnplay.com/pages/roundvideos.html
Swim'n Play, Inc.
313 Regina Avenue
Rahway, New Jersey 07065-4891 USA
Tel: (732) 574-1500 • Fax: (732) 574-1551
www.swimnplay.com
Email: info@swimnplay.com
Part# 420615-11
Advertisement

Related Manuals for Swim'n Play YORKSHIRE


Summary of Contents for Swim'n Play YORKSHIRE
- Page 1 Part# 420615-11 RIGID FRAMEWORK ROUND SWIMMING POOLS PISCINES RIGIDES RONDE STARRE SCHWIMMBECKEN RUND PISCINAS RIGIDAS REDONDA PISCINA RIGIDE ROTONDA Installation videos for reference only Read instructions carefully in their entirely before setting up and using the swimming pool. Vidéo d'installation pour référence seulement Bien lire toutes les instructions avant le montage et l’utilisation.
- Page 2 CLOSE UPS YORKSHIRE CONCORDE CASTAWAY • QUEST 2,5cm 15cm Steel Acier Stahl Acero Acciaio Steel 15cm Acier Stahl Acero Acciaio Fig. B Steel Acier Stahl Acero Acciaio Fig. A 15cm XL 7000 • TANGO YUKON MILANO DESTIN Resin 18cm 18cm 18cm Résine...
- Page 3 CLOSE UPS GALVESTON MYSTIC II • PARADISE RICHWOOD TROPICANA • KEYSTONE MYSTIC 22cm 18cm PARADISE Resin pool Harz Schwimmbad piscine de résine piscina de resina piscina di resina 18cm 18cm GALVESTON RICHWOOD Steel painted Acier peint Stahl lackiert Acero pintado TOPICANA Acciaio verniciato KEYSTONE...
-
Page 4: Notwendige Hilfsmittel
THE REQUIRED TOOLS Check that you have at your disposal all the tools and materials for setting up the swimming pool: a shovel, a pick-axe, a rake, a beam longer than the radius of the pool and a quantity of sand. In addition you will need string, adhesive tape, a cutter, a tape measure, engineer’s pliers, a mason’s level, two stakes and a bag of flour. - Page 5 RIGID FRAMEWORK ROUND SWIMMING POOLS • INSTRUCTIONS IMPORTANT : Read instructions carefully in their entirely before setting up and using the swimming pool. Before beginning assembly of your pool, check that you have the correct number of parts using the packing slip.
-
Page 6: Safety Guidelines
SAFETY GUIDELINES adéquate. 5) Ne jamais permettre des jeux violents dans la 1) Do not authorize access to the pool without the piscine ni autour. presence of an adult. 6) Ne jamais modifier ni enlever de pièces, percer 2) Do not dive or jump from the edge of the pool. des trous dans la piscine ou l’échelle. -
Page 7: Consignas De Seguridad
keine Löcher in das Becken oder in die Leiter. 10) Nunca utilizar la escalera para otras utilizacio- Befolgen Sie stets die Installierugsanleitung. nes que la prevista, es decir entrar y salir de la piscina. 7) Die Leiter muß auf einer festen Unterlage und vollständig waage-recht stehen. - Page 8 VERIFICATION DES COLIS ET DES PIECES Vous devez contrôler minutieusement dans chaque Expertly designed, your swimming pool offers every carton si vous avez bien toutes les pièces constitu- quality and security guaranty and you will soon be tives. able to appreciate how easy it is to use it. Before be- ginning to set up the pool, it is absolutely necessary Procéder de même pour les équipements complé- that you read these instructions carefully.
- Page 9 ELECCION DEL EMPLAZAMIENTO rimane più che da installarla. Prima di incominciare, è indispensabile che leggiate attentamente le istru- El emplazamiento de la piscina es un elemento zioni per il montaggio. determinante para una correcta utilización posterior. CELTA DELL’UBICAZIONE Es inperativo elegir un terreno plano. En efecto, la piscina debe estar absolutamente nivelada.
- Page 10 PREPARING THE GROUND Pour assurer une meilleure protection, Swim’n Play vous suggère la pose d’un tapis de sol. Déployez Drive a stake into the ground in the center of the uniformément le tapis sur l’emplacement nivelé. spot chosen for your swimming pool. Attach a En suivant le même procedé, tracez avec un mar- length of string equal to the radius of the pool and queur la circonférence du cercle sur le tapis.
- Page 11 PREPARACION DEL TERRENO Segnate quindi una lunghezza sullo spago che sarà identica alla misura del raggio della piscina, Delimitar en primer lugar el emplazamiento trans- il riferimento deve essere ben visibile. Regolate il firiendo la circunferencia de la piscina en el suelo. sacchetto di farina con il punto di riferimento, quindi Para ello, ate la cuerda a una estaca plantada tracciate il cerchio sul suolo.
- Page 12 ASSEMBLING THE SWIMMING POOL L’ASSEMBLAGE DE LA PISCINE DER ZUSAMMENBAU DES SCHWIMMBECKENS MONTAJE DE LA PISCINA L’ASSEMBLAGGIO DELLA PISCINA Center steak Piquet central Mittelstange Estaca central Bottom Rail Paletto centrale Rail inférieur Unteren Schienen Rail inferior Joining part Rotaia inferiore connecteurs Anschlußstücke Conectores...
- Page 13 ASSEMBLING THE SWIMMING POOL correspondant à celui de votre piscine (Fig.4). Amener alors la quantité de terre tamisée ou de Before beginning with the assembly of the pool, we sable prélavé à proximité de la piscine. Se reporter have some important recommendations to make: au tableau pour la quantité...
- Page 14 MONTAJE DE LA PISCINA: L’ASSEMBLAGGIO DELLA PISCINA: Antes de efectuar el montaje de la piscina, se Prima di procedere al montaggio della piscina, recomienda lo siguiente: è opportuno formulare alcune raccomandazioni importanti: 1- Prever en caso de un filtro, el emplazamiento de la abertura del skimmer en el lugal adecuado.
- Page 15 Pose de la paroi : Hundir la pared en el rail para que los dos extre- mos de la pared se superpongan para el cierre. Cette opération nécessite l’aide d’au moins deux Asegúrese de que el centro de la línea de los personnes.
- Page 16 Die Wand schließen (System A und B): Verwenden Sie sämtliche Schrauben und Muttern, lassen Sie kein Loch leer. Setzen Sie die Schrauben CLOSING THE WALL von innen ein und ziehen Sie die Muttern fest an FERMETURE DE LA PAROI (Abb.6a / Abb.6b). DIE WAND SCHLIESSEN Cierre de la pared (sistema A y B): CIERRE DE LA PARED...
- Page 17 Inside of pool Intérieur de la piscine Fig. 6b Innerhalb Interior de la piscina All'interno della piscina View from the top Blick von oben Vue de dessus Vista de arriba Vista dall'alto Outside of pool Extérieur de la piscine Außerhalb Exterior de la piscina Al di fuori della piscina CONCORD...
- Page 18 Inside of pool • Intérieur de la piscine • Innerhalb von Schwimmbecken Interior de la piscina • All'interno della piscina Fig. 8 3 LAYERS OF CLOTH TAPE OR DUCT TAPE 3 LAYERS OF TAPE 3 COUCHES DE RUBAN TOILE OU DE RUBAN À CONDUITS Fig.
- Page 19 Vérification : Verificación: (fig.9) Para evitar cualquier problema en la instalación Afin d’éviter tout problème pour la pose du liner del liner, debe verificar que su piscina está bien (Fig. 9) vous devez vérifier que votre piscine est redonda y nivelada. Si no fuere el caso, debe bien ronde et à...
- Page 20 Terraplén interior: (fig.10) Rinterro interno: (Fig.10) Se trata de una etapa fundamental del montaje Si tratta di una tappa fondamentale nel montaggio, que no hay que descuidar: un terraplén demasiado da non trascurare assolutamente. Un rinterro trop- pequeño puede implicar tensiones excesivas en el po piccolo potrebbe generare tensioni eccessive liner.
- Page 21 Top Rail FITTING THE LINER Rail supérieur MISE EN PLACE DU LINER Oberen Schienen DIE BECKENAUSKLEIDUNG ANBRINGEN Rail superior Rotaia superiore INSTALACIÓN DEL LINER SISTEMAZIONE DEL LINER Plastic Edging LINER Fitting the liner: This operation requires that at LINER least one person hold the wall Fig.
- Page 22 Doublez l’épaisseur de la poche sur les rebords et Nocken in das Anschlußstück. Setzen Sie jedes- repliez la de 4 cm maximum sur la paroi. mal, wenn Sie ein Anschlußstück einsetzen, auch einen senkrechten Pfosten ein und schrauben ihn Maintenez la poche en place et emboîtez un pro- mit einer Schraube fest.
- Page 23 en la pared, para el skimmer. posizionate il connettore, dovete contemporanea- mente inserire e broccare il corrispondente mon- Si sobra tapiz de suelo, corte luego por el exterior tante verticale per mezzo di una vite (Fig.1). de la pared. -Proseguite in questo modo l’operazione su tutto il Sistemazione del liner: perimetro.
- Page 24 Instalacion de los montantes verticales Collocazione dei montanti verticali Si se le entrega un adhesivo con la piscina, Se vi e stato fornito un adesivo con la piscina, decorar los montantes verticales. decorate i montanti verticali. Ajustar luego los montantes verticales en cada una Aggiustate poi i montanti verticali su ciascuna delle de las placas metálicas inferiores y atornillarlas.
- Page 25 INSERTING THE TOP RAIL AND THE TOP PLATES L’INSTALLATION DES RAILS ET DES PLAQUES SUPÉRIEURES DIE OBEREN SCHIENEN UND PLATTEN EINSETZEN INSTALACION DE LOS RAILES Y PLACAS SUPERIORES INSTALLAZIONE DELLE ROTAIE E DELLE PIASTRE SUPERIORI Inserting the top rail and the top plates Igualmente, encajar los raíles pequeños entre los puntales.
- Page 26 FIXING THE TOP LEDGE POSE DE MARGELLES DIE BRÜSTUNG EINSETZEN INSTALACION DE LOS BROCALES COLLOCAZIONE DELLE SPONDE Fixing the top ledge Place the top ledges onto the metal top plates one after Fig. 17 another and insert screws, tightening only lightly. Depending on the size of &...
- Page 27 Instalacion de los brocales Collocazione delle sponde Se disponete de nastro adesivo, utilizzatelo per Si cuenta con la cinta adhesiva, utilícela para dec- decorare le sponde. orar los brocales. Posizionate le sponde ad una ad una sulle piastre Posicionar los brocales uno por uno en las placas metalliche superiori e avvitatele leggermente.
- Page 28 durch Ausrichten des Vorsprungs an der lengüeta en el fondo de la cubierta con la plancha Abdeckungsunter-kante mit dem Schlitz in der superior de la piscina (figura 3) y fijar con un tor- oberen Pool-Platte (Abb. 3) die Abdeckung an nillo Nº...
- Page 29 Schutzkappen anbringen (Ansicht Seite 3 • Fig. F) 1 - Setzen Sie das Logo in den Schutzkappen. 2 - Setzen Sie die Schutzkappen auf die schwarzen Muttern, die Sie vorher in die Metallplatten eingefügt haben. Richten Sie sie gut aus und schrauben Sie sie von oben mit Edelstahlschrauben fest.
- Page 30 Le montage des capuchons de 24cm et 28cm (Voir la page 3 • Fig. G & H) 1 - Placez le capuchon intérieures au-dessus des écrous noirs glissés auparavant sous les plaques métalliques. Ajustez-les et serrez la vis inoxydable par dessus. 2 - Glissez le capuchon extérieure sur le capuchon intérieur.
- Page 31 TREATING THE WATER Comply with the dosages indicated liming agent), it is importante to on the package. ensure proper maintenance: WARNING: The information con- 1- Once a week, control pH 2- Chlorine tained in the following sections about and chlorine levels. Water Treatment and Filtering are Check the active chlorine value, The pH value is generally quite sta-...
- Page 32 LE TRAITEMENT DE L’EAU Si le pH est inférieur à 7,2 utiliser du façon suivante: “pH PLUS”. ATTENTION : Pour tout ce qui suit 1-Contrôler au moins une fois par dans les paragraphes “FILTRATION” Se référer aux dosages mentionnés semaine le pH et le taux de chlore et “TRAITEMENT DE L’EAU “...
- Page 33 wenden Sie das Produkt “pH MOINS”. Wasserqualität erhalten bleibt. WASSERAUFBEREITUNG Wenn der pH-Wert niedriger als 7,2 ist, Das geschieht folgendermaßen: verwenden Sie das Produkt “pH PLUS”. A C H T U N G : D i e A b s c h n i t t e 1- Mindestens einmal pro Woche den “FILTERSYSTEM”...
- Page 34 MAS” recomienda luego efectuar el man- TRATAMIENTO DEL AGUA tenimiento de la manera siguiente: Remitirse a las dosificaciones men- AT E N C I O N : E n l o s p á r r a f o s cionadas en el embalaje.
- Page 35 IL TRATTAMENTO prodotto “pH PLUS” (pH PIU’). di cui sopra è stato realizzato (pH, DELL’ACQUA tasso di cloro, stabilizzante e antical- R i s p e t t a t e d o s i i n d i c a t e care), converrà...
Need help?
Do you have a question about the YORKSHIRE and is the answer not in the manual?
Questions and answers