Table of Contents
Advertisement
Quick Links
Vise with standard-length cover (for center-to-center screw distance up to 16
Vise with long cover (for center-to-center screw distance up to 24")
IMPORTANT NOTE:
If you are the kind of person who only looks at instruction sheets after
something goes wrong, this is one product where you should mend your
ways. If you ignore these instructions, we can almost guarantee trouble.
Please try to save all your innovative design urges until after you
have installed the vise. As a bare minimum, at least read through the
instructions before you start being creative.
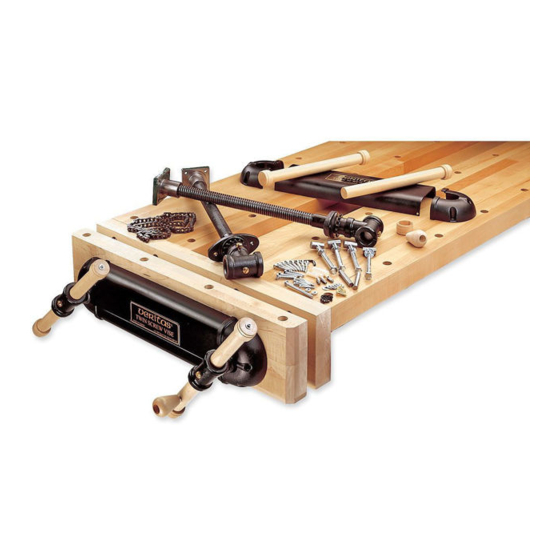
Used as an end vise, the Veritas
versatile. It can, and should, have vertical dog holes drilled
on the top face of the front jaw and corresponding dog holes
on the top of your bench for clamping large objects or for
panel gluing. Holes can also be drilled horizontally in the
side faces of the front jaw and corresponding holes along the
side of your bench to clamp objects such as doors for planing.
The dog holes in the front jaw should be counterbored 1" dia.
by 2" deep from the bottom of the jaw. This will allow you to
reach under and push the dog above the surface, if it should
slip under. On account of the relatively tall front jaw (6"+),
®
Twin-Screw Vise is very
Boards glued up on top surface
between round bench dogs.
The two easiest ways to screw up are:
•
By drilling holes in the wrong place and at an angle.
•
By using warped wood with the intention of straightening it out
with bolts, screws and brute force later.
It isn't a lot of fun to follow instructions exactly but this is one time
when it will save you a lot of grief.
the dog holes may have to be drilled from the top side, in the
same position as the counterbores in the bottom side.
Vertical dog holes drilled along the top of your bench can be
used in conjunction with Veritas
®
®
Pups
or Wonder Dog
3
/
" holes should be drilled. Horizontal holes drilled in the
4
front jaw and corresponding holes drilled horizontally in the
bench skirt will enable you to clamp large panels or doors for
planing, etc.
Twin-Screw Vise
U.S. Patent Nos. 5,301,934 & 5,284,331
/
")
05G12.21
7
8
05G12.22
Made in Canada
®
Round Bench Dogs, Bench
Clamps, and Bench Hold-Down.
Large panel or
door clamped
along the
side of your
workbench using
horizontally
drilled holes in a
skirt and round
bench dogs.
1
Advertisement
Table of Contents

Related Manuals for VERITAS Twin-Screw Vise 05G12.21

Summary of Contents for VERITAS Twin-Screw Vise 05G12.21
- Page 1 ® Used as an end vise, the Veritas Twin-Screw Vise is very the dog holes may have to be drilled from the top side, in the versatile.
- Page 2 16 Chain Cover Screws: #10 × " (4) -16 × 1 " Round Nuts (4) The Veritas ® Twin-Screw Vise is designed to enable you to skew thick front jaw. This may be made from a solid piece or can be the front jaw in either direction.
- Page 3 Min. Skirt following suggestions. The (The throat depth may be increased by making deeper jaws and end skirt on the Veritas " mounting the screws lower, if desired.) Workbench is not tall or " thick enough to be the rear...
- Page 4 Installation " Min. Scribed Line Before you begin to install your Veritas ® Twin-Screw Vise, please read the instructions completely. There are several tips and hints that will make your vise easier to install and work better.
- Page 5 If this is an installation You need to drill two holes in the rear jaw for the steel to a Veritas Workbench, see the section entitled Note to dowel pins, which will keep your work off the vise Builders of a Veritas ®...
- Page 6 #10 Wood Screw with Chain Roller Note: Due to the nature of the design of the Veritas Twin-Screw If there is a great amount of sag in your chain (more than Vise, the front jaw may have a tendency to drop from vertical a link), the link may be used.
- Page 7 ® Veritas Twin-Screw Vise Fitting the Rear Jaw to Your Bench Vise Handles (For retrofi tting the vise to an existing bench.) Supplied with your twin-screw vise are the components to make Holes will have to be drilled through the rear jaw and into two vise handles, with end caps, and one speed knob.
- Page 8 Chain may be too tight. main screws are parallel to freely? Go to... one another. 814 Proctor Avenue 1090 Morrison Drive Ogdensburg, New York Ottawa, Ontario 13669-2205 USA K2H 1C2 Canada INS-051 Rev. G © Veritas Tools Inc. 2005 Printed in Canada.
Need help?
Do you have a question about the Twin-Screw Vise 05G12.21 and is the answer not in the manual?
Questions and answers