Isotra TITAN 90 Measurement And Assembly Manual
Exterior blinds
Hide thumbs
Also See for TITAN 90:
- Control and maintenance manual (7 pages) ,
- Operating and maintenance instructions (2 pages)
Advertisement
Quick Links
MEASUREMENT AND ASSEMBLY MANUAL
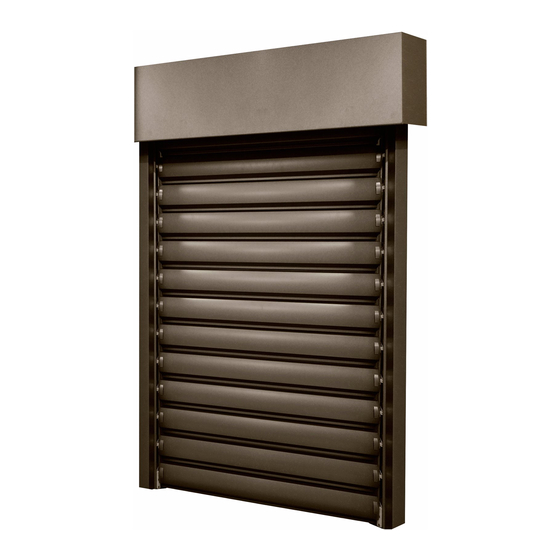
EXTERIOR BLINDS TITAN 90
1. MEASUREMENT
Measure the width (SZ) and height (VZ) of the blind.
Measure the width (SZ) of the blind at least at 3 points, on the top, in the middle and on the bottom.
Use the lowest measured value for ordering and production of the blind.
ATTENTION! Produced width (SV) of the blind TITAN is always shorter compared to measured one according to
chosen assembly option. See: Assembly options.
Measure the height of the blind (VZ) at 3 points as well, on both sides of lining and in the middle. Use the lowest
measured value for ordering and production of the blind.
ATTENTION! Produced height of the blind TITAN (VV) is always 20 mm shorter compared to the measured one
(VZ). The reason is ensuring manipulation space for assembly process and space for fixing brackets for front
cover of the blind.
Note:
Real width of produced blind (SV) is always shorter compared to the one in order form. Width difference comes from the
chosen assembly option. For assembly onto lining it is obligatory to use 2 mm distance pads (D). The pads help to adjust
vertical level of guiding rails. Real height of produced blind (VV) is always 20 mm shorter than the one in order form. The
reason is ensuring manipulation space for assembly process and space for fixing brackets for front cover of the blind.
Validity of the manual: 1. 8. 2016
1
Advertisement

Related Manuals for Isotra TITAN 90


Summary of Contents for Isotra TITAN 90
- Page 1 MEASUREMENT AND ASSEMBLY MANUAL EXTERIOR BLINDS TITAN 90 1. MEASUREMENT Measure the width (SZ) and height (VZ) of the blind. Measure the width (SZ) of the blind at least at 3 points, on the top, in the middle and on the bottom.
- Page 2 MEASUREMENT AND ASSEMBLY MANUAL Minimal lining depth for correct assembly is approximately 120 mm. ATTENTION! Take the utmost care during measurement you will avoid possible problems during later assembly of the blind. Installation into reveal A = min. 65 mm Spacing pad Assembly holes for guiding rails: Blind height including assembly...
- Page 3 MEASUREMENT AND ASSEMBLY MANUAL VZ = Blind height PP = Number of punching T = Upper punching position RP = Distance between holes 2. ASSEMBLY Validity of the manual: 1. 8. 2016...
-
Page 4: Preparation For Assembly
MEASUREMENT AND ASSEMBLY MANUAL Basic product specification (exterior view) Assembly parts of blind TITAN 90: 10, 20 Self-supporting guiding channels 1 pc Short shaft 2 pc Upper head rail including engine 1 pc Slats x pc (according to the slats number) - Page 5 MEASUREMENT AND ASSEMBLY MANUAL - Check all assembly materials, verification of all assembly values (width x height x size of packet). ATTENTION! All marks on blind parts are always palced and visible from interior view! 2.2. SCREW DIMENSIONS FOR ASSEMBLY - Ø...
- Page 6 MEASUREMENT AND ASSEMBLY MANUAL 2.5.1. Guiding rails assembly A – Level the rail into lining. B – Minimal distance between guiding rail axis and the obstacle is 65mm. C – Mind the difference between left and right guiding rail, place them correctly. D –...
- Page 7 MEASUREMENT AND ASSEMBLY MANUAL 2.5.5. head-rail with engine A – Insert the head-rail from below onto both guiding rails and center it. ATTENTION: B – Keep in mind that the label is always facing the interior view. C – Secure the head-rail with securing hooks by tightening to guiding rails.
- Page 8 MEASUREMENT AND ASSEMBLY MANUAL 2.5.9. Slats - adjustment A – Using the mounting cable move the blind up and down. B – Moving the slats up push the upper limit button on the engine. C – Both slats are in opened position. Check their parallelism. 2.5.10.
- Page 9 MEASUREMENT AND ASSEMBLY MANUAL 2.6. FUNCTIONALITY CHECK AND ENGINE DRIVE ATTENTION! Never connect more than one engine with single control unit. Functionality check: A – Using the mounting cable move the blind several times up and down. B – Check horizontal free motion of the slat side clips towards left guiding rail.
Need help?
Do you have a question about the TITAN 90 and is the answer not in the manual?
Questions and answers