Advertisement
Quick Links
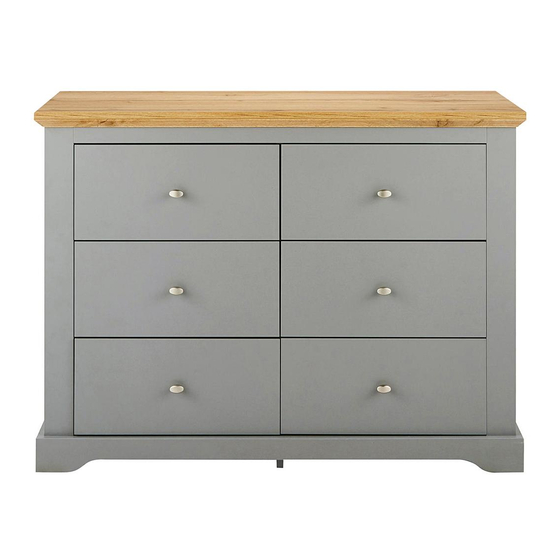
GREY 6 Drawer Chest
Dimensions
No. people Assembly Time
Width: 1136 mm
Depth: 439 mm
Heigth: 844 mm
Important - Please read these instructions fully before starting assembly
If you need help damaged or missing parts, call the JDW Customer Helpline: 0871 231 2000
Assembly Instructions
Please keep for future reference
2 hrs
1
/ 25
Advertisement

Related Manuals for At Home Collection GREY OP782


Summary of Contents for At Home Collection GREY OP782
- Page 1 Assembly Instructions Please keep for future reference GREY 6 Drawer Chest Dimensions No. people Assembly Time Width: 1136 mm 2 hrs Depth: 439 mm Heigth: 844 mm Important - Please read these instructions fully before starting assembly If you need help damaged or missing parts, call the JDW Customer Helpline: 0871 231 2000 / 25...
-
Page 2: Dear Customer
FSC® certified furniture As a raw material for making furniture, wood has no equal - from its vibrancy through its aesthetics to its many design possibilities. But the wood from which this furniture is made has even more to offer: The FSC label proves that the wood used comes from forests managed to strict ecological, social and economic standards with lasting effect. -
Page 3: Parts List
PART LIST PARTS LIST DIMENSIONS BOTTOM HORIZONTAL PANEL 1136x439x38 DRAWER LEFT PANEL 350x150x12 DRAWER RIGHT PANEL 350x150x12 DRAWER BACK PANEL 421x150x12 LEFT SIDE PANEL 828x400x16 RIGHT SIDE PANEL 828x400x16 LEFT SIDE PANEL 416x80x16 RIGHT SIDE PANEL 416x80x16 FRONT PANEL 1122x80x16 (10) FRONT PANEL 956x60x16... - Page 4 / 24...
-
Page 5: Hardware List
HARDWARE LIST 15x16mm 8x35mm 15x12mm 15x10mm CAM LOCK DOWEL HOLDER CAM BOLT CAM LOCK CAM LOCK 3.5x13mm 3x20mm 3x13mm HOLDER SCREW SCREW SCREW 70x50mm FELT PAD FRONT BACK SLIDE ATTACH TO BACK DRAWER BASE FRONT BACK FRONT SLIDE ATTACH TO CARCASS FRONT BACK... - Page 6 HARDWARE LIST M4x22mm 3.5x16mm 4.5x45mm ANGLE BRACKET BOLT SCREW HANDLE SCREW D20mm CAM LOCK COVER 5x8mm M6x25mm SLEEVE SPIKE HEEL BOLT / 24...
- Page 7 TOP TIPS BEFORE YOU START! 1. Please check that all parts are present before you start the assembly of your furniture, as once assembled, the furniture is exempt from our home approval policy. 2. For ease and speed of assembly, we recommend that before you commence each step of the assembly, that you identify all the pats required for that step.
- Page 8 STEP 1 15x12mm 8x35mm CAM BOLT CAM LOCK DOWEL В Arrow to the edge of the part В В В В / 24...
- Page 9 STEP 2 BACK FRONT SLIDE ATTACH TO CARCASS 5x8mm 3.5x13mm 15x12mm 8x35mm FRONT BACK SLEEVE 3x Left / 3x Right SCREW CAM LOCK DOWEL L=350 ROLLER RUNER Right Right Right В Arrow to the edge of the part Left Left Left В...
- Page 10 STEP 3 15x12mm 15x16mm 8x35mm 5x8mm CAM LOCK CAM LOCK DOWEL SLEEVE CAM BOLT В Arrow to the edge of the part В / 24...
- Page 11 STEP 4 15x12mm CAM LOCK CAM BOLT В Arrow to the edge of the part / 24...
- Page 12 STEP 5 15x10mm CAM LOCK Arrow to the edge of the part STEP 6 CAM BOLT / 24...
- Page 13 STEP 7 7x50mm CONFIRMAT STEP 8 7x50mm CONFIRMAT / 24...
- Page 14 STEP 9 STEP 10 1/2 turn / 24...
- Page 15 STEP 11 M4x22mm D20mm BOLT HANDLE CAM LOCK COVER STEP 12 BACK FRONT SLIDE ATTACH TO BACK DRAWER BASE FRONT 6x Left / 6x Right 3x13mm L=350 SCREW ROLLER RUNER Right Left / 24...
- Page 16 STEP 13 1/2 turn STEP 14 1/2 turn / 24...
- Page 17 STEP 15 BACK FRONT SLIDE ATTACH TO CARCASS 5x8mm 3.5x13mm FRONT BACK SLEEVE 3x Left / 3x Right SCREW L=350 ROLLER RUNER / 24...
- Page 18 STEP 16 1/2 turn STEP 17 / 24...
- Page 19 STEP 18 1/2 turn STEP 19 1/2 turn / 24...
- Page 20 STEP 20 STEP 21 M6x25mm 70x50mm BOLT FELT PAD / 24...
- Page 21 STEP 22 1/2 turn STEP 23 / 24...
- Page 22 STEP 24 В 1/2 turn STEP 25 3x20mm HOLDER HOLDER SCREW / 24...
- Page 23 STEP 26 3.5x16mm 4.5x45mm SCREW SCREW ANGLE BRACKET P,Q,R Wall fixings are not supplied with this product as different wall materials require different types of fixing devices ( such as Rawl plugs used on brick work).You must use fixing devices suitable for the type of wall you intend to mount this product to.
- Page 24 STEP 27 / 24...
Need help?
Do you have a question about the GREY OP782 and is the answer not in the manual?
Questions and answers