Table of Contents

Related Manuals for KERN Optics ODC-2


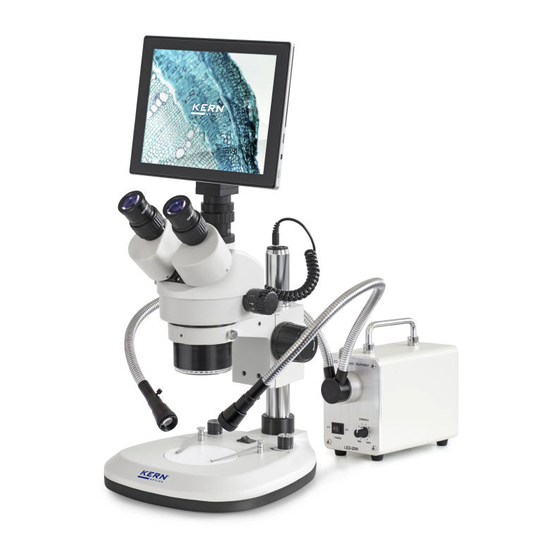
Summary of Contents for KERN Optics ODC-2
- Page 1 KERN & Sohn GmbH Ziegelei 1 Tel: +49-[0]7433- 9933-0 D-72336 Balingen Fax: +49-[0]7433-9933-149 E-mail: info@kern-sohn.com Internet: www.kern-sohn.com User Instructions Tablet camera for microscopes KERN ODC-2 ODC 241 Version 1.0 01/2019 ODC-2-BA-e-1910...
-
Page 3: Table Of Contents
KERN ODC-2 Version 1.0 01/2019 User Instructions Tablet camera for microscopes Table of contents Before use ..................3 General notes ..........................3 Storage ............................3 Scope of supply ................4 Nomenclature ................5 Technical data ................9 Operation ..................11 Unpacking and setting up ..................... -
Page 4: Before Use
The ideal temperature range is between 0 and 40°C and a relative humidity of 85% should not be exceeded. Sudden temperature fluctuations may cause fog inside the tablet. The tablet should therefore be stored in a bag or have a protective sleeve to protect it from these fluctuations. ODC-2-BA-e-1910... -
Page 5: Scope Of Supply
2 Scope of supply Tablet camera Power adapter User Instructions ODC-2-BA-e-1910... -
Page 6: Nomenclature
3 Nomenclature ODC-2-BA-e-1910... - Page 7 ODC-2-BA-e-1910...
- Page 8 ODC-2-BA-e-1910...
- Page 9 Part Part Description Description number number USB port Tablet / Touch display PC mouse connection Connection socket Camera housing for headphones Camera sensor Loud speaker Power connector Micro SD slot Microphone Micro HDMI port USB port On/Off switch ODC-2-BA-e-1910...
-
Page 10: Technical Data
Photo format JPEG Input voltage 12 V DC (no battery operation) Operating system Android 5.1 Interfaces WLAN, USB 2.0, Micro SD, Micro HDMI S-eye Language English Packaging dimensions 275x230x85 mm Without packaging: 0.65 kg Weight With packaging: 1.05 kg ODC-2-BA-e-1910... - Page 11 ODC-2-BA-e-1910...
-
Page 12: Operation
To do this you need a C-mount adapter, which fits the microscope you are using. (For an example, see figure on page 12) 5. Connect the power supply using the power adapter The power connector is located on the left on the underside of the tablet ODC-2-BA-e-1910... - Page 13 Tablet camera C-mount adapter Microscope ODC-2-BA-e-1910...
-
Page 14: Start Microscope Software (S-Eye)
If this does not happen, then this App (from the desktop of the tablet) can be started manually (touchscreen) See figure below 3. To operate the tablet/microscope software easily, you can connect a PC mouse to the USB port at any time Tablet start screen ODC-2-BA-e-1910... -
Page 15: User Interface And Functions Of The S-Eye Microscope Software
(can be selected on the righthand edge of the scree) – 1. Effect Setting the camera parameters – 2. Measure Various measuring functions – 3. Playback Image and video playback/image analysis – 4. Snap Image capture – 5. Record Video recording – 6. Setting General settings ODC-2-BA-e-1910... -
Page 16: Effect - Setting The Camera Parameters
Vertical image mirroring 5. Reset The settings implemented for image processing can be saved under four different profiles. To do this click on the following symbol: You can also reset to the original settings using the “factory” profile. ODC-2-BA-e-1910... -
Page 17: Capturing And Playing Back Images And Videos
Under “Enable built-in image viewer” you can set whether images can be opened using the standard Android gallery or in the built-in image display program (see 5.3.4 Image analysis). ODC-2-BA-e-1910... -
Page 18: Measurements
1. Place the object holder with integrated scale onto the stage of the microscope 2. Click on the Measure button 3. Click on “Add” (or “+”) in the lower area of the “Calibrations” area 4. Follow the instructions which are displayed, step by step ODC-2-BA-e-1910... - Page 19 In the example here: 1000 µm. Click on “Calculate” in order to save and close the calibration. This procedure must be carried out again for other lens magnifications. ODC-2-BA-e-1910...
- Page 20 Adding text annotations Setting the line thickness, line colour, font and font Settings size and colour Creating an image which contains the currently Save displayed measurements Delete 1 Delete one selected measurement Delete 2 Delete all measurements on the screen ODC-2-BA-e-1910...
- Page 21 2. Click on the symbol for line measurement. Then the measuring line along with the measurements will be displayed in the live image transfer. This can be moved as required and the length can be altered. ODC-2-BA-e-1910...
-
Page 22: Image Analysis
Tick the box for “Enable built-in image viewer” As soon as an image is opened in the “Playback” program category, this is then displayed on the S-EYE image display. Further images can be opened here or new images can be captured at this point. ODC-2-BA-e-1910... - Page 23 Four different instruments for image processing or image analysis can be implement with this program: 1. Greyscale “GREYSCALE” function 2. Contrast and brightness “CONTRAST” function ODC-2-BA-e-1910...
- Page 24 3. Threshold “THRESHOLD” function 4. Particle analysis “PARTICLES” function ODC-2-BA-e-1910...
-
Page 25: Service
The illustrations may differ slightly from the product. The descriptions and illustrations in this user manual are subject to change without notice. Further developments on the device may lead to these changes. language versions contain non-binding translation. The original German document is the binding version. ODC-2-BA-e-1910...
Need help?
Do you have a question about the ODC-2 and is the answer not in the manual?
Questions and answers