Advertisement
Quick Links
LabSat 3 User Manual
•
01 - LabSat3 Introduction
•
02 - LabSat3 Components
•
03 - LabSat3 Media
•
04 - LabSat3 Menu layout
•
05 - LabSat3 Record and Replay operations in detail
•
06 - LabSat3 HDD File Layout
•
07 - LabSat3 Battery
•
08 - LabSat3 External reference clock input
•
09 - LabSat3 Digital Channels
•
10 - LabSat3 CAN Bus
•
11 - LabSat3 Digital In/Out
•
12 - LabSat3 Remote control
•
13 - LabSat3 Converting LabSat scenarios
•
14 - LabSat3 SatGen Software
•
15 - LabSat3 Troubleshooting
•
16 - LabSat3 Technical Properties
•
LabSat3 EC Declaration of Conformity
•
LabSat3 Label
•
LabSat3 PIN OUTS
•
LabSat3 Replacement parts and optional accessories
•
LabSat3 RoHS Declaration
•
LabSat3 Technical specificiation
•
LabSat3 Upgrading Firmware
1
Advertisement

Subscribe to Our Youtube Channel
Related Manuals for Racelogic LabSat 3


Summary of Contents for Racelogic LabSat 3
- Page 1 LabSat 3 User Manual • 01 - LabSat3 Introduction • 02 - LabSat3 Components • 03 - LabSat3 Media • 04 - LabSat3 Menu layout • 05 - LabSat3 Record and Replay operations in detail • 06 - LabSat3 HDD File Layout •...
- Page 2 LabSat 3 is a lightweight, portable record and replay system for GNSS testing. With the ability to record real world GNSS signals directly to SD card or HDD storage, the LabSat 3 is a simple to use, fully stand-alone system. Recorded signals can be replayed back by LabSat 3 in the Lab enabling development and testing of most types of GNSS equipment.
- Page 3 • Digital input for event marking or 1PPS recording • Adjustable attenuation (0 – 31dBm) • On-board GNSS receiver for monitoring RF during record and replay The LabSat 3 line-up includes a number of variants to suit a range of testing requirements. These are: Version Description Triple Constellation record &...
-
Page 4: How Does It Work
If the drive is recorded once with LabSat 3, the recorded signal can be replayed over and over on the bench saving hours of drive time and with the knowledge that the conditions will be the same for each replay. - Page 5 Example of Replay using the included SD card with preloaded scenario. Briefly press the power button to power up the LabSat 3. Connect from the RF output on the rear of the LabSat 3 to your GPS system antenna input. With the SD card inserted, use the UP/DOWN arrows to select a file. Press the PLAY button to start replay.
-
Page 6: Record Example
Example of Recording your own file to an SD card (RP variants only). To record a new file, connect the LabSat 3 antenna to the RF input on the rear of the LabSat. Ensure that the antenna has a clear view of the sky, press the REC button to start recording. Press the REC button again to stop recording. - Page 7 During recording, while using battery power, the GNSS monitor display will automatically revert to the record display after a short period to conserve battery power. This power save feature can be switched off but it is recommended to be left active for maximum battery life. https://racelogic.support/03LabSat_GPS_Simulators/LabSat_3/LabSat_3_User_Manual/...
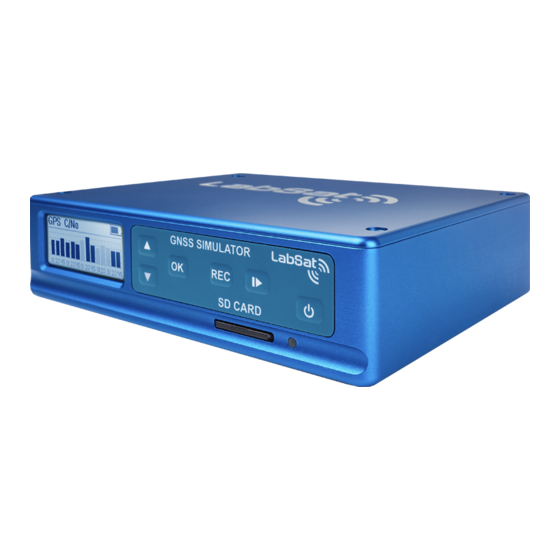
- Page 8 02 - LabSat3 Components LabSat 3 has been designed to be portable and simple to use allowing virtually anyone to gather field test signals without in depth training. Recording GNSS signals is as simple as positioning the antenna and pressing one button. The sunlight-readable graphic display gives instant feedback of record status and can show live histogram data to verify satellites in view during recording.
- Page 9 LabSat 3 Rear https://racelogic.support/03LabSat_GPS_Simulators/LabSat_3/LabSat_3_User_Manual/...
- Page 10 Remote access and control USB ‘B’ NMEA data output RF OUT Output RF signal RF IN Input RF signal (RP variants only) 10MHz Reference Clock Input Expansion 36 Way MDR 1PPS, Digital I/O*, CAN*, RS232* *Model dependent – available as options. https://racelogic.support/03LabSat_GPS_Simulators/LabSat_3/LabSat_3_User_Manual/...
- Page 11 LabSat 3 file formats LabSat 3 uses I&Q binary data and runs the FAT32 file format. LabSat 3 files are recorded into a folder with separate 2 GB data files which will run sequentially when replayed. The folder description GPS_000 will contain several files with the name format GPS_000_000.ls3.
-
Page 12: Recommended Media
Racelogic LabSat department. Formatting LabSat3 Media Formatting an SD card or a HDD is important when using LabSat 3, to make sure that the card cluster size is set to an optimum level. Cluster size is the minimum amount of data that can be written in a single operation. So, the larger the cluster size, the better the performance of the card (up to a point). - Page 13 If the speed test does not bring up any warnings, this means that the cards read and write speed should be fast enough for use with the LabSat 3. Note, this is not a guarantee that recording a large amount of data will be successful, as the speed test cannot check if the card is fragmented and has other files stored on it.
- Page 14 • Power Save – When selected, will power down display backlight and internal monitor during recording. • CLK REF ◦ Internal - As the default setting LabSat 3 will use it internal reference clock. ◦ External 10MHz – Allows the user to connect a 10 MHz reference signal on the REF input.
- Page 15 • LAN ◦ DHCP – Enable/Disable DHCP. ◦ IP Address – Set the IP address assigned to LabSat 3. ◦ SUBNET MASK - Set the Subnet mask assigned to LabSat 3. ◦ DEFAULT GATEWAY - Set the default gateway for the network.
- Page 16 Replay operation LabSat 3 uses SD card or HDD memory for storage and playback of GNSS data. It is important to note that Class 10 or higher cards must be used to sustain the transfer speeds required. Racelogic recommend SanDisk Extreme Class 10 cards for best performance.
-
Page 17: Record Operation
Record operation LabSat 3 uses SD card and HDD memory for storage and playback of GNSS data. It is important to note that Class 10 or higher cards must be used to sustain the transfer speeds required. When recording two constellation types, the data rate is approximately 8.2MB (Mega Bytes) per second. - Page 18 BeiDou B1 Depending on the model, LabSat 3 will have 1, 2 or 3 RF channels. This allows recording of 1, 2 or 3 frequency bands so, for example, a 2 constellation LabSat 3 may record the band containing GPS L1/Galileo E1 and the band containing GLONASS L1 simultaneously.
- Page 19 06 - LabSat3 HDD File Layout Below is a guide to how the folder layout works on LabSat 3. This example below shows the folder layout on the HDD provided with LabSat 3. The LabSat USB HDD is uses multiple folders. When folders are detected LabSat will display them in a similar fashion to a PC using the DIR indicator.
- Page 20 Continue to navigate using ‘OK’ until <DIR> is no longer shown, this indicates the file is a scenario not a directory. Pressing play will start the individual scenario replay. https://racelogic.support/03LabSat_GPS_Simulators/LabSat_3/LabSat_3_User_Manual/...
-
Page 21: Battery Operation And Charging
Alternatively, an external battery charger is available to order. To remove the battery from LabSat 3, unscrew the battery plate on the rear of the device and slide the battery out. When operating from battery power, the battery charge status will be shown in the top-right section of the display - If external power is connected and the battery is being charged, a power symbol will be shown over the battery symbol - The discharge temperature range for the battery is -20°C to +60°C. - Page 22 Battery fitting, removal and handling • Replace battery with Racelogic, Part No. RLACS201 only. Use of another battery may present a risk of fire, explosion or other malfunction. • Caution: The battery used in this device may present a fire or chemical burn hazard if mistreated. Do not disassemble or heat above 60°C (140°F) or incinerate.
- Page 23 08 - LabSat3 External reference clock input LabSat 3 features an external reference input for synchronization to a 10 MHz clock. To use this feature, connect a 10 MHz reference signal with a -2 dBm to +14 dBm level (0.5–3 Vp-p) to the REF IN SMA connector and ensure that the 'External 10MHz' reference clock option is ticked in Menu >...
- Page 24 LabSat. Recorded digital channel data is synchronized to each sample of recorded RF data; the maximum input frequency for each channel is 1 MHz. To record 2 digital channels, at least 2 RF channels must be selected or 1 single channel with 2-bit quantisation. https://racelogic.support/03LabSat_GPS_Simulators/LabSat_3/LabSat_3_User_Manual/...
- Page 25 During replay, the signal will be re-created Option on Single constellation DIGI on pin 2 (DIGO) of the expansion variant* connector. See section EXPANSION CONNECTOR for more details. *Contact Racelogic or your LabSat distributor to purchase upgrade options https://racelogic.support/03LabSat_GPS_Simulators/LabSat_3/LabSat_3_User_Manual/...
-
Page 26: Digitize Mode
LabSat 3 is capable of listening to, and recording data from, two separate CAN networks. Dual channel CAN Bus data recording with LabSat 3 can be achieved in two ways. Depending on the mode selected, the CAN signal will be either digitized and re-created on a raw bit level or decoded and recorded in a time-stamped text file. - Page 27 At the end of the log file there will be a summary of the number of CAN messages received on each channel during the recording. The log file is recorded in the same folder as the RF data and has a .TXT file extension. https://racelogic.support/03LabSat_GPS_Simulators/LabSat_3/LabSat_3_User_Manual/...
- Page 28 During recording, the CAN controller listens to the CAN bus and stores incoming data. LabSat 3 will transmit acknowledge pulses on the bus in response to correctly received data unless the ‘Silent Record’ option is ticked. The ability to transmit acknowledge pulses in ‘LOG FILE’ mode means that it is possible to record data directly from inertial sensors or other devices with a CAN bus output.
- Page 29 LabSat 3 Single Constellation can be upgraded to capture and replay CAN. Once upgraded the LabSat will have the capability to capture a single channel of digitized CAN data or two channels of arbitrated CAN data. LabSat 3 Dual &...
- Page 30 V. Digital out is a 5 V level output. To enable the digital input for recording, go to Menu > Setup > Digital > CH1 and then enable the tick against ‘Digi’ in the signal list. Then, during recording, LabSat 3 will also record the state of DIGI (pin3 of the expansion connector).
- Page 31 (API) is available together with a manual for communication via Telnet over IP. • The LabSat 3 and LabSat 3 Wideband API is a Microsoft .NET API to allow functions of a LabSat 3 or LabSat 3 Wideband connected via LAN to be accessed programmatically.
- Page 32 Wideband store GNSS RF data as an I & Q binary file. This means that existing LabSat scenarios cannot be run natively on a LabSat 2 or vice versa. The LabSat scenario converter software included on the LabSat 3 HDD will convert LabSat, LabSat 2 and LabSat 3 files to each other’s format and these formats to LabSat 3 Wideband format.
- Page 33 ‘Destination Scenario’ box. LabSat 3 file format requires a folder for the data files. So when converting to LabSat (.bin), LabSat 2 (.ls2) or LabSat 3 Wideband (.LS3W) formats please select the first file within the LabSat 3 scenario folder for conversion. The software will automatically convert all the files in the folder.
- Page 34 SatGen software is a powerful tool for defining and creating RF playback scenario files for use with the LabSat Simulator. For many applications, LabSat 3 can record and playback real world, live sky data, but there may be times when you need a more controlled, user definable signal. When this is the case, SatGen provides all of the tools necessary to create a predictable, stable and accurate RF output from LabSat.
- Page 35 (DUT) performs. Of course, LabSat 3 can record and replay live data, but creating an artificial scenario allows you to precisely control the data content, and create a ‘gold standard’ file for carrying out true comparisons between receivers. From your bench you can try different acceleration levels, crossing different time zones, the equator, leap second roll-overs and many hard to replicate tests.
- Page 36 There are three versions of SatGen software available to suit a range of testing requirements. These are: RLLSSGSW03-1 SatGen v3 Single Constellation Create single constellation scenario files for GPS L1, GLONASS L1 or BeiDou B1. RLLSSGSW03-2 SatGen v3 Dual Constellation Create single or dual constellation scenario files for GPS L1, GLONASS L1 or BeiDou B1. https://racelogic.support/03LabSat_GPS_Simulators/LabSat_3/LabSat_3_User_Manual/...
- Page 37 SatGen simulation software can create RF files for ‘LabSat’ 1 bit and ‘LabSat 2 or 3’ 2 bit. The RF data output can be created in static or dynamic modes: User configurable time, date and duration for static scenario creation. SatGen v3 dynamic scenario creation with draw a route, file upload and user defined command options. https://racelogic.support/03LabSat_GPS_Simulators/LabSat_3/LabSat_3_User_Manual/...
- Page 38 15 - LabSat3 Troubleshooting Restart • Should you need to restart the LabSat 3 unit for any reason please hold down the power button continuously for at least 30 seconds. Release the button and then press again briefly to switch device on.
- Page 39 Optimising Data Transfer Speeds • LabSat 3 uses a high speed SD card to record and replay RF data. If you wish to transfer LabSat scenarios from and to the LabSat 3 Hard Disk Drive (HDD) it is recommend to use a PC that supports USB3.0. The LabSat 3 HDD supports USB3.0 connection and to get maximum transfer speed then the SD card reader should also have USB3.0...
- Page 40 16 - LabSat3 Technical Properties LabSat3 EC Declaration of LabSat3 Label Conformity LabSat3 Replacement parts and LabSat3 PIN OUTS optional accessories LabSat3 RoHS Declaration LabSat3 Technical specificiation LabSat3 Upgrading firmware https://racelogic.support/03LabSat_GPS_Simulators/LabSat_3/LabSat_3_User_Manual/...
- Page 41 LabSat3 EC Declaration of Conformity https://racelogic.support/03LabSat_GPS_Simulators/LabSat_3/LabSat_3_User_Manual/...
- Page 42 https://racelogic.support/03LabSat_GPS_Simulators/LabSat_3/LabSat_3_User_Manual/...
- Page 43 LabSat3 Label The LabSat 3 label is located on the left side toward the rear. Please quote your serial number in all correspondence. https://racelogic.support/03LabSat_GPS_Simulators/LabSat_3/LabSat_3_User_Manual/...
- Page 44 LabSat3 PIN OUTS Rear View of LabSat3 https://racelogic.support/03LabSat_GPS_Simulators/LabSat_3/LabSat_3_User_Manual/...
- Page 45 Connector 1 - POWER (Lemo 2 PIN) Function Range Power+ 8 - 30 V Ground https://racelogic.support/03LabSat_GPS_Simulators/LabSat_3/LabSat_3_User_Manual/...
- Page 46 Name Function Range RF Signal including RF IN Bias output 2.8 - 3 V 3 V DC bias for active antenna Center RF Signal Output DC RF OUT Blocked 10 MHz Reference clock. 10.000 MHz +6 dB Chassis Ground https://racelogic.support/03LabSat_GPS_Simulators/LabSat_3/LabSat_3_User_Manual/...
- Page 47 Expansion port 36 way MDR type connector The 'EXPANSION' connector on the rear of LabSat 3 gives access to a number of signals including CAN Bus, RS232, 1PPS and Digital input/output. Accessory RLACS202 is used to provide user signal access for integration into the users test system.
- Page 48 I2C Bus Data – Reserved I2C SCL for future use I2C Bus Data – Reserved I2C VCC for future use RS232 data output. NMEA Data from GNSS monitor RS232 Tx or User RS232 data if enabled. Standard RS232 Level https://racelogic.support/03LabSat_GPS_Simulators/LabSat_3/LabSat_3_User_Manual/...
- Page 49 Ground Connection Ground Ground Connection Ground Ground Connection IO_0 Reserved IO_1 Reserved IO_2 Reserved IO_3 Reserved Ground Ground Connection Ground Ground Connection Connected to input power Power – Max 250 mA Connected to input power Power – Max 250 mA https://racelogic.support/03LabSat_GPS_Simulators/LabSat_3/LabSat_3_User_Manual/...
- Page 50 Expansion Connector (RLACS202) https://racelogic.support/03LabSat_GPS_Simulators/LabSat_3/LabSat_3_User_Manual/...
- Page 51 Connector 1 - RS232 (9 PIN SUB-D) Function Range RS232 data output. NMEA Data from GNSS monitor or User RS232 data if enabled. Standard RS232 Level User RS232 data which is recorded if RS232 is enabled in Digital configuration menu. Standard RS232 Level Ground https://racelogic.support/03LabSat_GPS_Simulators/LabSat_3/LabSat_3_User_Manual/...
- Page 52 Connectors 2 / 3 - CAN 1 / CAN 2 (9 PIN SUB-D) Function Range CAN Bus Low Channel 1/ 2 – Standard ISO 11898 CAN Low voltage signal levels for CAN Bus High Channel 1/ 2 – Standard ISO 11898 CAN High voltage signal levels for https://racelogic.support/03LabSat_GPS_Simulators/LabSat_3/LabSat_3_User_Manual/...
- Page 53 SMA plug to MCX plug cable – 1 m RLCAB082-1 SMA plug to MMCX plug cable – 1 m RLCAB083-1 SMA plug to TNC plug cable – 1 m RLCAB084-1 LabSat 3 battery RLACS201 LabSat 3 expansion connector adapter RLACS202 LabSat 3 cable identification sheet LS03-CABIDEN https://racelogic.support/03LabSat_GPS_Simulators/LabSat_3/LabSat_3_User_Manual/...
-
Page 54: Optional Accessories
Active GPS antenna (Recording only) RLACS205 Passive GPS/GLONASS antenna RLACS206 USB3.0 dual slot card reader RLACS204 1 TB scenario hard drive (HDD) LS03HDD-1TB Battery charger RLACS200 LabSat 3 battery RLACS201 Please contact your local distributor or Racelogic for pricing and availability. https://racelogic.support/03LabSat_GPS_Simulators/LabSat_3/LabSat_3_User_Manual/... - Page 55 https://racelogic.support/03LabSat_GPS_Simulators/LabSat_3/LabSat_3_User_Manual/...
- Page 56 LabSat3 RoHS Declaration https://racelogic.support/03LabSat_GPS_Simulators/LabSat_3/LabSat_3_User_Manual/...
- Page 57 https://racelogic.support/03LabSat_GPS_Simulators/LabSat_3/LabSat_3_User_Manual/...
- Page 58 LabSat3 Technical specificiation LabSat 3 Technical Specificiation Constellation GPS, Galileo, SBAS, QZSS, GLONASS or BeiDou Output Signal Level Adjustable from -73 dBm to -103 dBm • Single Constellation: 1 RF Constellations • Dual Constellation: 2 • Triple Constellation: 3 RF Constellation 1575.4/1602.00/1561.098/MHz...
- Page 59 -20°C to +60°C Note: Battery will not charge below 0°C or above +45°C (charger shuts down outside this Operating Temperature range). Unit will shut down outside operating temperature range. –20°C to +60°C Note: Battery will discharge whilst in Storage Temperature storage and discharge rate will increase at higher https://racelogic.support/03LabSat_GPS_Simulators/LabSat_3/LabSat_3_User_Manual/...
- Page 60 LabSat 3 dimensions The LabSat 3 dimensions in millimetres. https://racelogic.support/03LabSat_GPS_Simulators/LabSat_3/LabSat_3_User_Manual/...
- Page 61 https://racelogic.support/03LabSat_GPS_Simulators/LabSat_3/LabSat_3_User_Manual/...
-
Page 62: How To Upgrade The Firmware
SD card and the LabSat 3 retains the previous version of firmware. To confirm the LabSat 3 has upgraded, navigate to the ‘About’ section of the menu, this will display the current version of firmware the LabSat 3 is running.
Need help?
Do you have a question about the LabSat 3 and is the answer not in the manual?
Questions and answers