Table of Contents
Advertisement
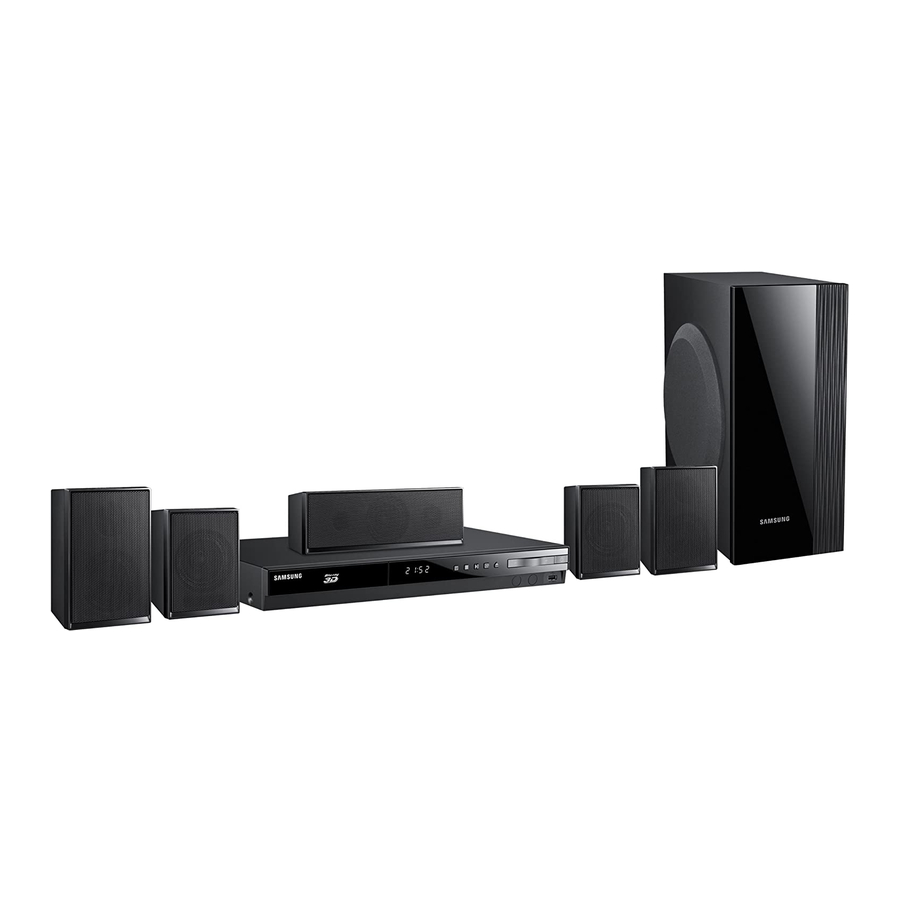
Home Entertainment System
HT-EM45_ZA_0417-1(D2D).indd 1
HT-EM45_ZA_0417-1(D2D).indd 1
5.1CH Blu-ray™
user manual
imagine
the possibilities
Thank you for purchasing this Samsung product.
To receive more complete service,
please register your product at
www.samsung.com/register
HT-EM45
2012-04-17 오후 6:28:48
2012-04-17 오후 6:28:48
Advertisement
Table of Contents

Subscribe to Our Youtube Channel
Related Manuals for Samsung HT-EM45


Summary of Contents for Samsung HT-EM45
-
Page 1: User Manual
5.1CH Blu-ray™ Home Entertainment System imagine Thank you for purchasing this Samsung product. To receive more complete service, please register your product at www.samsung.com/register HT-EM45_ZA_0417-1(D2D).indd 1 HT-EM45_ZA_0417-1(D2D).indd 1 user manual the possibilities HT-EM45 2012-04-17 오후 6:28:48 2012-04-17 오후 6:28:48... -
Page 2: Warning
Safety Information Warning TO REDUCE THE RISK OF ELECTRIC SHOCK, DO NOT REMOVE THE COVER (OR BACK). NO USER-SERVICEABLE PARTS ARE INSIDE. REFER SERVICING TO QUALIFIED SERVICE PERSONNEL. The lighting flash and Arrowhead within the triangle is a warning sign alerting you of dangerous voltage inside the product. -
Page 3: Precautions
Consequently, the power plug must be easily and readily accessible at all times. • Do not touch the power plug with a wet hand. It can cause an electric shock. English 2012-04-17 오후... -
Page 4: Using The 3D Function
Then, contact the nearest customer service center for technical assistance. Do not use the product. Using the product as it is may cause a fire or an electric shock. • To turn this apparatus off completely, you must pull the power plug out of the wall socket. -
Page 5: License
HT-EM45_ZA_0417-1(D2D).indd 5 • iPad, iPhone, iPod, iPod classic, iPod nano, iPod shuffle, and iPod touch are trademarks of Apple Inc., registered in the U.S. and other countries. • This product uses Cinavia technology to limit the use of unauthorized copies of some commercially-produced film and videos and their soundtracks. -
Page 6: Table Of Contents
Accessing the Settings Screen Settings Menu Functions Networks and the Internet Upgrading Software MEDIA PLAY The AllShare Play Screen Playing Files on a USB Storage Device or iPod/iPhone iPod/iPhone Models You Can Use with This Product The Function Screen Playing Commercial Video Discs... -
Page 7: Getting Started
\ Your product will not play content that has been recorded on a DVD-R at a bitrate that exceeds 10 Mbps. \ Your product will not play content that has been recorded on a BD-R or USB device at a bitrate that exceeds 30 Mbps. -
Page 8: Region Code
Region Code Both products and discs are coded by region. These regional codes must match for a disc to play. If the codes do not match, the disc will not play. The Region Number for this product is displayed on the rear panel of the product. -
Page 9: Video File Support
*.trp Limitations - Even when a file is encoded by a supported codec listed above, the file might not be played if its content has a problem. - Normal playback is not guaranteed if the file’s container information is wrong or the file itself is corrupted. -
Page 10: Notes On The Usb Connection
- Supports WMA 7, 8, 9 and STD - Does not support WMA 9 PRO multi-channel files if the number of channels is more than 2 or the files require lossless audio decoding. - Does not support WMA sampling rate of... -
Page 11: Remote Control
\ AVCHD format discs need to be finalized. \ “x.v.Color” offers a wider color range than normal DVD camcorder discs. \ Some MKV and MP4 format discs may not play, depending on their video resolution and frame rate. Accessories Check for the supplied accessories below. -
Page 12: Front Panel
\ To upgrade the product's software through the USB Host jack, you must use a USB memory stick. \ When the product displays the Blu-ray Disc menu, you cannot start the movie by pressing the 6 button on the product or the remote. -
Page 13: Tour Of The Remote Control
Press to select Blu-ray's mode (AUX, BD/DVD, etc.). FUNCTION Press to select TV's video mode. SOURCE Set a Sleep time to shut off the RECEIVER SLEEP product. To open and close the disc tray. Use to enter the Popup menu/... -
Page 14: Installing Batteries In The Remote Control
Installing batteries in the Remote Control Battery size: AAA NOTE \ Make sure to match the “+” and “–” ends of the batteries with the diagram inside the compartment. \ Assuming typical TV usage, the batteries last for about one year. -
Page 15: Connections
Connections This section describes various methods of connecting the product to other external components. Before moving or installing the product, be sure to turn off the power and disconnect the power cord. Connecting the Speakers Center Subwoofer Product Front (L) Surround (L) Place these speakers in front of your listening position, facing inwards (about 45°) -
Page 16: Center Speaker
CAUTION \ If you want to install the product on the wall, fasten the screws or nails on the wall firmly and use the holes on the rear of speaker to install. However, when you install it, accessories (nails or screws) and installation is not provided by the company. -
Page 17: Connecting To An Ipod/Iphone
Connecting the FM Antenna 1 . Connect the FM antenna supplied to the FM ANTENNA Jack. 2 . Slowly move the antenna wire around until you find a location where reception is good, then fasten it to a wall or other rigid surface. -
Page 18: Connecting To A Tv
Select either Method 1 or Method 2. • If you have set the product's remote control to operate your TV, press the TV SOURCE button on the remote control, and then select the correct external source from the TV's source list (HDMI, Video In, etc.) to view video from the home theater. -
Page 19: Method 2 Optical : Connecting An External Digital Audio Component
Connecting to External Devices To select the correct mode for an external device, press the FUNCTION button. Each time you press the button, the mode changes in this order : BD/DVD VIDEO SPEAKERS OUT CENTER FRONT SURROUND OPTICAL SUBWOOFER FRONT... -
Page 20: Connecting To A Network Router
\ The home theater supports the following security protocols only: 1) Authentication Mode : WEP, WPAPSK, WPA2PSK 2) Encryption Type : WEP, AES \ For the AllShare Play function, a PC must be connected in the network as shown in the figure. VIDEO SPEAKERS OUT... -
Page 21: Wired Network
Settings The Initial Settings Procedure • The Home menu will not appear if you do not configure the initial settings. • The OSD (On Screen Display) may change in this product after you upgrade the software version. • The access steps may differ depending on the menu you selected. -
Page 22: The Home Screen
Next have set the Anynet+ (HDMI-CEC) feature to ON in both the TV and the product and 2.) You have set the TV to a language supported by the product, the product will select that language as the preferred language automatically. -
Page 23: Accessing The Settings Screen
NOTE \ If you leave the product in the stop mode for more than 5 minutes without using it, a screen saver will appear on your TV. If the product is left in the screen saver mode for more than 20 minutes, the power will automatically turn off. -
Page 24: Settings Menu Functions
BD Wise is Samsung’s latest inter-connectivity feature. When you connect a Samsung product and a Samsung TV with BD Wise to each other via HDMI, and BD Wise is on in both the product and TV, the product outputs video at the video resolution and frame rate of the Blu-ray/DVD Disc. - Page 25 Lets you select which speakers you want active, either the TV's speakers or the Home theater's speakers. Lets you direct the sound from the TV to the Home Theater speakers. Requires an HDMI connection and an Audio Return Channel (ARC) compatible TV.
- Page 26 The Simple Menu appears. 3 . Click the menu options you want. NOTE \ Depending on the model of the USB HID keyboard and mouse may not be compatible with your product. \ Some HID keyboard keys may not work.
- Page 27 If you forget your PIN 1 . Remove any disc or USB storage device. 2 . Press and hold the 5 button on the front panel for 5 seconds or more. All settings will revert to the factory settings.
-
Page 28: Networks And The Internet
2 . Select IP Settings on the right of the screen, and then press E button. The IP Settings screen appears. 3 . Select the IP Mode field, and then set it to Manual. 4 · Use the number keypad on your remote to enter the Network values. - Page 29 NOTE \ You should be able to find the Security Code or Pass Phrase on one of the set up screens you used to set up your router or modem. Wireless (General) - Manual If you have a static IP address or the Automatic procedure does not work, you'll need to set the Network Settings values manually.
-
Page 30: Allshare Settings
8 · Select IP Settings on the right of the screen, and press the E button. The IP Settings screen appears. 9 · Select the IP Mode field, and then set it to Manual. 10 · Use the number keypad on your remote to enter the Network values. -
Page 31: Upgrading Software
4 · If you select Update now, the product upgrades the software, turns off, and then turns on automatically. 5 · If you do not make a selection in one minute or select Update later, the product stores the new upgrade software. You can upgrade the software later using the By Downloaded function. -
Page 32: Standby Mode Upgrade
Settings NOTE \ There should be no disc in the product when you upgrade the software using the USB Host jack. \ When the Software Update is done, check the software details in the Software Update menu. \ Do not turn off the product during the Software Update. It may cause the product to malfunction. -
Page 33: Media Play
When the AllShare Play screen appears, it displays My List and a list of content types - Videos, Photos, and Music - on the left side. On the right, it displays, by default, the content in My List: a list of recently played or viewed items, a list of the newest items you have viewed or listened to, and your most recent Playlist. -
Page 34: Playing Files On A Usb Storage Device Or Ipod/Iphone
E button. To play a file, select it, and then press the E button. 5 · Press the RETURN ( ' ) button to exit a folder or to return to the Main screen. NOTE... -
Page 35: Playing Commercial Video Discs
Tuner Select to listen to the FM radio. Playing Commercial Video Discs 1 · Place a disc into the disc tray with the disc’s label facing up and then close the disc tray. Playback starts automatically. If playback does not start automatically, press... -
Page 36: Playing A Disc With User Recorded Content
NOTE \ Even though the product will display folders for all content types, it will only display files of the content type you selected in Step 2. For example, if you selected music, you will only be able to see music files. You can change this selection using AllShare Play. -
Page 37: Controlling The Playback Of Content Located On Your Pc With Your Smart Phone
4 · Select the connected DLNA compatible device or your PC, and then press the E button. A screen listing the available files appears. 5 · Select the file you want to play or view, and then press the E button. HT-EM45_ZA_0417-1(D2D).indd 37 HT-EM45_ZA_0417-1(D2D).indd 37... -
Page 38: Controlling Video Playback
Media Play Controlling Video Playback You can control the playback of video files located on Blu-ray, DVD, and CD discs, and on USB storage devices. Depending on the disc, some of the functions described in this manual may not be available. -
Page 39: Using The Tools Menu
Search the video file by the scene. Information Check the video file's information. NOTE \ Depending on the disc or storage device, the Tools menu may differ. All options may not be displayed. English 2012-04-17 오후 6:30:32 2012-04-17 오후 6:30:32... -
Page 40: Creating A Playlist
The selected tracks play automatically. NOTE \ You can create a playlist with up to 99 tracks on Audio CDs (CD-DA). \ If you have created a playlist, Selection Play is replaced by Edit Playlist on the Tools menu. -
Page 41: Playing Photo Contents
The Ripping Completion Bar pop-up appears. 10 · When ripping is complete, the “Ripping is completed.” message appears. Press the E button. 11 · Press the RETURN ( ' ) button to go back to the Playback screen. HT-EM45_ZA_0417-1(D2D).indd 41 HT-EM45_ZA_0417-1(D2D).indd 41 NOTE \ When Ripping is done, a folder called MP is created in the USB. -
Page 42: Using The Tools Menu When A File Is Highlighted
However, the sound quality can be affected by the bitrate of the MP3 file, the size of the photo, and the encoding method. \ You can't enlarge the subtitle and PG graphic in the full screen mode. -
Page 43: Delete (Playlist)
2. Repeat for each track or file you want to upload. Send NOTE \ You can also move to Select All on the right, and then press the E button to select all tracks or files. 3. Select Send on the right side, and then press the E button. -
Page 44: Presetting Stations
• Power Bass : Increases the volume level of bass tones and provides thudding sound effects. • Virtual 7.1 : Applies the 7.1 CH sound effect using the 5.1 CH speaker system. • Off : Select this for normal listening. - Page 45 HALL1. • Jazz Club in Seoul B : Recommended setting for Jazz. • Church in Seoul : Gives the feel of being in a grand church. • Amphitheater (Rock) : Recommended setting for Rock.
-
Page 46: Network Services
Downloads. The Download Center appears. 5 · On the Download Center page, click the Manuals tab. 6 · On the Manuals tab, click the file icon to the right of Smart Hub Users Manual. The manual downloads. NOTE \ The web location of the Smart Hub manual is subject to change without notice. -
Page 47: Using Disc To Digital
Once the product is connected to your network, you can enjoy various movie-related service contents available on BD-LIVE compliant discs. 1 · Attach a USB memory stick to the USB jack on the front of the product, and then check its remaining memory. The memory device must have at least 1GB of free space to accommodate the BD-LIVE services. -
Page 48: Additional Information
Settings appears in the Resolution menu. • If the product is connected to a device that does not support BD Wise, you can not use the BD Wise function. • For proper operation of BD Wise, set the BD Wise option in both the product and the TV to On. - Page 49 • If your Samsung TV has an Anynet+ logo, then it supports the Anynet+ function. BD Data Management • In the external memory mode, disc playback may be stopped if you disconnect the USB device in the middle of playback.
-
Page 50: Allshare Play
• Before selecting Dolby Pro Logic II mode, connect your external device to the AUDIO INPUT jacks (L and R) on the product. If you connect to only one of the inputs (L or R), you cannot listen to surround sound. -
Page 51: Resolution According To The Output Mode
Resolution according to the output mode Blu-ray Disc/E-contents/Digital Contents playback Output Setup BD Wise Resolution of Blu-ray Disc Auto Max. Resolution of TV input 1080p@60F Movie Frame : Auto (24Fs) 1080i 720p 480p 480i DVD playback Output Setup BD Wise... -
Page 52: Digital Output Selection
PCM audio and adds Navigation Sound Effects. * If the Source Stream is 2ch or mono, “Re-encoded Dolby D” Setting are not applied. Output will be PCM 2ch. Blu-ray Discs may include three audio streams : - Main Feature Audio : The audio soundtrack of the main feature. -
Page 53: Troubleshooting
Refer to the table below when this product does not function properly. If the problem you are experiencing is not listed below or if the instructions below do not help, turn off the product, disconnect the power cord, and contact Samsung Electronics at 1-800-SAMSUNG (1-800-726-7864). - Page 54 • The Product is not working normally. • With no disc in the product, press and hold the product's 5 button for longer than 5 You have forgotten the rating level password. Can't receive radio •...
- Page 55 If you contact us to repair your product, an administration fee may be charged if either: 1. An engineer is called out to your home at your request and there is no defect in the product. 2. You bring the unit to a repair center and there is no defect in the product.
-
Page 56: Specifications
0.5 % Reading Speed : 9.834 m/sec Reading Speed : 6.98 ~ 7.68 m/sec. Approx. Play Time (Single Sided, Single Layer Disc) : 135 min. Reading Speed : 4.8 ~ 5.6 m/sec. Maximum Play Time : 74 min. Reading Speed : 4.8 ~ 5.6 m/sec. - Page 57 Dimensions (W x H x D) Weights • Samsung Electronics Co., Ltd reserves the right to change the specifications without notice. • Weight and dimensions are approximate. • Design and specifications are subject to change without prior notice. • Dispose unwanted electronics through an approved recycler.
-
Page 58: Limited Warranty To Original Purchaser
This limited warranty begins on the original date of purchase, and is valid only on products purchased and used in the United States. To receive warranty service, the purchaser must contact SAMSUNG for problem determination and service procedures. - Page 59 QUESTIONS OR COMMENTS? COUNTRY CALL 1-800-SAMSUNG IN THE US (726-7864) HT-EM45_ZA_0417-1(D2D).indd 59 HT-EM45_ZA_0417-1(D2D).indd 59 OR VISIT US ONLINE AT Samsung Electronics America, Inc. www.samsung.com 85 Challenger Road Ridgefield Park, WRITE NJ 07660-2112 AH68-02446H-03 2012-04-17 오후 6:30:45 2012-04-17 오후 6:30:45...
Need help?
Do you have a question about the HT-EM45 and is the answer not in the manual?
Questions and answers