Futurecom VRX1000 Installation Manual
Hide thumbs
Also See for VRX1000:
- Installation and programming manual (175 pages) ,
- Installation & programming manual (145 pages) ,
- User manual (92 pages)
Table of Contents
Advertisement
Quick Links
Advertisement
Table of Contents

Subscribe to Our Youtube Channel
Related Manuals for Futurecom VRX1000


Summary of Contents for Futurecom VRX1000
- Page 1 Futurecom Systems Group, ULC VRX1000 Installation Guide...
- Page 2 8M087X03 R0 VRX1000 Installation Guide Notes Nov 2020 Page 2...
-
Page 3: Related Publications
8M087X03 R0 VRX1000 Installation Guide Related Publications Publication Description Number VRX1000 User’s Guide 8A087X02 8A087X01 VRX1000 Ordering Guide 8K087X02 VRX1000 Functional Description Manual Revisions Rev # Date Notes & References November 23, 2020 Original Release Nov 2020 Page 3... -
Page 4: Foreword
8M087X03 R0 VRX1000 Installation Guide Foreword Futurecom Vehicular Repeater (VR) is designed to be seamlessly interfaced to: • Remote Mount APX Series MSU with or without control head When the VR is interfaced to a Remote Mount Motorola APX Mobile Radio, the complete equipment package is referred to as Digital Vehicular Repeater System (DVRS). -
Page 5: Document Copyrights
However, no responsibility is assumed for inaccuracies. Futurecom Systems Group, ULC. reserves the right to make changes to any products herein to improve reliability, function or design. Futurecom does not assume any liability arising out of the application or use of any product or circuit described herein. -
Page 6: Commercial Warranty
In the event no defect or breach of warranty is discovered by Futurecom upon receipt of any returned item, the item will be returned to Buyer at Buyer’s expense and Buyer will reimburse Futurecom for the transportation charges, labor and associated charges incurred in testing the allegedly defective item. -
Page 7: Table Of Contents
FCC Label ............................... 13 Installation Requirements for Compliance with Radio Frequency (RF) Energy Exposure Safety Standards ..........................14 INTRODUCTION ...........................15 IDENTIFYING YOUR VRX1000 MODEL ................17 Frequency Band of Operation ......................17 Cross-Band ............................17 Cross Band VRX1000 Dimensions........................18 In-Band .............................. 19 In-Band VRX1000 Dimensions ........................ - Page 8 Mounting the VRX1000 ........................22 Cross-Band VRX1000 Mounting ........................22 In-Band VRX1000 Mounting .......................... 23 Mounting the Mobile Radio ......................24 Connecting the VRX1000 Cables ....................25 Power Cable ..............................26 RF Cables ............................... 27 Control Cables ............................... 27 VRX1000 Auxiliary Cable ..........................30 AVRA ..............................
-
Page 9: List Of Tables
Figure 2 Cross-Band VRX1000 - Dimensions mm / [in] ..............18 Figure 3 In-Band VRX1000 - Conceptual Diagram ................19 Figure 4 In-Band VRX1000 – Flat Mount Dimensions mm / [in] ............20 Figure 5 Cross-Band VRX1000 Mounting Details ................22 Figure 6 In-Band VRX1000 - Flat Mount Details ................ -
Page 10: Notations Used In This Manual
8M087X03 R0 VRX1000 Installation Guide Notations Used in This Manual The following notations are used throughout this document: NOTE: A clarifying statement that expands on the text that follows. IMPORTANT! An important statement that should be considered and / or implemented in order to achieve adequate equipment operation. -
Page 11: Declaration Of Conformity
8M087X03 R0 VRX1000 Installation Guide Declaration of Conformity This equipment has been tested and found to comply with the limits for a Class A digital device, pursuant to Part 15 of the FCC Rules. These limits are designed to provide reasonable protection against harmful interference when the equipment is operated in a commercial environment. -
Page 12: Rf Energy Exposure Compliance, Awareness And Control Information And Operational Instructions
Futurecom requires the P25 VRX1000 operator to ensure FCC Requirements for Radio Frequency Exposure are met. The minimum distance between all possible personnel and the body of the VRX1000 equipped vehicle is specified in the “RF Safety” booklet. Failure to observe the Maximum Permissible Exposure (MPE) distance exclusion area around the antenna may expose persons within this area to RF energy above the FCC exposure limit for bystanders (general population). -
Page 13: Rf Exposure Label
50% Tx duty cycle is defined as Push To Talk (PTT), 50% Talk - 50% Listen. 100% Tx duty cycle is defined as Push To Talk (PTT), 100% Talk IMPORTANT The nominal allowed gain of the λ/4 Omni-directional antenna for the VRX1000 is Unity (0 dBd). RF Exposure Label The RF Exposure Label should be affixed in the vehicle beside the mobile radio control head. -
Page 14: Installation Requirements For Compliance With Radio Frequency (Rf) Energy Exposure Safety Standards
To ensure compliance with RF Energy Safety Standards: ▪ Install only Futurecom / Motorola Solutions approved antennas and accessories and set conducted power into the VRX1000 antenna equal to or lower than the approved power levels – refer to Table 1. Nov 2020... -
Page 15: Introduction
VRX1000 Installation Guide Introduction The VRX1000 is a simplex radio coverage extender, which is interfaced to a compatible remote mount Motorola Solutions Mobile Radio and enables Portable Subscriber Units (PSU) to be used in areas where only Mobile Subscriber Unit (MSU) coverage is available and PSU coverage is either intermittent or completely absent. - Page 16 8M087X03 R0 VRX1000 Installation Guide Nov 2020 Page 16...
-
Page 17: Identifying Your Vrx1000 Model
Cross-Band Cross-Band VRX1000 models do not include any filters on the MSU side since the MSU and VRX1000 are not intended to simultaneously operate in the same frequency band. In single band MSU configurations the MSU and VRX1000 operate in different frequency bands. -
Page 18: Cross Band Vrx1000 Dimensions
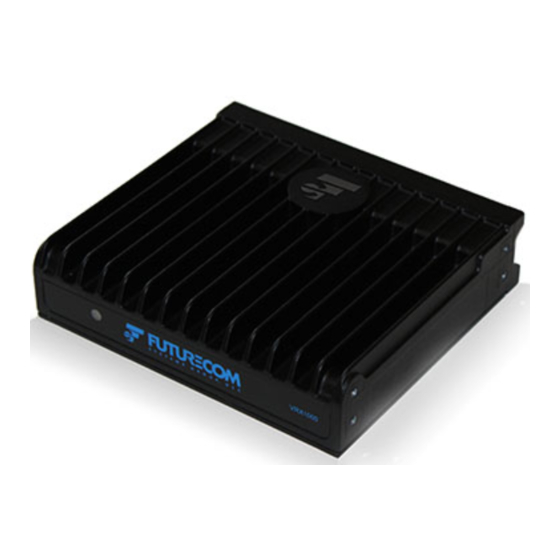
8M087X03 R0 VRX1000 Installation Guide Cross Band VRX1000 Dimensions 180 [7.10] x 160 [6.30] x 63 [2.48] mm [in] Figure 2 Cross-Band VRX1000 - Dimensions mm / [in] Nov 2020 Page 18... -
Page 19: In-Band
Frequency changes may require filter retuning or replacement. NOTE: The VRX1000 and MSU require two or three (in the case of dual band MSU) separate antennas. NOTE: The In-Band filters connected to the APX MSU have typical insertion loss of 1.5dB. -
Page 20: In-Band Vrx1000 Dimensions
253.2 [10.0] X 152.4 [6.00] X 55.6 [2.20] 7N087X01-XX MSU In-Band Filter 253.2 [10.0] X 152.4 [6.00] X 55.6 [2.20] Figure 4 In-Band VRX1000 – Flat Mount Dimensions mm / [in] NOTE: The in-band filters are also available as stacked mount. -
Page 21: Vrx1000 Installation Basics
VRX1000), the VRX1000 components, MSU, Control Head, MSU accessories. Ensure to provide adequate separation between the Mobile Radio and VRX1000 antennas. When planning the VRX1000 installation, make sure to leave adequate room around all modules to allow for easy RF and Control cabling connections and to enable programming / re-flashing access to both the VRX1000 and MSU ports. -
Page 22: Mounting The Vrx1000
8M087X03 R0 VRX1000 Installation Guide Mounting the VRX1000 Cross-Band VRX1000 Mounting Figure 5 Cross-Band VRX1000 Mounting Details Nov 2020 Page 22... -
Page 23: In-Band Vrx1000 Mounting
VRX1000 Installation Guide In-Band VRX1000 Mounting The in-band VRX1000 Configuration requires two filters to be installed in line with the VRX1000 and APX MSU Antennas respectively in order to prevent desense when one of the radios is receiving and the other transmitting. -
Page 24: Mounting The Mobile Radio
VRX1000 within the range of the VRX1000 cabling. NOTE: Unless special cabling length is specified upon placing an order, the VRX1000 is shipped with a standard 3ft-long interconnect cable between the MSU and VRX1000. Nov 2020... -
Page 25: Connecting The Vrx1000 Cables
8M087X03 R0 VRX1000 Installation Guide Connecting the VRX1000 Cables NOTE: The VRX1000 antenna port connector (cross-band and in-band models) is a mini UHF female. MOBILE RADIO ANTENNA POWER Figure 8 VRX1000 Connectors Nov 2020 Page 25... -
Page 26: Power Cable
3. From the inside of the vehicle, feed the red lead (without lug attached) through the access hole into the engine compartment. 4. Find a grounding point close to the VRX1000 location. Shorten the black lead. 5. Strip the end of the black lead as required. Crimp the large lug on the black lead and connect it to the vehicle chassis ground. -
Page 27: Rf Cables
8M087X03 R0 VRX1000 Installation Guide RF Cables QTY 2 of the following RF cable are provided with the In-Band VRX1000 Models: ORDER CODE / PN Description Connector Type / Cable Length • DDN1967A RF Cable for In-Band filter Mini UHF (m) connectors; Length 2 (FC PN 7W087X11-XX) •... -
Page 28: Figure 9 Vrx1000 Standard Control Cable (Pn 7W087X07)
8M087X03 R0 VRX1000 Installation Guide Figure 9 VRX1000 Standard Control Cable (PN 7W087X07) Figure 10 VRX1000 Y-Control Cable with AUX Extension (PN 7W087X08) Nov 2020 Page 28... -
Page 29: Figure 11 Msu Side Db25 Pinout (All Control Cables)
8M087X03 R0 VRX1000 Installation Guide Figure 11 MSU Side DB25 Pinout (All Control Cables) Nov 2020 Page 29... -
Page 30: Vrx1000 Auxiliary Cable
VRX1000 Auxiliary Cable The VRX1000 Auxiliary port provides three relay driver output ports and two switch contact input ports, which can be interfaced to external logic. The VRX1000 Auxiliary port is provided on the Y-Control Cable 7W087X08 The external logic can be easily interfaced by connecting to the correct pins on the DB15 connector as described in the next paragraph. -
Page 31: Avra
VRX1000 can be programmed to provide several status indications – ‘Master Light’, ‘LOC Mode Light’, ‘SYS Mode Light’ or ‘VRX1000 ON Light’. The VRX1000 then provides control input to an external switch which in turn toggles an external light. -
Page 32: Vrx1000 Antenna Installation
VRX1000 Installation Guide VRX1000 Antenna Installation Any VRX1000 configuration requires the use of two or three antennas – one or two connected to the MSU and one connected to the VRX1000. For a list of approved VRX1000 antennas, please refer to Appendix 7. - Page 33 8M087X03 R0 VRX1000 Installation Guide Nov 2020 Page 33...
-
Page 34: Appendix 1- Vrx1000 Specifications
Weight 2kg / 4.4 lbs (cross band, no filters) Channel Spacing 12.5 or 25 kHz programmable Number of Channels 192 Number of MSU Modes (VRX1000 2047 Entries Enabled) CTCSS/DCS Programmable per Analog Channel Power Supply 13.8V DC +/- 20%, negative ground only DC Current Drain (VRX1000 Only): VRX1000 Off 0.01 A Max... - Page 35 8M087X03 R0 VRX1000 Installation Guide Receiver Specification 700 / 800 Frequency Band FCC [MHz] 136-174 380-406 764-775 406.1-512 851-869 Frequency Band IC [MHz] 138-174 406.1-430 768-776 450-470 851-869 Receiver Sensitivity Analog 12 dB SINAD -115 dBm Digital P25 5% BER...
-
Page 36: Appendix 2 - Accessories
Length Notes DDN1966A 7W087X20-01 18ft VRX1000 DC Power Cable DDN1966A 7W087X11-01 RF Cable for in-band filter kit DDN1968A 10ft VRX1000 Programming cable (USB) DDN1969A 7W087X07-01 VRX1000 Control Cable DDN1970A 7W087X08-01 VRX1000 Y-Control Cable with AUX option Nov 2020 Page 36... -
Page 37: Contact Information
8M087X03 R0 VRX1000 Installation Guide Contact Information Technical Support 905-532-1158 support@futurecom.com Orders Please contact Motorola Solutions / Drop Ship Return Authorizations 1-800-701-9180 Head Office and Manufacturing 3277 Langstaff Rd Concord Ontario L4K 5P8 Canada 905-660-5548 www.futurecom.com Nov 2020 Page 37... -
Page 38: Index
Automated VR Activation (AVRA) ........ 31 AVRA ................31 Mounting the Mobile Radio ......... 24 Mounting the VRX100 ..........22 Connecting the VRX1000 Cables ........25 Control Cables .............. 27 Notations Used in This Manual ........10 Cross-Band ..............17 Planning the Installation .......... -
Page 39: Glossary
Description Acknowledgement of communications. Automated DVR/VRX Activation. Permits automated activation of the DVR/VRX1000 by either using a VIP input on the MSU AVRA CH / DEK or a pin on the DVR/VRX1000 Auxiliary cable. Requires external logic / switch, not supplied with the DVRS/VRX1000 Hardware. - Page 40 Local PSU (optionally MSU) Local Mode communications without keying up the Mobile radio interfaced to the DVR. Since the VRX1000 is simplex only, there is no Local repeat in ‘Local Mode’. PSU switched to the DVR/VRX1000 channel and used for...
- Page 41 Futurecom Repeater Vehicular Repeaters (VR) Programming Software Application Configurator Futurecom line of Vehicular Repeaters. It applies to one of the following products: VRX1000, DVR and DVR-LX. February 2016 Page 41 of 43...
- Page 42 8M087X03 R0 VRX1000 Installation Guide February 2016 Page 42 of 43...
- Page 43 Subscribe to our newsletter if you want to be informed about new releases and updates. Please visit http://futurecom.com/support/newsletter/ Futurecom Systems Group, ULC. 3277 Langstaff Rd Concord, Ontario L4K 5P8 Canada 1-800-701-9180 © Futurecom Systems Group, ULC 2020...
Need help?
Do you have a question about the VRX1000 and is the answer not in the manual?
Questions and answers