Samsung DVD-V8500 Instruction Manual
Hide thumbs
Also See for DVD-V8500:
- Instruction manual (87 pages) ,
- Manual de instrucciones (33 pages) ,
- Specifications (2 pages)
Table of Contents
Advertisement
Quick Links
Advertisement
Table of Contents

Subscribe to Our Youtube Channel
Related Manuals for Samsung DVD-V8500


Summary of Contents for Samsung DVD-V8500
- Page 1 Instruction Manual DVD-V8500 AK68-00593M-00 www.samsung.ca...
-
Page 2: Important Safety Instructions
Important Safety Instructions... - Page 3 Precautions RISK OF ELECTRIC SHOCK DO NOT OPEN WARNING : CAUTIONS FCC NOTE (for U.S.A): CLASS 1 LASER PRODUCT KLASSE 1 LASER PRODUKT LUOKAN 1 LASER LAITE KLASS 1 LASER APPARAT PRODUCTO LÁSER CLASE 1...
- Page 4 CAUTION Note: Handling Cautions Disc Storage Maintenance of Cabinet...
-
Page 5: Before You Start
Before you start Accessories Install Batteries in the Remote Control If the remote control doesn’t operate properly:... - Page 6 Table of Contents Chapter 1: Setup Chapter 2: Connections Chapter 3: Initial Setup...
- Page 7 Chapter 4: DVD Operations Chapter 5: VCR Operations Chapter 6: Reference...
-
Page 8: General Features
C h a p t e r 1 General Features DVD-VCR Features DVD Features VCR Features Note Note COPY PROTECTION PROGRESSIVE SCAN OUTPUTS (525p) -
Page 9: Disc Type And Characteristics
Disc Type and Characteristics Disc Types (Logos) Recording Types Disc Size Max. Playing Time AUDIO-CD Disc Markings NTSC STEREO DIGITAL SOUND You must only insert one DVD disc at a time. Inserting two or more discs will not allow playback and may cause damage to the DVD-VCR. -
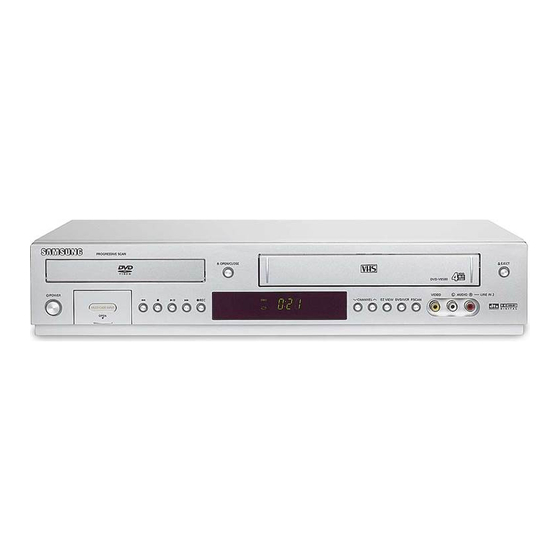
Page 10: Front Panel Controls
Description Front Panel Controls Œ Œ ˆ ˆ Ø Ø ∏ ∏ ” ” ’ ’ ˝ ˝ Ô Ô DISC TRAY OPEN/CLOSE VCR Deck EJECT POWER MULTI CARD INPUT (Reverse/Rewind) (STOP) (Play/Pause) Front Panel Display Œ Œ ´ ´ ¨... -
Page 11: Rear Panel
Rear Panel AUDIO OUT COMPONENT VIDEO OUT LINE IN 1 (VIDEO/AUDIO) LINE OUT (VIDEO/AUDIO) Notes Œ Œ ´ ´ ˇ ˇ ¨ ¨ ˆ ˆ Ø Ø ∏ ∏ ” ” RF IN (FROM ANT.) S-VIDEO OUT DIGITAL AUDIO OUT (OPTICAL/COAXIAL) RF OUT (TO TV) -
Page 12: Tour Of The Remote Control
Tour of the Remote Control POWER button NUMBER buttons 100+ button DVD button VCR button DVD/M.CARD button VOL (+, -) buttons Playback-related buttons SUBTITLE button 10 MENU button 11 ENTER/… … † † œ œ √ √ buttons 12 REC button 13 CLEAR button 14 EZVIEW/SPEED button 15 MODE button... -
Page 13: Connecting The Antenna Cable
C h a p t e r 2 Connecting the Antenna Cable Method1: Antenna + DVD-VCR + TV: No Cable box... - Page 14 Method2: Antenna + DVD-VCR + TV: Cable box with many scrambled channels Method3: Antenna + DVD-VCR + TV: Cable box with a few scrambled channels...
-
Page 15: Before Connecting The Dvd-Vcr
Before Connecting the DVD-VCR Connection to a TV Connection to a TV (Video) (yellow)/AUDIO (red and white) OUT (yellow)/AUDIO (red and white) Notes - Noise may be generated if the audio cable is placed too close to the power cable. VIDEO VIDEO... -
Page 16: Connection To A Tv (S-Video)
Connection to a TV (S-Video) S-VIDEO OUT S-VIDEO IN and white) OUT AUDIO (red and white) IN S-Video P.SCAN Notes AUDIO (red... -
Page 17: Connection To A Tv (Interlace)
Connection to a TV (Interlace) COMPONENT VIDEO OUT and white) OUT AUDIO (red and white) IN Component: Interlace P.SCAN Notes - If Video output is incorrectly set to S-Video with the Component cables connected, the screen will turn red. COMPONENT AUDIO (red... - Page 18 Connection to a TV (Progressive) COMPONENT VIDEO OUT and white) OUT AUDIO (red and white) IN Component Progressive P.SCAN Component signal To see the progressive video output, - Consult your TV User’s Manual to find out if your TV supports Progressive Scan. If Progressive Scan is supported, follow the TV User’s Manual regarding Progressive Scan settings in the TV’s menu system.
-
Page 19: Connection To An Audio System
Connection to an Audio System Connection to an Audio System (2 Channel Amplifier) AUDIO (red and white) OUT AUDIO (red and white) IN VIDEO, S-VIDEO COMPONENT OUT S-VIDEO VIDEO, COMPONENT IN Notes - Please turn the volume down when you turn on the Amplifier. Sudden loud sound may cause damage to the speakers and your ears. - Page 20 Connection to an Audio System (Dolby digital, MPEG2 or DTS Amplifier) DIGITAL AUDIO OUT (COAXIAL) AUDIO OUT (OPTICAL) DIGITAL AUDIO IN (COAXIAL) DIGITAL AUDIO OUT (OPTICAL) S-VIDEO COMPONENT OUT S-VIDEO COMPONENT IN Notes - When you connect the DVD-VCR to DTS Amplifier and play a DTS disc, set the DTS to On in Audio Setup menu.
-
Page 21: Connecting A Power Cord & Auto Setup
Connecting a Power Cord & Auto Setup POWER POWER... -
Page 22: Selecting A Menu Language
C h a p t e r 3 Selecting a Menu Language MENU … † Setup ENTER … † Language √ ENTER … † ENTER MENU √... -
Page 23: Setting The Clock
Setting the Clock Setting the Clock Automatically MENU … † Setup ENTER … † √ Clock ENTER … † Auto Clock √ ENTER √ ENTER √ Notes... - Page 24 … † Time Zone √ ENTER … † œ √ ENTER Automatic … † Daylight Saving √ ENTER Yes No Auto MENU Note...
-
Page 25: Setting The Clock Manually
Setting the Clock Manually Note MENU … † √ Setup ENTER … † √ Clock ENTER … † Manual Clock √ ENTER œ √ … † ENTER MENU Manual Clock Time Date Year 12 : 00am 1/01 2005 SAT... -
Page 26: Memorizing The Channels
Memorizing the Channels Selecting the Video Signal-source MENU … † Setup ENTER … † Channel √ ENTER √ ENTER Antenna Cable √... - Page 27 Storing Channels in Memory (Automatic Method) … † Auto Channel Memory √ ENTER Adding and Erasing Channels (Manual Method) … † Channel Add/Delete √ ENTER œ √ MENU Note CHANNEL ADD/DELETE √ œ …† CHANNEL ADD/DELETE √ œ Note …†...
-
Page 28: Selecting The Rf Output Channel
Selecting the RF Output Channel MENU … † Setup ENTER … † Channel √ ENTER … † RF Output CH √ ENTER MENU √... -
Page 29: Setting The Front Panel Display
Setting the Front Panel Display MENU … † Setup ENTER … † Front Display √ ENTER Auto Bright MENU √... -
Page 30: Setting The Power Off Automatically
Setting the Power Off Automatically MENU … † Setup ENTER … † Auto Power Off √ ENTER Off 1Hr MENU √... -
Page 31: Playing A Disc
C h a p t e r 4 Playing a Disc Before Play Playback OPEN/CLOSE Stopping Play Stop/Resume... - Page 32 Pausing Play Step Motion Play (Except CD) F.ADV Slow Motion Play (Except CD) To remove the Disc OPEN/CLOSE Note Note...
-
Page 33: Using The Search And Skip Functions
Using the Search and Skip Functions Searching through a Chapter or Track Notes Skipping Tracks... -
Page 34: Using The Display Function
Using the Display Function When Playing a DVD/CD INFO. … † œ √ ENTER INFO. MOVE... - Page 35 Note TITLE CHAPTER TRACK TIME AUDIO SUBTITLE...
-
Page 36: Using The Disc And Title Menu (Dvd)
Using the Disc and Title Menu (DVD) MENU … † Function √ ENTER … † DVD Function √ ENTER … † Title Menu Disc √ Menu ENTER Notes... -
Page 37: Using The Function Menu (Dvd)
Using the Function Menu (DVD) MENU … † Function √ ENTER … † DVD Function √ ENTER … † √ ENTER... -
Page 38: Repeat Play
Repeat Play When playing a DVD/CD REPEAT œ √ Chapter Title ENTER REPEAT œ √ ENTER Chapter Title A - B Track rack Disc A - B Chapter Title A - B Note Track Disc A - B Chapter Track... - Page 39 Using the A-B Repeat function REPEAT œ √ Mark the Starting Point ENTER Mark the Ending Point ENTER Cancel A-B Repeat REPEAT œ √ ENTER Chapter Track Chapter Title A A - B Track Disc A A - B Chapter Chapter Track Chapter Title A A - B...
-
Page 40: Slow Repeat Play
Slow Repeat Play When playing a DVD REPEAT œ √ ENTER ENTER REPEAT œ √ ENTER Chapter Chapter Chapter Title A A - B Chapter Title A - B B Chapter Title A - B Chapter... -
Page 41: Adjusting The Aspect Ratio (Ez View)
Adjusting the Aspect Ratio (EZ View) To Playback using Aspect Ratio (DVD) EZ VIEW EZ VIEW If you are using a 16:9 TV For 16:9 aspect ratio discs - WIDE SCREEN - SCREEN FIT - ZOOM FIT EZ VIEW For 4:3 aspect ratio discs - NORMAL WIDE - SCREEN FIT - ZOOM FIT... - Page 42 If you are using a 4:3 TV For 16:9 aspect ratio discs - 4:3 Letter Box - 4:3 Pan Scan - SCREEN FIT - ZOOM FIT Note For 4:3 aspect ratio discs - NORMAL SCREEN - SCREEN FIT - ZOOM FIT...
-
Page 43: Selecting The Audio Language
Selecting the Audio Language Using the AUDIO button (DVD/CD) AUDIO œ √ Stereo Right Left AUDIO CLEAR RETURN Notes ENG DOLBY DIGITAL 5.1CH Stereo DISC MENU... -
Page 44: Selecting The Subtitle Language
Selecting the Subtitle Language Using the SUBTITLE button (DVD) SUBTITLE œ √ SUBTITLE SUBTITLE CLEAR RETURN Notes DISC MENU... -
Page 45: Changing The Camera Angle
Changing the Camera Angle Using the ANGLE button (DVD) ANGLE œ √ CLEAR RETURN Using the Bookmark Function Using the MARK button (DVD) MARK ENTER Note Note... - Page 46 Recalling a Marked Scene MARK œ √ Clearing a Bookmark MARK œ √ CLEAR...
-
Page 47: Using The Zoom Function (Dvd)
Using the Zoom Function (DVD) MENU … † Function √ ENTER … † DVD Function √ ENTER … † √ Zoom ENTER … † œ √ ENTER Note... -
Page 48: How To Insert A Memory Card
How to insert a Memory Card This unit accepts 10 different types of Memory Cards MEMORY STICK MEMORY STICK PRO Compact Flash Notes When playing a Memory Card DVD/M.CARD Smart Media XD picture Memory Stick Duo Secure Digital Multi Media Mini SD Micro Drive... -
Page 49: Clips Menu For Mp3/Wma/Jpeg
Clips Menu for MP3/WMA/JPEG Folder Selection - To select the Parent Folder RETURN … † ENTER - To select the Peer Folder œ √ … † ENTER - To select the Sub-Folder œ √ … † ENTER O f f R O O T R O O T W M A... -
Page 50: Mp3/Wma Playback
MP3/WMA Playback … † œ √ ENTER Notes Repeat/Random playback REPEAT Off Track Folder Random O f f R O O T R O O T M P 3 W M A O f f 0 0 : 0 0 : 2 3 B e c a u s e Y o u R O O T B e c a u s e Y o u... - Page 51 MP3/WMA file - Your MP3 or WMA files should be ISO 9660 or JOLIET format. - When naming your MP3 or WMA files, do not exceed 8 characters, and enter “.mp3, .wma” as the file extension. - Use a decompression transfer rate of at least 128 Kbps when recording MP3 files.
-
Page 52: Program Play & Random Play
Program Play & Random Play Program Play With the unit in stop mode REPEAT œ √ PROGRAM ENTER … † œ √ ENTER CLEAR Note Random Play REPEAT œ √ ENTER Note To Cancel Programming REPEAT To Cancel Program Play CLEAR... -
Page 53: Picture Cd Playback
Picture CD Playback ENTER … † ENTER INFO. œ √ ENTER Album Screen Rotation ENTER Zoom … … † † œ √ ENTER ENTER ➝ O f f R O O T R O O T W M A J P E G M P 3 O f f R O O T... - Page 54 JPEG Discs...
-
Page 55: Using The Setup Menu
Using the Setup Menu MENU … † √ ENTER Œ ´ ˇ ¨ … † √ ENTER MENU Note... -
Page 56: Setting Up The Language Features
Setting Up the Language Features MENU … † √ ENTER … † Language √ ENTER … † √ ENTER … † √ ENTER... -
Page 57: Language Function
Language Function Disc Menu Audio Subtitle Subtitle Language Automatic Subtitle... -
Page 58: Setting Up The Audio Options
Setting Up the Audio Options MENU … † √ ENTER … † Audio √ ENTER … † √ ENTER PCM Down Sampling : On... -
Page 59: Audio Options
Audio Options Digital Output Dynamic Compression PCM Down Sampling PCM Down Sampling : On PCM Down Sampling : On PCM Down Sampling : On PCM Down Sampling : On Note Note Note... -
Page 60: Setting Up The Display Options
Setting Up the Display Options MENU … † √ ENTER … † Display √ ENTER … † √ ENTER... - Page 61 Display Options TV Aspect Note Black Level Alt Video Out P.SCAN...
-
Page 62: Setting Up The Parental Control
Setting Up the Parental Control MENU … † √ ENTER … † Parental √ ENTER √ ENTER Note Re-enter new Password... - Page 63 Setting Up the Rating Level MENU … † √ ENTER … † Parental √ ENTER … † Rating Level √ ENTER … † √ ENTER...
- Page 64 Changing the Password MENU … † √ ENTER … † Parental √ ENTER … † Change Password √ ENTER Note POWER...
-
Page 65: Inserting And Ejecting A Video Cassette Tape
C h a p t e r 5 Inserting and Ejecting a Video Cassette Tape To Insert a Video Cassette Tape To Eject a Video Cassette Tape EJECT... -
Page 66: Playing A Pre-Recorded Video Cassette Tape
Playing a Pre-Recorded Video Cassette Tape Playing the Tape Pausing Play... -
Page 67: Special Vcr Playback Features
Special VCR Playback Features Frame Advance F.ADV Fps/Rps Review SEARCH Skip SKIP SKIP Repeat REPEAT REPEAT... -
Page 68: Using Automatic Tracking
Shuttle Shuttle >> ➝ ➝ Shuttle << SHUTTLE Using Automatic Tracking... -
Page 69: Selecting The Cassette Type
Selecting the Cassette Type MENU … † √ ENTER … † Tape Length √ ENTER MENU Note... -
Page 70: Setting The Auto Play
Setting the Auto Play MENU … † √ ENTER … † Auto Play √ ENTER MENU Note... -
Page 71: Setting The Auto Repeat
Setting the Auto Repeat MENU … † √ ENTER … † Auto Repeat √ ENTER MENU... -
Page 72: Using The Tape Counter
Using the Tape Counter INFO. CLEAR INFO. -
Page 73: Using The Assemble Edit Function
Using the Assemble Edit Function F.ADV... -
Page 74: Selecting The Audio Output Mode
INPUT SEL. LINE1 LINE2 Selecting the Audio Output Mode AUDIO Audio output mode... -
Page 75: Searching For A Specific Sequence
Searching for a Specific Sequence MENU … † Function √ ENTER … † VCR Function √ ENTER SEARCH … † √ ENTER DVD Function VCR Function Go to [0:00:000] End Search Forward Intro Scan Reverse Intro Scan... -
Page 76: Variable Search System
Variable Search System Go To [0:00:00] Stop CLEAR End Search Scan and play Forward Intro Scan ENTER Reverse Intro Scan Go to [0:00:000] End Search Forward Intro Scan Reverse Intro Scan [0:00:00] Go to [0:00:000] End Search Forward Intro Scan Reverse Intro Scan Go to [0:00:000] End Search... -
Page 77: Basic Recording
Basic Recording Note Before You Begin... Protecting a Recorded Cassette Recording Line 1 CH … † INPUT SEL. -
Page 78: Special Recording Features
Pause/Resume Recording Stop Recording Special Recording Features To Watch a different Channel while Recording Note... -
Page 79: Using One-Touch Recording
To Watch a DVD while Recording To Add Recording Time Using One-Touch Recording Line 1 CH … † INPUT SEL. -
Page 80: Selecting The Recording Speed
Record length 0:30 Add Recording Time Selecting the Recording Speed SPEED Maximum Recording Time - SP vs. SLP Record length 0:30 Note... -
Page 81: Using A Timer Recording
Using a Timer Recording To Begin Setting the Timer Recording, MENU … † PROG √ ENTER TIMER Select Channel Number √ … † √ Set Time/Date/Speed Start Date Speed Start Date Speed 9:00am 11:00am 5/10 Note... - Page 82 Selecting Auto Speed Daily/Weekly Date Programming Save Timer Recording RETURN POWER...
-
Page 83: Using The Tv Buttons On The Remote Control
C h a p t e r 6 Using the TV Buttons on the Remote Control TV Codes BRAND CODE Note Button Function... -
Page 84: Troubleshooting
Troubleshooting Identifying DVD Problems Problem Action Page... - Page 85 Problem Identifying VCR Problems Problem √ Action œœ √√ œœ √√ Action Page Page...
-
Page 86: Technical Specifications
Technical Specifications Inputs Outputs SYSTEM... -
Page 88: Warranty
Warranty HEADQUARTERS...
Need help?
Do you have a question about the DVD-V8500 and is the answer not in the manual?
Questions and answers