Table of Contents
Advertisement
Quick Links
Advertisement
Table of Contents

Related Manuals for Fanotec MECHA C1


Summary of Contents for Fanotec MECHA C1
- Page 1 MECHA User’s Guide v.06 C1 USER’S GUIDE March 29, 2021 © 2021 FANOTEC...
-
Page 2: Table Of Contents
MECHA User’s Guide v.06 Contents WARNINGS................Introduction............What is MECHA?..............MECHA C1 Presentation............About Buttons ............... About UI vs. Codes or Buttons ..........About the User Interface ............. Splitting Lights ‒ Set MECHA in AP, STA, AP+STA Mode....11 Table of Equivalences: LEDs ‒ Characters ........12 About the Firmware (FW) Update........ - Page 3 Favorite Codes..................49 More from Server, zLM, Firmware ..........49 Technical Details ‒ IP Addresses, FW ..........50 Backup and Restore Data ...............50 Other Updating Methods........Firmware Update Using a Smartphone: Method 2................Presets for MECHA Single Axis ......MECHA MSA............© 2021 FANOTEC...
- Page 4 How to Change the SSID Password ....Working with Presets ......... Programming a Preset Using Parameters......How to Create Your Own Presets Using the UI....Default Presets.................78 Loading a Preset ................79 Modifying a Preset................82 Saving a Preset.................82 Preset Power Code ................83 © 2021 FANOTEC...
- Page 5 Panorama of 3 Rows + Nadir + Zenith ‒ EXAMPLE 1 (SL)....116 Panorama of 3 Rows + Nadir + Zenith ‒ EXAMPLE 2 (SL)....116 Panorama Using Loop in Script ‒ EXAMPLE 3 (SL) ......119 Panorama with Extra Shots and Pause ‒ EXAMPLE 4 (SL) ....119 © 2021 FANOTEC...
- Page 6 How to use this User’s Guide Welcome to the MECHA C1 User’s Guide! If you have never used MECHA before, we recommend that you read the introduction first, to get an overview of how it works and what you can do with it.
-
Page 7: Warnings
(123123<). ● If the movement is not as expected, or there is any danger for the moving parts to hit something, please press , the power button of MECHA, to stop the movement immediately. © 2021 FANOTEC... -
Page 8: Introduction
Internet. This is a short description of MECHA, a long one could be a dozen, if not hundreds of pages. © 2021 FANOTEC... -
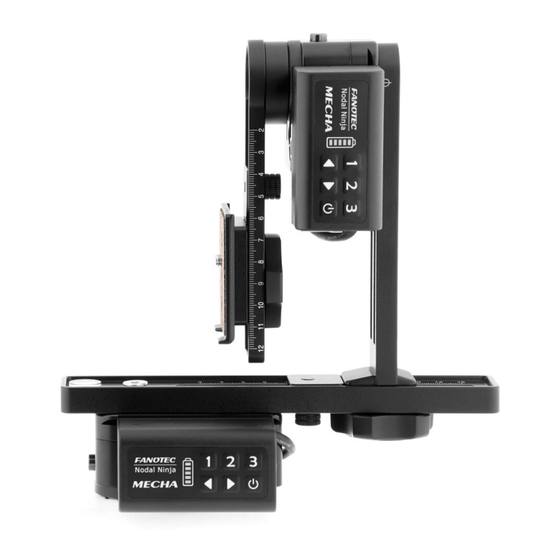
Page 9: Mecha C1 Presentation
In this user guide, we will focus first on using MECHA to automate the movements of a panoramic head on a single axis, like Fanotec R1, or dual axis, like Nodal Ninja 3 and alike, reducing the panorama shooting to a simple press of a button, or two, regardless of its complexity, and to do that without flaws, again and again. -
Page 10: About Buttons
UI can be used. But, before diving in assigning complex tasks to buttons, it is worth mentioning that MECHA has a unique set of features ‒ zLM, which stands for © 2021 FANOTEC... -
Page 11: About The User Interface
LEDs blink alternately: (splitting lights). Splitting Lights ‒ Set MECHA in AP, STA, AP+STA Mode During this period: pressing will set MECHA in AP mode pressing will set MECHA in STA mode pressing will set MECHA in AP+STA mode © 2021 FANOTEC... -
Page 12: Table Of Equivalences: Leds - Characters
Table of Equivalences: LEDs ‒ Characters The conventions of how the numbers and symbols are shown on LEDs are featured in this table. ! . : 1 2 3 4 5 6 7 8 9 0 AB C D E F © 2021 FANOTEC... -
Page 13: About The Firmware (Fw) Update
These tests can also be used for shooting a real panorama with a 18-55mm kit lens on a panoramic head, like NN3, mounted on MECHA. NOTE. Whenever you enter codes, press the buttons consecutively, one at a time. © 2021 FANOTEC... - Page 14 For example, some presets contain all the information that MECHA needs to execute a whole panorama. You can create your own presets or download presets from server. © 2021 FANOTEC...
-
Page 15: Mecha Single Axis
MECHA User’s Guide v.06 ‒ Single Axis Part 1 MECHA Single Axis © 2021 FANOTEC... -
Page 16: Before First Use
Power on and Test – MECHA Single Axis �� https://youtu.be/qRZDfC1-YZ8 Power ON and test - MECHA Single Axis Power on MECHA by pressing the power button, , for 3 to 5 seconds (long press). It may take about 35-45 seconds to start. © 2021 FANOTEC... -
Page 17: Check The Battery Level
○ Otherwise, if the LEDs light up normally, as shown in the Power ON and test... video, after 30-40 seconds, you will hear two beeps, and the LEDs below the battery symbol will turn off. © 2021 FANOTEC... -
Page 18: Simple Rotations
If, for some reasons, you want to reverse the direction of horizontal simple rotations, you can use the 2313< code. After this change, for < > example, will rotate the system to the right, and , to the left. Use the same code to cancel the change. © 2021 FANOTEC... -
Page 19: Quick Panoramas Using Mecha's Buttons
However, if you prefer not to update at this time, or you are not comfortable with the firmware update procedure, you can skip now to Test using MECHA’s buttons, in the next page. © 2021 FANOTEC... -
Page 20: Firmware Update Using A Hot-Spot
< by pressing the < left arrow button, . Now, notice how MECHA starts scanning the existing networks. �� https://youtu.be/LNx64vps6Pg LEDs during Firmware Update - MECHA Single Axis © 2021 FANOTEC... -
Page 21: Test Using Mecha's Buttons
, then quickly the button – and if it is indeed 90°, then the rotator is correctly set. Alternatively, you can contact your dealer, or mecha@nodalninja.com, for more info or help in identifying the type of rotator you have. © 2021 FANOTEC... - Page 22 ● 132 is similar to 131, but for 12 shots around. ● 3212< - enter this code to find out the firmware version, which will be displayed on the LEDs. © 2021 FANOTEC...
-
Page 23: Panorama With Automatic Shooting Pattern Using Only The Mecha's Buttons - Single Axis
● the LEDs 1, 2 and 3, under the battery symbol, will start flashing, and MECHA waits seconds) for one of the buttons , or to be pressed, to assign the computed preset to that particular button. To cancel the assignment, the power button, , can be pressed instead. © 2021 FANOTEC... - Page 24 If Single MECHA is used, after first row MECHA pauses and suggests, on LEDs, a manual tilt of the vertical axis to continue to full spherical panorama. If only cylindrical is needed or no manual tilt is possible, press the power button of MECHA, © 2021 FANOTEC...
-
Page 25: How To Access The Ui
Access the User Interface (UI) on Your Computer Connected to a Wireless Network ● The first step is to access the User Interface (UI) with your smartphone, as shown above, and preferably set the AP+STA mode. After that: © 2021 FANOTEC... - Page 26 → 1.2. Usually, the IP addresses in your local network differ only by the last number of the IP (the part displayed at the end, after the last dot). To display the last part of the IP, enter the code 321<. For the example above, .188 will be displayed. © 2021 FANOTEC...
- Page 27 IP is not displayed. ● Now you can access the MECHA’s UI on your computer’s browser by entering the IP address you found, like 192.168.2.188, in the browser address bar, at the top of the window. © 2021 FANOTEC...
-
Page 28: Test Using The Ui
After that, access the Row page by tapping the [Row] button at the top of the Configuration page. Tap the [info] button at the top of the Row page whenever you want to find out more details about the functions of the controls available on the User Interface. © 2021 FANOTEC... -
Page 29: Ui Test - 131, 132 Codes
To load the preset, tap the [Load] button, if visible, under Presets list. Otherwise, it means the UI complexity is S (Simple) and some buttons and options are not visible, and the selected preset is already loaded. That means you can go to the next step. © 2021 FANOTEC... - Page 30 Note how the settings on the Row page change when a preset is loaded. In other words, the settings we see are, in fact, the loaded preset. In the Degrees of rotation field, 30° is automatically displayed, not 60° as before. That is because a complete rotation has 360 degrees. © 2021 FANOTEC...
-
Page 31: User Interface (Ui)
MECHA during charging, to prevent accidents caused by the charger cable, which can twist around the tripod if MECHA is commanded, by mistake, to do a preset during charging. © 2021 FANOTEC... - Page 32 Useful when shooting (filming) 360°. If the Rewind option is selected, the rotation is 0° (no rotation). ● [RIGHT] button — Shoots a 360° panorama clockwise. It is similar to [LEFT] button, but the rotation is to the right. © 2021 FANOTEC...
- Page 33 ● [Probe] button — Downloads a probe (a PTGui file) from shooting pattern to study/refine the overlap. ● [goVM] button — Downloads a script (a goVM.py file) for the upcoming Virtual MECHA. Until Virtual MECHA will be available, this file can be also used for support and demo purposes. © 2021 FANOTEC...
- Page 34 Also, it will force a B (Before) delay in case of B: not zero. A small negative value, under 1 second – for example, W:-0.9 s, or W:-0.1 s – will trigger the Wake signal, which is a focus signal, before every position © 2021 FANOTEC...
- Page 35 ● Repeat — Delay in seconds until the shooting sequence will be repeated automatically, for example, 300 for 5 minutes, or 4*300 to repeat 4 times 5 minutes apart, or 0, or no repeat, for no repeat. © 2021 FANOTEC...
- Page 36 For example, if you want to take 3 shots 45° apart to the left, set the degrees of rotation to 45°, and the number of positions to 3, as in the image below, and click the [3 x LEFT] button. © 2021 FANOTEC...
- Page 37 During the pause, pressing on IR Remote, or [SHOOT] on UI, MECHA will trigger the number of shots specified by [TRG] in presets. This can be used for extra shots for a particular position. ● [STOP] — Emergency stop. © 2021 FANOTEC...
- Page 38 ● [Load 3] button — Loads the preset assigned to the button using the [Save 3] button. ● [Save 0] button — Saves the current preset as default preset that can be loaded with the [Load 0] button. © 2021 FANOTEC...
- Page 39 Configuration page, in which case it has priority over other options, displayed on a gray background. ● [Go to Ring] button — Accesses the Ring page, and alternates with [Go to Row]. © 2021 FANOTEC...
- Page 40 MECHA in station mode or for firmware update. ● [Wi-Fi Off] button — Turns Wi-Fi OFF. It needs power cycling to have it ON again. ● [More or Less...] button — Shows more or less settings. © 2021 FANOTEC...
-
Page 41: Configuration Page
3 seconds – at splitting lights – to reset the following settings to default values: ● Fixed Settings: no settings ● AP Mode SSID: MECHA-ID ● SSID password: 12345678 ● Password for the Configuration page: Mecha © 2021 FANOTEC... - Page 42 Pairing PIN for more than 2 MECHAs. UI Password — Allows you to prevent someone from changing the settings on the Configuration page. You may want to allow someone to access your interface, but may not want the settings to be changed. © 2021 FANOTEC...
-
Page 43: Sta Mode
Fixed Settings — Settings that overwrite the corresponding settings on the Row/Ring/Turn page. For example, if the fixed Motor Speed is 7, the one provided via the preset will be ignored, and MECHA will use 7 RPM as speed. © 2021 FANOTEC... - Page 44 When Charging: Stay ON — Means that MECHA does not stop during charging and you can use it as usual. The other possible value is Turn OFF, which means that MECHA stops automatically and remains off, except the charging function during charging. © 2021 FANOTEC...
-
Page 45: Rotator Settings
Use local CAM and AUX ports only — Check this checkbox if you want to connect camera to the horizontal unit in Dual Axis Combo. This means faster communication between MECHA and camera. Note that the camera cannot be connected to the vertical unit while this setting is active. © 2021 FANOTEC... - Page 46 ○ -45.0=1A rotates MECHA -45.0° from Home position, absolute. ○ ^45.0=1A rotates MECHA 45.0° from previous position, incremental. ○ ^-45.0=1A rotates MECHA -45.0° from previous position, incremental. ● H=1A returns MECHA to Home position set by HS or by the power button. © 2021 FANOTEC...
-
Page 47: Reverse Direction Of Rotations
(==) with the computed script. For example, if you want Start Parked instead of Start Level, and a single Zenith photo instead of two, and a pause before the first row, the Preferred MSS Pattern should be: SP,P==,Z,NN © 2021 FANOTEC... -
Page 48: Arrow Buttons
Arrow buttons Interval 1 — Rotation angle for <2 >2 Arrow buttons Interval 2 — Rotation angle for <3 >3 Arrow buttons Interval 3 — Rotation angle for Please see the Simple Rotations section for more details. © 2021 FANOTEC... -
Page 49: Safety Interval
● FavCode 1 to the 1 button ● FavCode 2 to the 2 button ● FavCode 3 to the 3 button These are shortcuts that allow a quick use of codes by long pressing the corresponding button. More from Server, zLM, Firmware © 2021 FANOTEC... -
Page 50: Technical Details - Ip Addresses, Fw
[Connect to Wi-Fi] button — Initiates the process of connecting to a Wi-Fi network to use MECHA in station mode or for firmware update. [Reboot] button — Restarts MECHA, similar to restarting a computer. [Apply] button — Applies / saves the current settings. © 2021 FANOTEC... -
Page 51: Other Updating Methods
● When the update is complete, a few beeps are heard, and the new firmware version is displayed at the top of the page. If it is not displayed in 1-2 minutes, refresh the page or reconnect the smartphone to MECHA, if necessary. © 2021 FANOTEC... -
Page 52: Presets For Mecha Single Axis
S1 (Simple 1) display level. The level of complexity for the User Interface can be set using the options available in the select list next to the [info] button, at the top of the Row page. © 2021 FANOTEC... - Page 53 To create a new preset, select any preset from the Presets list, make any changes you want (if you need to), and save it with the [Save] button. If you enter a new name, a new preset will be created, otherwise the current preset will be overwritten. © 2021 FANOTEC...
- Page 54 MECHA User’s Guide v.06 ‒ Single Axis Please see the chapter Working with Presets for more details. © 2021 FANOTEC...
-
Page 55: Mecha Msa
The expected manual angle for the 2nd axis is shown both on UI and on LEDs. To understand what is displayed on the LEDs, please see the Table of Equivalences: LEDs - Characters. > After manual tilting, press , or on NN Remote, or click the [PAUSE] button on UI. © 2021 FANOTEC... -
Page 56: Mecha Dual Axis Combo - Dac
MECHA User’s Guide v.06 ‒ Dual Axis Part 2 MECHA Dual Axis Combo – DAC © 2021 FANOTEC... -
Page 57: Before First Use - Mecha Dac
MECHA Dual Axis Combo ‒ DAC ‒ is preassembled and packed in a carrying case. If the two MECHA units are not mounted, please see below DAC installation image, or watch the video: �� https://youtu.be/wvAJoXsX6Kw Dual Axis Automated NN3 MK3 with 2 MECHA C1 and E1 Upgrade Instruction © 2021 FANOTEC... - Page 58 MECHA User’s Guide v.06 ‒ Dual Axis © 2021 FANOTEC...
- Page 59 Usually, MECHA-H is mounted on the horizontal rail of the panohead, and MECHA-V is mounted on the vertical rail. However, if necessary, MECHA-H can be mounted on the vertical rail, for example, and MECHA-V on the horizontal rail, depending on what you want to do. © 2021 FANOTEC...
-
Page 60: Power On And Test - Mecha Dac
● Press the button of MECHA-H for 3 to 5 seconds (long press). ● Press the button of MECHA-V for 3 to 5 seconds (long press). The order in which you power off MECHA units is not important. © 2021 FANOTEC... -
Page 61: Simple Rotations - Mecha Dac
● For 45° rotations: ○ Press then quickly press ○ Press then quickly press , for the opposite direction. ● For 90° rotations: ○ Press then quickly press ○ Press then quickly press , for the opposite direction. © 2021 FANOTEC... - Page 62 , to the left. Similar for the left and right buttons of MECHA-V. Use the same codes to cancel the change. Note that the above code does not change the rotation of the motors. There are special codes to do that. © 2021 FANOTEC...
-
Page 63: Parked, Level And Raised Positions
(the left button of MECHA-V) then quickly press , and do this twice (90°x2=180°). ● Press (the left button of MECHA-V) then quickly press ● Press and hold (the left button of MECHA-V) until the upper rail reaches the desired position. © 2021 FANOTEC... -
Page 64: Check If Two Mechas Are Paired
Assuming both MECHAs are mounted as shown in the image above, let’s see how to update the firmware, how to pair MECHA units, if they are not paired, and how paired units work. © 2021 FANOTEC... -
Page 65: Dac Firmware Update Using A Hot-Spot
Wi-Fi password. However, due to the nature of the Internet, sometimes the update server cannot be reached, and this can be investigated once we get in contact by e-mail. Table of equivalences: LEDs – characters NOTE. See the © 2021 FANOTEC... -
Page 66: Pairing Using Mecha's Buttons
Next step is to test the combo using MECHA’s buttons, and see how it works. Once you get more familiar with MECHA, you can use it in an advanced way, via the UI (User Interface). The zLM pairing method is only given as a quick start, with very little to learn. © 2021 FANOTEC... - Page 67 STA mode will always try to pair with MECHA-H999 if its SSID is ON, and both have the same password and only the H-V difference in SSID name. This also opens the way to pair remotely two MECHAs via support, if needed, if they can access the Internet. © 2021 FANOTEC...
-
Page 68: Dac Test Using Mecha's Buttons
DAC Test Without Camera - 1312 Parked Position With the vertical rail in the parked position, as shown in the image on the right, enter the 1312< or 1312> code on MECHA-H, using the buttons of MECHA-H. © 2021 FANOTEC... -
Page 69: Dac Test Without Camera - 1313 Level Position
This code tells the Combo to execute a panorama to the left or right, as follows: 12 shots around, 3 rows ‒ at 0° and +/- 45° ‒ plus zenith and nadir, starting from raised position. �� https://www.youtu.be/9bAnR1HHgp4 MECHA DAC Tests © 2021 FANOTEC... -
Page 70: Panorama With Camera Mounted
The shooting pattern will be computed by MECHA based on only few presses of a button, without using the User Interface, as follows: ● First, position the upper rail in the level position using the left/right buttons of MECHA-V. © 2021 FANOTEC... - Page 71 ”!!!”, which indicates that nothing has changed. To execute the panorama computed by MECHA, make sure the upper rail is in the level position, and press the button to which you have assigned the panorama, then press either the left or right button. © 2021 FANOTEC...
-
Page 72: Dac Test Using The Ui
Internet access (like your Wi-Fi at home or office) and the password to be able to download the firmware from the Internet. Please do not turn off MECHA while updating the firmware! ● Tap the [Row] button to go to Row page. © 2021 FANOTEC... -
Page 73: Ui Test - 1312, 1313, 1321 Codes
To load the preset, tap the [Load] button, if visible, under Presets list. Otherwise, it means the UI complexity is S (Simple) and some buttons and options are not visible, and the selected preset is already loaded. That means you can go to the next step. © 2021 FANOTEC... -
Page 74: How To Change The Ssid Password
Configuration page, if you have not changed it yet. ● Scroll to the bottom of the page and tap [Apply] button. Once the SSID password is changed on MECHA-H, it changes automatically on MECHA-V, because the MECHA units are paired. © 2021 FANOTEC... -
Page 75: Working With Presets
If you press the buttons: ● MECHA will take 12 shots around (s=12) if you enter 192.168.8.1/preset?b=1&s=12&f=30&p=2 ● or it will start to shoot a full 360° panorama for a 30 mm lens (FF equiv.) (f=30) if you enter 192.168.8.1/preset?b=1&f=30&p=2 © 2021 FANOTEC... - Page 76 Now, all you have to do is replace the values in this example with the desired values. For example, for 6 shots around: 192.168.8.1/preset?b=1&s=6 and for a full spherical panorama for a 50 mm lens (FF equiv.): 192.168.8.1/preset?b=1&f=50 © 2021 FANOTEC...
- Page 77 MECHA is used. Please see the User Interface (UI) — Shots for more details about how to use the focal length. © 2021 FANOTEC...
-
Page 78: How To Create Your Own Presets Using The Ui
● TEST 1321 Raised — 12 shots around, 3 rows ‒ at 0° and +/-45° ‒ plus zenith and nadir, starting from raised position. ● TEST 131 — 6 shots around (for single axis applications). ● TEST 132 — 12 shots around (for single axis applications). © 2021 FANOTEC... -
Page 79: Loading A Preset
Suppose we want 6 shots around, 1 horizontal row, plus zenith and nadir, starting from parked position. The most appropriate preset seems to be TEST 1312 Parked, so we select this preset and load it using the [Load] button. © 2021 FANOTEC... - Page 80 360°. On the other hand, if we change the rotation angle, the number of images does not change. We will get a similar result for 33mm focal length entered via Custom instead of 12 Shots. © 2021 FANOTEC...
- Page 81 Set zero (0) or No Repeat for no repeat. ● SP,0x12,-45x12,45x12,Z,N — The MSS script that describes our preset: start position is parked, 3 rows of 12 positions, one Zenith and one Nadir (see MECHA’s Simple Scripting (MSS) for more details). © 2021 FANOTEC...
-
Page 82: Modifying A Preset
2. Remove the second row (-45x12,) and third row (45x12,) from the MSS script as follows: SP,0x12,Z,N 3. Follow the instructions below to save the preset. Saving a Preset To save a preset, do one of the following: © 2021 FANOTEC... -
Page 83: Preset Power Code
4. Tap/click the [Save 3] button to overwrite the preset with the name Button 3, assigned to the button. Now the new preset is saved and displayed in the Presets list and ready to be used in the future. © 2021 FANOTEC... -
Page 84: Mecha's Simple Scripting (Mss)
0°: SP,Z,N,P0x12,45x12,-45x12 In the example above, the pause is infinite, and to continue you need to > press , the right button of MECHA, or the equivalent UI button, [RIGHT]. © 2021 FANOTEC... - Page 85 Server. The naming conventions for starting and ending positions for Level Parked Raised MECHA DAC presets available via More from Server... Adjust the position using buttons to match the preset before starting the preset. © 2021 FANOTEC...
-
Page 86: Shooting Panorama Made Easy For Dual Axis
Button 2 preset. To load this preset, use the [Load 2] button. Now, the current settings are the loaded preset settings. 5. Click/Tap on Shots field, choose the Custom option and enter the desired focal length, for example 29mm. Confirm by clicking/tapping the OK button. © 2021 FANOTEC... -
Page 87: Mss Script Explained
29mm (FF equiv), that consists in: 1. one row of 12 positions at a tilt of 0° (horizontally) 2. another row of 12 positions at a tilt of +45° 3. another row of 12 positions at a tilt of -45° © 2021 FANOTEC... - Page 88 To have the full benefit of MSS, it is recommended to launch an update from the MECHA-H, and that should synchronize the firmware by updating both to the latest firmware version, resulting in having both MECHAs with the same firmware, indicated by no © 2021 FANOTEC...
- Page 89 The rotators can be set either on the Configuration page or using special codes. Considering the script: SL,0x12,45x12,-45x12,N,Z let's see how it can be modified in different situations. © 2021 FANOTEC...
-
Page 90: What Needs To Be Changed, Sometimes, In Real Situations
12, then the script can be changed as follows: SL,0x12,45x10,-45x10,N,80x2^90 The above apply for Nadirs as well, in which case the N, NN, -90x1, -80x1, -80x2^90 can be used. The Nadir is like a row at a tilt of -90°. © 2021 FANOTEC... -
Page 91: Using Pause In Mss Script
For example, if starting from level, we may not need a pause, as we can launch the preset after the clapboard preparations are done, and we will have the pause only before the actual row of 12 to start, time to remove, say, the gray card. SL,0x1,P0x12,45x10,-45x10,N,ZZ © 2021 FANOTEC... -
Page 92: Let's Take A More Dense Approach With More Photos Toward Gigapixel Imagery
45° degrees wide, instead of 360°, with the same camera-lens combo. To achieve this, we need to add (45), which tells MECHA that only a bit over 45 degrees should be taken. The resulting MSS script will be: © 2021 FANOTEC... -
Page 93: Rewind After Each Row
For example, for 50mm (FF equiv.): SL,0x18,-28.30x17,-56.60x12,28.30x17,56.60x12, ZZ,NN,RW Shooting in Horizontal Zigzag Pattern The HZ term in MSS script indicates shooting in Horizontal Zigzag pattern. MECHA will change the sense of rotation after each row. For example, for 50mm (FF equiv.): © 2021 FANOTEC... -
Page 94: Script For 2 Focal Lengths - Mecha Dual Axis
1< buttons. < During Pause (P), change the lens or focal length, then press the button to continue. Please watch the video below for more details. �� https://youtu.be/fKb7Ma3Rddg Script for 2 Focal Lengths - MECHA Dual Axis © 2021 FANOTEC... -
Page 95: Download More Presets From Server
○ Select a preset from the Presets list. ○ Tap/click the [Load] button to load it (if the button is visible). ○ Modify the preset if necessary. ○ Save the preset with the same name, or with a different name. © 2021 FANOTEC... -
Page 96: How To Set Both Mecha And Smartphone To Have Internet Access
2. Connect to MECHA-H /config with your device, then set it in STA mode, choosing the STA option from the Default Mode select list. Scroll to the STA Mode and enter the following values: ○ Static IP: 192.168.43.101 ○ Subnet: 255.255.255.0 ○ Gateway: 192.168.43.1 © 2021 FANOTEC... - Page 97 MECHAs, and to maintain it on while using MECHAs, for example disable any automatic turn-OFF of hot-spot on phone/device. Now your device is connected to the Internet and to MECHAs, and you can download presets from server. © 2021 FANOTEC...
-
Page 98: Other Pairing Methods
Please do not use this code, because you will also use it as a pass- word. When the power code is entered in both MECHAs, these two MECHA units connect automatically and become a Dual Axis Combo (DAC). © 2021 FANOTEC... - Page 99 On successful pairing, MECHA-H has the middle LED on, and MECHA-V has the two middle LEDs on. Otherwise, power off and on both MECHAs again, preferably power on the MECHA-H first. Next step is to test the combo using MECHA’s buttons, and see how it works. © 2021 FANOTEC...
-
Page 100: Pairing Pin For More Than 2 Mechas
● Start team building entering the code 1212< on horizontal MECHA. In other words, the unit on which you enter this code, will rotate horizontally. ● Confirm the participation in the team, entering the code 12< on vertical MECHA. This unit will rotate vertically. © 2021 FANOTEC... -
Page 101: Automatic Pairing Using The Ui
192.168.8.x on browser address. Vertical MECHA UI will show [V] at the upper left corner and [Team] near the bottom of page. Select [V] to go back to horizontal MECHA. Use 2 Tabs with MECHA IPs in browser to access both MECHAs quickly. © 2021 FANOTEC... - Page 102 Server] is not available. You can use MECHA’s STA_IP to access it. For example, on Android, STA_IP is 192.168.43.x, where x can be 2-254; on iPhone / iPad, STA_IP is 172.20.10.x, where x can be 2-14. Refer to MECHA Controller C1 Manual on STA mode for details. © 2021 FANOTEC...
-
Page 103: How To Unpair Mechas
When both units are powered up, they will pair automatically. If a pairing PIN is set If a pairing PIN is set and you want to permanently break the pairing, please set a different PIN on MECHA-V. © 2021 FANOTEC... -
Page 104: Mecha's Current Codes
See all standard current codes below. Please note that the power button, , can always be used as an emergency stop, if necessary, except for the speed calibration procedure (123123<). © 2021 FANOTEC... -
Page 105: Current Codes List
The same as 1312, but with MECHA-V in the level position. First time, please test the codes without camera mounted on the panohead. 1321< 1321> The same as 1312, but with MECHA-V in the raised position. First time, please test the codes without camera mounted on the panohead. © 2021 FANOTEC... - Page 106 Team build started on one MECHA with [Team] or 1212< code will automatically exit from the team building once a signal from another MECHA is received (after the 12< confirmation on other MECHA), and the LEDs will light accordingly. 121< Shows the MECHA’s ID, like “123ABC“. © 2021 FANOTEC...
- Page 107 Disabling the motor is useful to prevent MECHA from turning on by acci- dent while charging, for kids protection, or to simulate the functioning of MECHA for learning purposes, or to save energy, and also the battery can be charged faster. There are other applications, not listed here. © 2021 FANOTEC...
- Page 108 If it’s no power on charging cable, the code will be ignored. If the code is executed, the LEDs will show charging, then the cable has to be unplugged and MECHA has to be powered-up again to go back to normal use. © 2021 FANOTEC...
- Page 109 You can cancel the procedure with any other button when the power button, , flashes, or press the button right after it starts to flash to have no compensation at all, or it will time-out in 5 minutes if no buttons are pressed. © 2021 FANOTEC...
- Page 110 The procedure can be repeated after a longer period of time, after gear wears. If you hear or see a slight right-left movement when starting the unit, a compensation is set. Otherwise, the compensation is 0, or is not set. © 2021 FANOTEC...
- Page 111 LEDs the code of the button pressed (after the button is released), and over the battery symbol in UI. To end the test, press the power button, , which flashes during the test. © 2021 FANOTEC...
- Page 112 231231231< again. The power LED will flash and the button needs to be short-pressed. If three exclamation marks are shown on the LEDs – “!!!“– it means that the factory file is not found, and nothing is done. © 2021 FANOTEC...
-
Page 113: Appendix
MECHA User’s Guide v.06 Appendix © 2021 FANOTEC... -
Page 114: Mecha's S (Shots) Language
In the case of DAC, we commonly have 3 possible start positions: level, parked, and raised. To go from a position to another, please see the Simple Rotations Parked, Level and Raised Positions sections at the beginning of this guide. © 2021 FANOTEC... - Page 115 Double colon is the equivalent of the equal sign. Round brackets indicate a loop. Caret means „relative to the previous position”, and can be used for MECHA-V, as the positions for MECHA-H are always relative to the previous position. © 2021 FANOTEC...
-
Page 116: Panorama Of 3 Rows + Nadir + Zenith - Example 1 (Sl)
MECHA has to rotate the upper rail 90° to photograph the first row, as required in our example. So we specify the parked start position for MECHA-V as follows: S=90. © 2021 FANOTEC... - Page 117 The movement for the next 10 positions or photos (as we have only one photo in every position) will continue by changing only the rotation of MECHA-H, then at 11th photo something changes, MECHA-V should rotate the upper rail up 45°, so we have to add 11=45, to our script: © 2021 FANOTEC...
- Page 118 Before launching the panorama, enter 38 in the number of shots field, via Custom option, then click/tap either the [RIGHT] or [LEFT] button. We will explain in another example how to tell MECHA to wait or take extra shots in a particular orientation, so on. © 2021 FANOTEC...
-
Page 119: Panorama Using Loop In Script - Example 3 (Sl)
— The next shot is at the same tilt, but 36° apart, and will keep going 11=-45, — Then, at the 11th shot from the previous change, the tilt becomes -45 and =_36, — the next shot is at the same tilt, but 36° apart, and will keep going © 2021 FANOTEC... - Page 120 P to the first shot: 1=P0_0, MECHA will pause before the first shot, and will continue only after you click the > [PAUSE] button on UI or press the button of MECHA-H. © 2021 FANOTEC...
- Page 121 Nodal Ninja Youtube Channel https://forum.nodalninja.com/ Nodal Ninja's Panoramic Photography Forum https://www.fanotec.com/ Fanotec International Limited official website Developed and manufactured by Fanotec International Limited. Address: Flat 2, 4/F, Kar Wah Indl. Bldg. 8 Leung Yip Street Yuen Long, Hong Kong © 2021 FANOTEC...
- Page 122 MECHA User’s Guide v.06 © 2021 FANOTEC...
Need help?
Do you have a question about the MECHA C1 and is the answer not in the manual?
Questions and answers