
Related Manuals for IMOU Cell Pro


Summary of Contents for IMOU Cell Pro
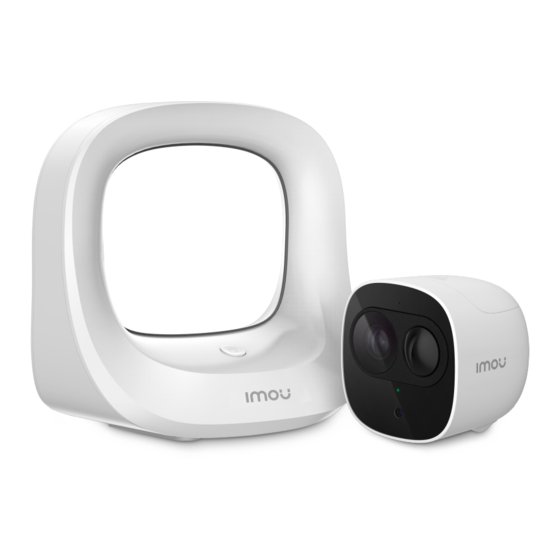
- Page 1 Quick Start Guide *Cell Pro(Add-on Camera) *Cell Pro Kit(Hub+Camera) www.imoulife.com...
- Page 2 Welcome Thank you for choosing IMOU. We are devoted to providing you easy smart home products. If you have problems using the product, please contact our service team before returning your product. Our service mail: service.global@imoulife.com Frequently asked questions can be found at...
-
Page 3: Package Content
Package content Camera ×1 Quick Start Guide ×1 Power Adapter ×1 Bracket ×1 Positioning Map ×1 Power Cable ×1 Hub ×1 Screw Package ×1 Battery ×1 Camera introduction Power Port Built-in Mic Lens SYNC Button PIR Detector LED Indicator Built-in Speaker Photosensor Note: Press the SYNC button to pair with the base station. -
Page 4: Installing Battery
Installing Battery The pattern of the LED indicator is included in the following table. LED Indicator Status Device Status Sleeping mode Run out of battery Alarm is triggered Green light on Instructed to wake Green light ashing Reconnecting Wi-Fi Green light quick ashing Waiting for pairing with the base station Green light stay on for 10 s, Pairing succeeded... - Page 5 SYNC Button Ethernet Port USB Port Power Port Imou Life Windows...
- Page 6 Tips To ensure the best possible wireless performance, please make sure there are no obstacles and electromagnetic interference between the camera and hub. Setup Setup WIFI Name Password Next Done...
- Page 7 Pairing with the Hub Press the SYNC button, and then the indicator Press the SYNC button, and then the indicator on the base station ashes with white light. on the camera ashes with green light. The system indicator on the Hub stays on with white light for 10 s, and then o . The indicator on the camera stays on with green light for 10 s, and then o .
-
Page 8: Installing Camera
Installing Camera Bracket Bracket Expansion Bolt Self-tapping Screw Mounting Surface Pairing mit dem Hub... -
Page 9: Troubleshooting
Troubleshooting Problem Solution • Ensure your mobile device and the camera are within range of your Wi-Fi router. Cannot set up camera • Ensure the LED indicator on the camera is ashing green before beginning setup. • Reset your Camera and connect it again. The APP says "Failed to •... - Page 10 Kurzanleitung *Cell Pro(Add-on Camera) *Cell Pro Kit(Hub+Camera) www.imoulife.com...
- Page 11 Willkommen Vielen Dank, dass Sie sich für IMOU entschieden haben. Wir sind bestrebt, einfachere Produkte für das intelligente Heim anzubieten. Wenn Sie Probleme bei der Verwendung des Produkts haben, wenden Sie sich bitte an unser Serviceteam. Unsere Service-Mail lautet: service.global@imoulife.com Häu g gestellte Fragen nden Sie unter imoulife.com/...
- Page 12 Packungsinhalt Kamera ×1 Kurzanleitung ×1 Netzteil ×1 Halterung ×1 Bohrlochschablone ×1 Stromkabel ×1 Befestigungsmaterial ×1 Akku ×1 Hub ×1 Einführung in die Kamera Stromanschluss Eingebautes Mikrofon Objektiv Synchronisation- staste PIR- Bewegungsmelder LED-Anzeige Eingebauter Lautsprecher Fotosensor Hinweis: Drücken Sie die Synchronisationstaste SYNC, um eine Verbindung mit derBasisstation aufzubauen.
- Page 13 Installing Battery Das Muster der LED-Anzeigen ist in der folgenden Tabelle aufgeführt. Anzeigestatusv Gerätestatus Standby-Modus Akku niedrig Alarm ist ausgelöst Grüne LED leuchtet Standby-Modus wird verlassen Grüne LED blinkt Erneute Verbindung mit WLAN Grüne LED blinkt schnell Warten auf Kopplung mitBasisstation Grüne LED leuchtet 10 Sekunden Kopplung erfolgreich und erlischt dann...
- Page 14 Synchronisationstaste Ethernet- USB- Stromanschluss Anschluss Anschluss Imou Life Windows...
- Page 15 Tips Um die bestmögliche Funkübertragung zu gewährleisten, stellen Sie sicher, dass zwischen Kamera und Hub keine Hindernisse und elektromagnetische Störungen vorhanden sind. Setup Setup WIFI Name Password Next Done...
- Page 16 Pairing mit dem Hub Drücken Sie die SYNC-Taste, die Anzeige auf Drücken Sie die SYNC-Taste, die Anzeige auf derBasisstation blinkt weiß. derKamera blinkt grün. Die Systemanzeige auf der Basisstation leuchtet für 10 Sekunden weiß underlischt dann wieder. Die Anzeige auf der Kamera leuchtet für 10 Sekunden grün und erlischt dannwieder. Die Kopplung wird erfolgreich.
- Page 17 Kamerainstallieren Halterung Halterung Dübel Selbstschneidende Montage-Ober äche Schraube /-Decke...
- Page 18 Problem...
-
Page 19: Guía De Inicio Rápido
Guía de inicio rápido *Cell Pro(Add-on Camera) *Cell Pro Kit(Hub+Camera) www.imoulife.com... - Page 20 Bienvenido Gracias por elegir IMOU Nuestra misión es proporcionar productos fáciles de usar para un hogar inteligente. Si tiene problemas usando el producto, por favor diríjase a nuestro equipo de atención al cliente antes de devolver su producto. Nuestro correo electrónico de servicio: service.global@imoulife.com...
-
Page 21: Contenido Del Paquete
Contenido del paquete Cámara ×1 Guía de inicio Adaptador de rápido ×1 corriente ×1 soporte ×1 Plantilla de Cable de posicionamiento ×1 alimentación ×1 juego de tornillos × 1 batería ×1 Hub ×1 Introducción a la cámara Puerto de alimentación Micrófono integrado Lente... -
Page 22: Instalar La Batería
Instalar la batería El patrón de los indicadores LED se incluye en la siguiente tabla. Estado LED Estado del aparato Modo de suspensión Desactivar Batería descargada La alarma se ha disparado Luz verde encendida Se recibió orden de despertar Luz verde parpadeante Volviéndose a conectar a la red wi Luz verde parpadeante rápida En espera para emparejarse con la estación base... - Page 23 Botón SYNC Puerto Ethernet Puerto USB Puerto de alimentación (sincronizar) Imou Life Windows...
- Page 24 Tips Para garantizar el mejor rendimiento inalámbrico posible, por favor asegúrese de que no hay obstáculos ni interferencias electromagnéticas entre la cámara y el hub. Setup Setup WIFI Name Password Next Done...
- Page 25 Emparejamiento con el Hub Pulse el botón SYNC y la luz blanca del En lacámara Pulse el botón SYNC y la luz verde del indicador dela estación base parpadeará. indicador de lacámara base parpadeará. La luz blanca del indicador del sistema de la estación base se mantieneencendida durante 10 s para, luego, apagarse.
- Page 26 Instalación de la cámara soporte soporte Taco de expansión Tornillo Mounting Plate autorroscante...
-
Page 28: Guide De Démarrage Rapide
Guide de démarrage rapide *Cell Pro(Add-on Camera) *Cell Pro Kit(Hub+Camera) www.imoulife.com... - Page 29 Bienvenue Merci d’avoir choisi IMOU. Nous nous consacrons à fournir des produits pour la maison intelligente plus faciles à utiliser. Si vous rencontrez des di cultés lors de l’utilisation du produit, veuillez contacter notre équipe technique avant de renvoyer votre produit.
-
Page 30: Contenu De L'emballage
Contenu de l’emballage Caméra ×1 Guide de démarrage Adaptateur rapide ×1 secteur ×1 Support de Patron d’installation Cable de montage ×1 ×1 alimentación ×1 jeu de vis × 1 Batterie ×1 Le hub ×1 Introduction à la caméra Port d’alimentation Microphone intégré... -
Page 31: Installation De La Batterie
Installation de la batterie Le schéma des voyants est inclus dans le tableau suivant. Statut du voyant État de l’appareil Mode Sommeil Arrêt Batterie faible Alarme déclenchée Allumé en vert Commande de réveil Clignotant en vert Reconnexion au Wi-Fi En attente de couplage avec la station de base Clignotement vertrapide Indicateur lumineux vert s’allume Couplage réussi... - Page 32 Le hub Bouton Port Ethernet Port USB Port d’alimentation SYNCHRONISATION Imou Life Windows...
- Page 33 Tips Pour garantir les meilleures performances sans l possible, veuillez vous assurer qu’il n’y a pas d’obstacles ni d’interférences électromagnétiques entre la caméra et le hub. Setup Setup WIFI Name Password Next Done...
- Page 34 Couplage avec le hub sur la station de base-Appuyez sur le bouton sur la caméra-Appuyez sur le bouton SYNC; SYNC; l’indicateurlumineux de lastation de l’indicateur lumineux de lacaméra clignote en vert. base clignote en blanc. L’indicateurlumineux système de la station de base s’allume en continu en blancpendant 10s, puis s’éteint.
- Page 35 Installation de la caméra Support de montage Support de montage Cheville à expansion Vis autotaraudeuse Surface de montage/plafond...
-
Page 37: Guida Rapida
Guida Rapida *Cell Pro(Add-on Camera) *Cell Pro Kit(Hub+Camera) www.imoulife.com... - Page 38 Benvenuti Grazie per aver scelto IMOU. Il nostro obiettivo è quello di fornire prodotti per la domotica più facili da utilizzare. In caso di problemi durante l’utilizzo del prodotto, si prega di contattare il nostro team di assistenza prima di restituire il prodotto.
-
Page 39: Contenuto Della Confezione
Contenuto della confezione Telecamera ×1 Guida Adattatore ×1 introduttiva ×1 Supporto ×1 Dima di Cavo di posizionamento ×1 alimentazione ×1 confezione di viti × 1 Batteria ×1 Hub ×1 Introduzione alla telecamera Porta di alimentazione Microfono integrato Obiettivo Pulsante SYNC Rilevatore PIR Indicatore LED Altoparlante... -
Page 40: Installazione Della Batteria
Installazione della batteria Gli indicatori LED sono descritti nella tabella seguente. Stato dispositivo Stato LED Modalità notturna SPENTO Batteria scarica Allarme attivato Luce verde accesa Impostazione di attivazione Riconnessione alla rete Wi-Fi Luce verde lampeggiante Indicatore verdeche lampeggia rapidamente In attesa di associazione con la stazione dibase Spia verde accesa per 10 secondi, quindi Associazione completata spenta... - Page 41 Pulsante SYNC Porta Ethernet Porta USB Porta di alimentazione Imou Life Windows...
- Page 42 Tips Per garantire le migliori prestazioni wireless possibili, assicurarsi che non ci siano ostacoli e interferenze elettromagnetiche tra la telecamera e il hub. Setup Setup WIFI Name Password Next Done...
- Page 43 Associazione con l'hub premere il pulsante SYNC, quindi l'indicatore premere il pulsante SYNC, quindi l'indicatore dellastazione di base lampeggiacon spia dellatelecamera lampeggia con spia verde. bianca. L'indicatore sulla stazione dibase resta acceso con spia bianca per 10 secondi,quindi si spegne. L'indicatore sulla telecamera resta acceso con spia verde per 10 secondi, quindisi spegne.
- Page 44 Installazione della telecamera Supporto Supporto Tassello adespansione Vite auto lettante Super cie di montaggio...
- Page 46 Snelstartgids *Cell Pro(Add-on Camera) *Cell Pro Kit(Hub+Camera) www.imoulife.com...
- Page 47 Welkom Bedankt dat u voor Imou heeft gekozen. Onze toewijding is om u eenvoudige Smart Home producten te bieden. Als u problemen ervaart met het gebruik van uw product, neem dan eerst contact op met onze service team: service.global@imoulife.com...
-
Page 48: Inhoud Verpakking
Inhoud verpakking Camera ×1 Snelstarthandleiding Voedingsadapter ×1 ×1 Beugel ×1 Kaart Netsnoer ×1 installatiepositie ×1 Schroefpakket ×1 Batterij ×1 Hub ×1 Introductie camera Stroomaansluiting Geïntegreerde microfoon Lens Toets SYNC PIR-detector Led-indicator Ingebouwde luidspreker Fotosensor Opmerking: Druk op de toets SYNC om met het basisstation te koppelen. Houd de toets SYNC gedurende 8seconden ingedrukt om de camera teherstellen. -
Page 49: Batterij Installeren
Batterij installeren Het patroon van led-indicatoren wordt weergegeven in de volgende tabel. LED-IndicatorStatus Status apparaat Slaapmodus Batterij is leeg Alarm wordt geactiveerd Groen lampje aan Opgedragen om te wekken Groen lampje knippert Opnieuw verbinden Wi-Fi Snel knipperend groen lampje Wachten op koppelen met het basisstation Het groenelampje blijft 10 sec. - Page 50 Toets SYNC Ethernetpoort USB poort Stroomaansluiting Imou Life Windows...
- Page 51 Tips Zorg voor de best mogelijke draadloze prestatie dat er geen obstakels en elektromagnetische interferentie tussen de camera en hub aanwezig zijn. Setup Setup WIFI Name Password Next Done...
- Page 52 Couplage avec le hub Druk op de toets SYNC, waarna het Druk op de toets SYNC, waarna het indicatielampje indicatielampje ophet basisstation wit gaat opdecamera groen gaat knipperen. knipperen. De systeemindicator op het basisstation blijft gedurende 10 sec. wit branden engaat dan uit. Het indicatielampje op de camera blijft gedurende 10 sec.
- Page 53 Het installeren van de camera Beugel Beugel Expansiebout Zelftappende Schroef Montage-oppervlak...
-
Page 55: Guia Rápido
Guia rápido *Cell Pro(Add-on Camera) *Cell Pro Kit(Hub+Camera) www.imoulife.com... - Page 56 Bem-vindo Obrigado por escolher a IMOU. Estamos empenhados em fornecer produtos inteligentes e simpli cados para o lar. Se tiver problemas ao utilizar o produto, contacte a nossa equipa de assistência antes de devolver o produto. O nosso e-mail de assistência: service.global@imoulife.com- Prometemos responder no prazo de 24 horas.
-
Page 57: Conteúdo Da Embalagem
Conteúdo da embalagem Guia de início Adaptador de Câmara × 1 rápido ×1 energia ×1 Suporte ×1 Mapa de Cabo de posicionamento ×1 alimentação ×1 Conjunto Bateria ×1 Hub ×1 deparafusos ×1 Apresentação da câmara Porta de alimentação Microfone incorporado Objetiva Botão SYNC (de Sincronização) -
Page 58: Instalar A Bateria
Instalar a Bateria O padrão dos indicadores LED está incluído na tabela seguinte. Estado do LED Estado do dispositivo Modo de suspensão DESLIGADO Sem bateria Alarme ativado Luz verde acesa Instruído a ligar Luz verde intermitente A ligar novamente o Wi-Fi A aguardar o emparelhamento com a Luz verde rapidamente intermitente estação interior... - Page 59 Botão SYNC Entrada Ethernet Porta USB Porta de alimentação (de Sincronização) Imou Life Windows...
- Page 60 Tips Para assegurar o melhor desempenho possível do sistema sem os, certi que-se de que não existem obstáculos e interferência eletromagnética entre a câmara e o hub. Setup Setup WIFI Name Password Next Done...
- Page 61 Emparelhando com o Hub Prima o botão SYNC e o indicador na Prima o botão SYNC e o indicador na estação interiorpiscará a branco. câmara piscará averde. O indicador do sistema na estação interior acende a branco durante 10segundos e depois apaga-se.
- Page 62 Instalar a câmara Suporte Suporte Parafuso deexpansão Parafuso perfurante Superfície de montagem...
- Page 64 @imouglobal service.global@imoulife.com www.imoulife.com...
Need help?
Do you have a question about the Cell Pro and is the answer not in the manual?
Questions and answers