Advertisement
Quick Links
Advertisement

Summary of Contents for Amish Tables BROOKLYN 3 BD-8013
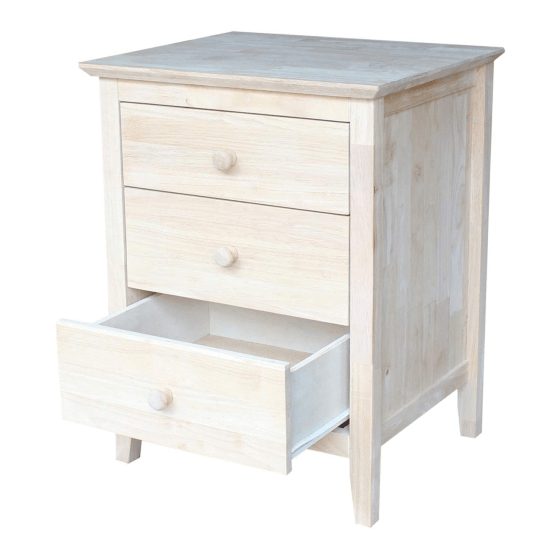
- Page 1 ASSEMBLY INSTRUCTIONS WARNING! Serious or fatal injuries can occur from furniture tip over. Use tip over restraint (steel band included) to secure this product to the wall. Description : BROOKLYN 3 DRAWER NIGHTSTAND Item No. : BD-8013 ITEM NO.: BD-8013 Printed in Vietnam REVISED DEC 07, 2016 - 1 -...
-
Page 2: Before Assembly
BEFORE ASSEMBLY Thank you for purchasing this quality product. This product has been designed for easy assembly and constructed for durability. All parts were checked prior to packaging to insure quality. Prior to beginning assembly, however, make sure all parts and hardware are included and free of obvious defect. -
Page 3: Part List
PART LIST When unpacking, please be careful not to discard any parts with the packaging. Before continuing, please make sure you have the following parts: Description Sketch Description Sketch Side panel (L-R) Back panel Bottom panel Upper Upper Drawer side Drawer front (L-R) Lower... -
Page 4: Hardware List
HARDWARE LIST When unpacking, please be careful not to discard any parts with the packaging. Before continuing, please make sure you have all of the following hardware: Description Sketch Description Sketch Bolt Spring washer (M6 x 30mm) (6.5 x11mm) Flat washer Long screw (6.5 x13mm) (M4 x 35mm) - Page 5 STEP 1 Attach top (A) and bottom panel (C) to side panel (B) with bolts (1), and washers (2) and (3) as shown below. Tighten with Allen key (7). Slide back panel (D) into the grooves as shown below STEP 2 Attach bottom panel (C) and top (A) to the other side panel (B) with bolts (1), and washers (2) and (3) as shown below.
- Page 6 STEP 3 Attach drawer sides (F) to drawer front (E) with screws (4) as shown below. Tighten with a screwdriver. Insert drawer bottom (K) into the grooves at bottom of drawer sides (F) and drawer front (E) as shown below. STEP 4 Attach drawer back (G) to drawer sides (F) with screws (4) as shown below.
- Page 7 STEP 6 Attach drawer sides (I) to drawer front (H) with screws (4) as shown below. Tighten with a screwdriver. Insert drawer bottom (K) into the grooves at bottom of drawer sides (I) and drawer front (H) as shown below. STEP 7 Attach drawer back (J) to drawer sides (I) with screws (4) as shown below.
- Page 8 STEP 9 Attach steel bands (8) to the unit with screws (9) as shown below. (to secure the product to the wall and reduce the risk of tipping over). Important! Properly attach steel bands (8) to the wall in an area of drywall or plaster with a wood stud: Mark the attachment point(s) with a pencil at the appropriate height positioned over the wood stud(s) in the wall.

Need help?
Do you have a question about the BROOKLYN 3 BD-8013 and is the answer not in the manual?
Questions and answers