
Related Manuals for Studiomaster Professional FIRE 92

Summary of Contents for Studiomaster Professional FIRE 92
- Page 1 Step into the amazing world of Line Array Systems with the Studiomaster Professional Advantage FIRE 92 - LINE ARRAY...
-
Page 2: Table Of Contents
TABLE OF CONTENTS IMPORTANT NOTES ...................................... 3 IMPORTANT SAFETY PRECAUTIONS ..............................3 INTRODUCTION ......................................4 FEATURES .......................................... 4 INTERNAL WIRING DIAGRAM .................................. 6 REAR PANEL & CONNECTION ................................. 6 SYSTEM CONFIGURATION ..................................7 8. INSTALLATION (FLYING) 8.1 General ........................................8 8.2 Fly Bar assembly ...................................... -
Page 3: Important Notes
Install in accordance with Studiomaster Professional's instructions and under the supervision of a licensed Professional Engineer only. • Studiomaster Professional shall not assume any responsibility for the incorrect installation/or use of this product. SAFETY SYMBOL AND MESSAGE CONVENTIONS Safety symbols and messages described below are used in this manual to prevent bodily injury and property damage which could result from mishandling. -
Page 4: Introduction
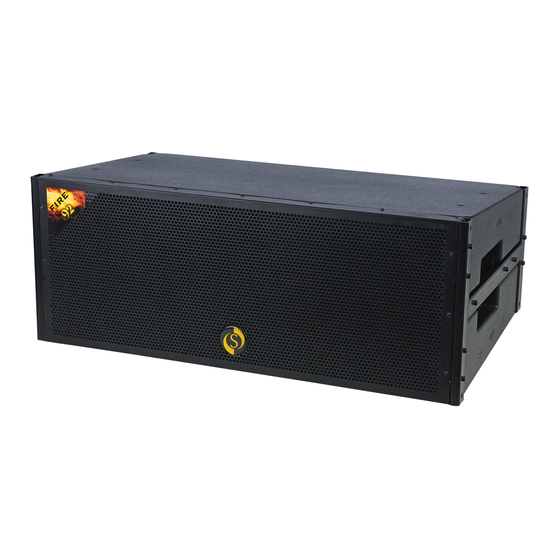
The Fire 92 series is simple to use & understand, quick to rig up ! The Fire 92 is a specially designed loudspeaker module designed to form a vertical stack in varying numbers. This stack is usually flown to provide superior sound coverage in the intended listening areas. - Page 5 Enclosure Features: The Fire 92 incorporates 2 x 12’’ Mid-Bass transducers & 2 x 2’’ High Quality HF transducers with state of the art Waveguide horn, all comprised into a sleek enclosure. This Array module has a horizontal coverage angle of 120 & vertical Coverage angle of 9 .
-
Page 6: Internal Wiring Diagram
• Because of increased HF throw of the system, need for delay stacks is eliminated or reduced. • Even sound pressure level can be achieved over the entire listening area by proper articulation of the vertical array formed by Fire 92. -
Page 7: System Configuration
7. SYSTEM CONFIGURATION You can configure Line array system with amplifiers as shown below. FIRE 92 FIRE 92 Link Link Link Link AMP 1 AMP 2 AMP 1 AMP 3 CH 1 CH 2 CH 1 CH 2 8Ω 8Ω... -
Page 8: Installation (Flying)
8. INSTALLATION (FLYING) 8.1 General Use Fly bar for flying the Line Array speakers. With the use of the Fly bar, up to 8 Line Array speakers can be arranged in flying configuration. When joining two or more speakers, or joining the Fly bar and the speaker, use the Joining Plates supplied with the system. -
Page 9: Fly Bar Assembly
8.2 Fly bar Assembly Use only shackle holes for suspension of array! For assembling, refer to the figure & procedure below. • Tighten 4 supplied M12X60 bolts with plain washers, spring washers and nut securely to fix each Suspension Bracket to the Fly bar. •... -
Page 10: Joining The Enclosure To The Fly Bar
• Place speaker box in line with Fly bar. • Please ensure that speaker direction is correct (“Studiomaster Professional” Logo on bottom side). Insert Inner Joining Plates to side channel of speaker box as shown in figure below. • •... -
Page 11: Joining Enclosures
• Please ensure that lower speaker direction is correct (“Studiomaster Professional” Logo on bottom side). Now fix quick release 25mm Locking Pin (SILSSSKR001) to lower speaker box & Joining Plate. You can adjust Splay Angles 0 , 3 , 6 & 9 •... -
Page 12: Variable Splay Angle Adjustment
8.5 Variable Splay Angle adjustment Splay angle can be adjusted using Joining plate holes as shown below. 9° 6° 3° 0° 0° 3° 4.5° 4.5° 9° 9° 6° 6° 0° 3° 3° 3° 0° 0° 4.5° 4.5° 9° 9° 6° 6°... -
Page 13: Vertical Directivity (Coverage Area)
9. VERTICAL DIRECTIVITY (COVERAGE AREA) With different Splay angles we can cover required area. The overlapping angle can be adjusted by means of the combination of different splay angles using holes on Joining Plate as explained in point 8.5. The horizontal directivity angle is fixed at 120 degrees. -
Page 14: All Enclosures Fitted With 6 Deg Splay Angle - Total Vertical Directivity 51
3. All enclosures fitted with 6 deg splay angle – total vertical directivity 51°. 4.5° 51° 51° Medium & Long Throw Short Throw 4. All enclosures fitted with 9 deg splay angle – total vertical directivity 72°. 4.5° 72° 72° Medium &... -
Page 15: Notes On Flying
960 x 560 x 386 Net Weight (Kg) 60Kg Recommended products to be used with Fire 92. 1) Subwoofer : Fire 82 (1 x 18’’ woofer, 1500Wrms / 3000W peak power) Fire 84 (2 x 18’’ woofer, 2000Wrms / 4000W peak power) S 8128 (2 x 18’’... - Page 16 Range of Studiomaster Professional Products. Wired Microphones ~ Air Series ~ DPA Series ~ XVP Series AiR X 10 DPA 2000 XVP 1225 SM 100XLR AiR X 14 DPA 3200 XVP 1540 TRIO 100 AiR X 18 DPA 4500 XVP 1540M...
Need help?
Do you have a question about the FIRE 92 and is the answer not in the manual?
Questions and answers