
Subscribe to Our Youtube Channel
Related Manuals for ASUNA 8570


Summary of Contents for ASUNA 8570
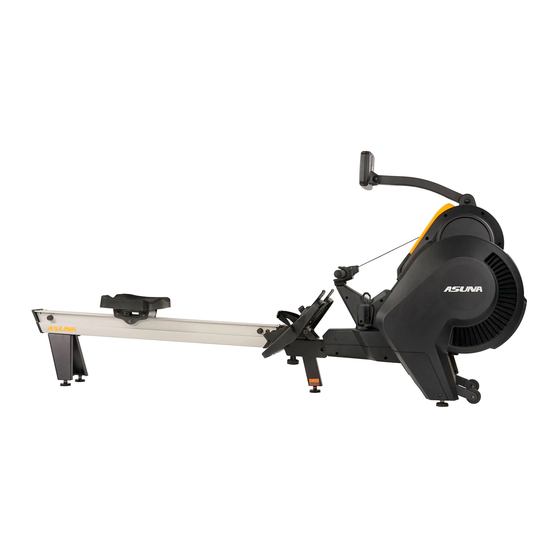
- Page 1 8570 Windmill Air Magnetic Rower IMPORTANT: Read all instructions carefully before using this product. Retain owner’s manual for future reference. For customer service, please contact: support@sunnyhealthfitness.com...
-
Page 2: Important Safety Information
IMPORTANT SAFETY INFORMATION We thank you for choosing our product. To ensure your safety and health, please use this equipment correctly. It is important to read this entire manual before assembling and using the equipment. Safe and effective use can only be achieved if the equipment is assembled, maintained and used properly. It is your responsibility to ensure that all users of the equipment are informed of all warnings and precautions. -
Page 3: Warm-Up And Cool-Down
WARM UP & COOL DOWN The warming up is an important part of your workout. It should begin every session to prepare your body for more strenuous exercise by heating up and stretching out your muscles. Cool down at the end of your workout, repeat these exercises to reduce soreness in tired muscles. - Page 4 OVERVIEW 划船器摺疊示意圖 ADJUSTABLE CONSOLE ARM CONSOLE AIR VENT 口口孔 SPECIAL ROPE HANDLEBAR WIRELESS HANDLEBAR CONTROLLER FOOT PEDAL AIR INTAKE MOVING SEAT WHEEL PEDAL BELT FOLDING BOLT HEEL SUPPORTER ALUMINUM RAIL REAR BRACKET ROWER FOLDING...
-
Page 5: Folding Instructions
FOLDING INSTRUCTIONS STEP 1 Press down console and adjustable arm (G), and loosen the knob (1) STEP 2 Move the seat to the front rail. STEP 3 Pull the bolt (3), and lift up rail (H) When you use the machine, please pull ... - Page 6 USING THE ROWING MACHINE READY YOUR BODY Sit down on the rowing seat and place your feet under the adjustable straps. Pull the straps tight to secure your feet to the pedals. Adjust the pedals if needed. Lean your body slightly forward with your back straight and extend your arms to grab the handle.
-
Page 7: Console Overview
CONSOLE OVERVIEW 划船器電子錶外觀圖 EXERCISE DATA DISPLAY SCREEN RESET DOWN When restarting or To decrease LEVEL ending a program, ENTER press to go to To confirm STANDBY MODE. setting data. When setting, press to back to last item. DISPLAY To increase LEVEL During exercise, press to select programs... - Page 8 CONSOLE OPERATING INSTRUCTIONS 划船器電子錶操作說明 CONSOLE DISPLAY SCREEN FUNCTION REST MODE BAR CHART FORCE CURVE RACE EXERCISE MODE TOTAL STROKE STROKE / MIN WATTS / STROKE WATT AVERAGE LEVEL CALORIES CALORIES / HR PULSE TIME TIME FOR DISTANCE 500M DISTANCE INTERVAL TRAINING TOTAL CYCLE INTERVAL TRAINING FUNCTION CONSOLE OPERATING MANUAL...
- Page 9 Functions 1. STANDBY MODE You may use UP or DOWN to select modes. In STANDBY MODE, the console will turn on when it detects speed signal and go into exercise display. Then, you can set your LEVEL. 2.
- Page 10 GOAL DIST., GOAL CAL., INTERVAL TRAINING all will count up from “ 00:00.” Preset race mode is 2 min. 15 sec., 100m /27sec. / adjustment. Time & distance will be counted by the proportion. 2. /500M The time for rowing distance 500m ...
- Page 11 Slow speed rowing High speed rowing 7. LEVEL Minimum resistance is LEVEL 1. Maximum resistance is LEVEL 10. 8. PULSE Machine can detect your pulse anytime. Display Range:40~ 220. If machine detects no signal, the screen will show 「P」 ...
- Page 12 14. RACE When using race mode, the pattern of on the top will present the machine, and pattern on the bottom will be yourself. 15. BEEP SOUND When you press buttons, there will be a beep sound to confirm order. ...
- Page 13 ■ During exercise, it can increase/decrease resistance level. ■ When the LED light up, please replace the battery. PROGRAM 1. QUICK START In STANDBY MODE, you may row 2 strokes, and machine will start your exercise. Resistance level will start from “1,”and other exercise data will start counting as well. 2.
- Page 14 Repeat 8 cycle, total time will be 4 min. Selecting TABATA-1(20/10), TABATA-2(10/20), screen will show 「TABATA∙1」 「TABATA∙2」 TABATA-3(10/10): You may create your own interval training. Selecting TABATA-3(10/10), screen will show 「TABATA∙ 3」 a. Press ENTER into EXERCISE TIME setting, screen 「 EXERCISE」 will flicker. Preset is 「10」.
- Page 15 counting. If after 120 seconds with no input, then it will go into STANDBY MODE. Hold RESET for 3 sec. to end the mode. The console will go back to the on state. During exercise, Press UP or DOWN to select a resistance level. ...
- Page 16 ASSEMBLY INSTRUCTIONS...
- Page 17 Step 1: Attach Rail Stabilizer (No. 62) to Aluminum Rail (No. 107) using 1 Screw (No. 27), 1Screw (No. 29), and 2 Washers (No. 28). Tighten and secure with Allen Wrench. Step 2: Attach Rear Cover (No. 111) to Aluminum Rail (No.
- Page 18 Step 3: Using Allen Wrench to remove 2 screws (No. 135), which are pre-assembled on the Aluminum Rail (No. 107). Step 4: Attach Seat (No. 77) to Aluminum Rail (No. 107).
- Page 19 Step 5: Tighten 2 screws (No. 135) with Allen Wrench. Step 6: Attach 2 Rubber Pads (No. 25) to the Aluminum Rail (No. 107).
- Page 20 Step 7: Attach Rail Front Cover (No.110) to Aluminum Rail (No. 107) Step 8: Connect Main Frame (No. 1) to Aluminum Rail (No. 107).
- Page 21 Step 9: Secure the Main Frame (No. 1) to Aluminum Rail (No. 107) by attaching 4 Screws (No. 26) and 4 Washers (No. 28) to each side and the bottom of the Aluminum Rail (No. 107) using Allen Wrench. Step 10: Make sure the Main Frame (No.
- Page 22 Aluminum Rail X1 Frame X1 NO. 1 NO. 107 Rear Bracket For Rear Cover For Assembly X1 Seat Assembiy X1 Aluminum Rail X1 Aluminum Rail X1 NO. 77 NO. 62 NO. 111 M10X50L Screw X1 M6X20L Screw X1 M10X40L Screw X1 NO.
-
Page 23: Exploded Diagram
EXPLODED DIAGRAM... -
Page 24: Parts List
PARTS LIST Item NO. Item FRAME SCREW M3*10L MOVING WHEEL SCREW M2*4 SCREW M8*45L SCREW M3*8L HANDLEBAR LEVEL CONTROLLER WASHER M8*16*2.0 PLATE HANDLEBAR LEVEL CONTROLLER CAP NUT M8 FILM ADJUSTABLE FOOT M10 HANDLEBAR CONTROLLER BOARD BEARING HOUSING BUTTON BATTERY SCREW M10*35L SEAT FIXED PLATE WASHER M10*21*2.0t SEAT... - Page 25 PARTS LIST Item NO. Item PULLEY SPACER RING RAIL FRONT COVER SCREW M10*50L RAIL REAR COVER SCREW M10*40L ROPE GATE FRAME NUT 13MM 113 NUT M5 SPECIAL ROPE 114 SCREW M5*10L ELASTIC ROPE 115 LEFT MAIN CASE ELASTIC ROPE HOOK 116 SCREW M4*20L NUT M10*1.5*8t 117 WASHER M8...
Need help?
Do you have a question about the 8570 and is the answer not in the manual?
Questions and answers