Advertisement
Quick Links
COMPUSHIFT SPORT
COMPUSHIFT PRO
INSTALLATION GUIDE
Congratulations on your purchase of COMPUSHIFT – HGM Automotive Electronics' next-
generation precision shift controller.
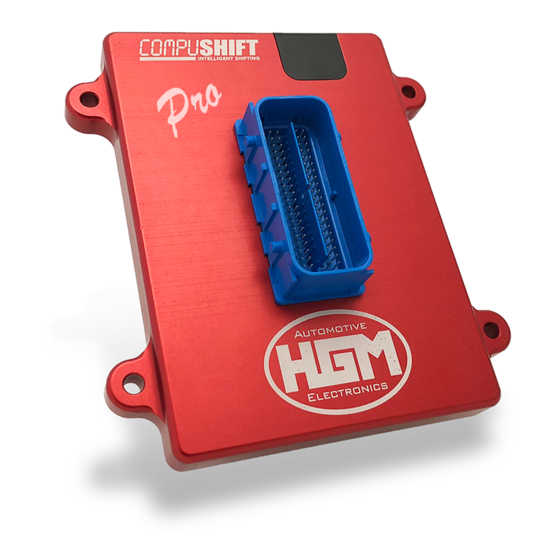
The sturdy COMPUSHIFT housing is water resistant to 3' / 1m. Though we prefer you mount inside the
vehicle, the controller can be mounted in the engine compartment or even under the vehicle, provided
it is away from heat sources. Plug-and-play connections and versatile factory tuning make installation a
breeze.
This guide takes you through the basic steps for installing your transmission controller.
For more details, including How-To videos, specifications, pinout information and more, go online:
http://manuals.hgmelectronics.com.
We're Here to Help
If you purchased directly from HGM, your COMPUSHIFT is calibrated to your unique vehicle specs, but
be sure to ask for help if you need it. Throughout installation, we'll work with you over the phone – we
can even take remote control of your system – to help you fine-tune to perfection. As you get to know
your system, we'll make sure you know how to make changes on your own, so you can manage your
own adjustments like a pro.
HGM Automotive Electronics
2751 Plaza Del Amo, Suite 305
Torrance, CA, U.S.A. 90503
877-SHIFT-UP (877-744-3887)
support@hgmelectronics.com
August 23, 2020
1
Advertisement

Related Manuals for HGM COMPUSHIFT SPORT


Summary of Contents for HGM COMPUSHIFT SPORT
- Page 1 We’re Here to Help If you purchased directly from HGM, your COMPUSHIFT is calibrated to your unique vehicle specs, but be sure to ask for help if you need it. Throughout installation, we’ll work with you over the phone – we can even take remote control of your system –...
-
Page 2: Before You Begin
Before You Begin 1. Check the Packing Slip Your COMPUSHIFT transmission controller should have been configured for your specific application. Check the packing slip to confirm you’ve received the correct components for your vehicle. Specifically, check the following: • Transmission Type •... - Page 3 Then, when prompted, enter the rest of your contact information and submit the form. August 23, 2020...
-
Page 4: Install The Controller
Install the Controller 1. Mount the Controller The sturdy COMPUSHIFT housing is water resistant to 3’/1m, so you can mount the controller inside the cabin, in the engine compartment or even under the vehicle – but AWAY from exhaust system and other sources of heat. - Page 5 To remove the connector, pull the red tab up, then press down on the release panel. Pull the lever up to the unlocked position. Gently remove the connector from the 80-pin assembly. August 23, 2020...
- Page 6 Connect the Transmission 1. Connect the Main Transmission Plug For easy identification, all connectors are labeled. Safely route the harness AWAY FROM the exhaust system, the rotating drive shaft, or other moving parts of the drivetrain. Connect the main transmission plug to the corresponding plug on the transmission. 2.
- Page 7 Most engines with Electronic Fuel Injection (EFI) don’t require a separate TPS. In this case, connect the OEM wiring harness using the HGM TPS adapter. GM TPS Only: Use the Y adapter if your fuel-injected engine uses the standard General Motors TPS socket.
- Page 8 Cable TPS system. Optional: CAN Bus Connector Certain versions of the HGM software can obtain throttle position, engine speed, manifold pressure, manifold temperature and other information directly from the ECU through the CAN bus. If applicable, connect the plug marked CAN to your vehicle’s ECM.
- Page 9 Install the nut on the rear of the switch. Tighten gently. Optional: Connect the Switch-Shift Harness For vehicles with paddle shifters or pushbutton shifters, an optional Switch-Shift Harness connects to the main connector. HGM also sells the Twist Machine paddle shifter, shown below. August 23, 2020...
- Page 10 Optional: Connect the Display If your system came equipped with a display, used the provided USB micro to USB adapter to connect the display to the USB port. Without a Display If you are not using a display or other USB accessory, plug the USB port with the dust cover provided in your small parts kit as shown: August 23, 2020...
- Page 11 Reconnect the vehicle’s battery and set the ignition to “ON” to power to the controller. Be sure Bluetooth is enabled on your phone, and then start the COMPUSHIFT Setup app. The screen should show “HGM CS3” in the list of devices. Select that device, and the app will ask to pair with the controller.
- Page 12 3. Setup On the app, select Vehicle Setup to begin. From this menu, confirm that the transmission and engine type are correct for your vehicle. Also verify: Final drive ratio Tire diameter Transfer case ratio (if you have a 4WD vehicle) Adjust settings accordingly if needed.
- Page 13 Use the Back arrow to return to the Home page. Select Dashboard. With the gear selector in PARK, start the engine. Confirm that the engine tachometer reading corresponds to the Engine Speed gauge on the app. Allow the engine to idle and warm until it normalizes rpm from fast idle or choke.
- Page 14 4. TPS Setup and Calibration If you are using a CAN bus connection to your engine management system, you can skip to the next step. Return to the Engine Setup menu. If you are using an Acculink or standalone TPS, turn on the TPS Ground. If you are using a tap loom to an existing TPS on an engine management system, turn the TPS Ground off.
- Page 15 5. Check Your Setup Use the Back arrow to return to the home page. Select Dashboard once again. When you press the accelerator pedal, the Throttle Position gauge should smoothly change from 0% to 100%. Confirm that the Faults gauge reads “0” (no faults), and the GREEN status light on the controller is blinking slowly.
- Page 16 Road Test! Now for the test drive! COMPUSHIFT uses information about throttle position, vehicle speed and gear level to shift for precision performance. Under light throttle, upshifts occur relatively early. As throttle level increases, upshifts occur at increasingly higher vehicle speeds. ...
Need help?
Do you have a question about the COMPUSHIFT SPORT and is the answer not in the manual?
Questions and answers