Advertisement
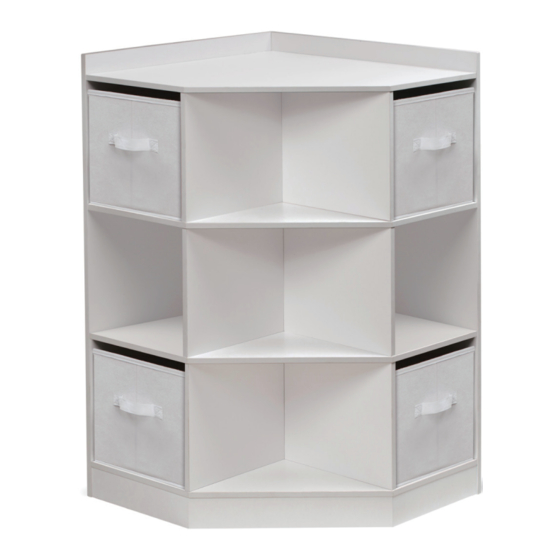
Corner Cubby Storage Unit with
Four Reversible Baskets
Assembly Instructions. Two Person Recommended -
This manual is part of the product and
•
Badger Basket®, PO Box 227, Edgar, WI 54426-0227 USA • Web: www.badgerbasket.com
U.S. Based Customer Service Toll-Free (Mon-Thurs 7:00 AM-4:00 PM CST): 1-800-236-1310
Adult Assembly Required.
Read all instructions before use.
must be kept for future reference.
assembly video available at Badger Basket's YouTube channel!
FOR REPLACEMENT PARTS:
http://www.badgerbasket.com/parts
Phone: 715-352-2311 • Fax: 715-352-3163
MODEL NUMBER*:
98812 - White
VERSION CODE*:
1.0/1119/TG
* Model and Version numbers are needed
if replacement parts are requested
Advertisement
Table of Contents

Subscribe to Our Youtube Channel
Summary of Contents for Badger Basket 98812
- Page 1 Badger Basket’s YouTube channel! FOR REPLACEMENT PARTS: http://www.badgerbasket.com/parts Badger Basket®, PO Box 227, Edgar, WI 54426-0227 USA • Web: www.badgerbasket.com U.S. Based Customer Service Toll-Free (Mon-Thurs 7:00 AM-4:00 PM CST): 1-800-236-1310 Phone: 715-352-2311 • Fax: 715-352-3163...
- Page 2 Keep instructions for future use. Use only the parts and hardware provided by Badger Basket®. Do not use the product if it is damaged, broken, or missing parts. DO NOT allow anyone to climb, sit on, stand on, or play on or inside of this product.
- Page 3 LEFT SIDE RIGHT SIDE CENTER SHELF TOP SHELF C×2 LARGE BASKET BOTTOM SHELF RIGHT DIVIDER LEFT DIVIDER BODY F×3 G×3 H×2 LARGE BASKET SMALL BASKET BOTTOM SMALL BASKET BOTTOM CENTER TOE KICK I×2 J×2 K×2 LARGE SCREW TOE KICK SCREW LEFT TOE KICK RIGHT TOE KICK 5×50mm...
- Page 4 “SCREW THE PINS INTO THEIR CORRESPONDING HOLES ONLY AS DEEP AS THEIR THREADS FOR STEPS 2, 4 AND 6. INSERT THE CAMS INTO THEIR HOLES . SECURE THE CAM AROUND THE HEAD OF THE PIN BY TURNING CLOCKWISE UNTIL IT IS TIGHT.”...
- Page 5 Q×4 T×4 R×4 CAREFULLY TIP THE UNIT ONTO THE FRONT EDGE BEFORE ATTACHING A – LEFT SIDE. Q×4 P×6 S×8 O×8...
- Page 6 AFTER ATTACHING B – RIGHT SIDE - CAREFULLY TIP THE UNIT INTO THE UPRIGHT POSITION Q×4 S×8 O×8 ×2 ×2...


Need help?
Do you have a question about the 98812 and is the answer not in the manual?
Questions and answers