Fox digital Micron MX Receiver User Manual
Hide thumbs
Also See for digital Micron MX Receiver:
- User manual (2 pages) ,
- Quick start manual (21 pages)
Advertisement
Quick Links
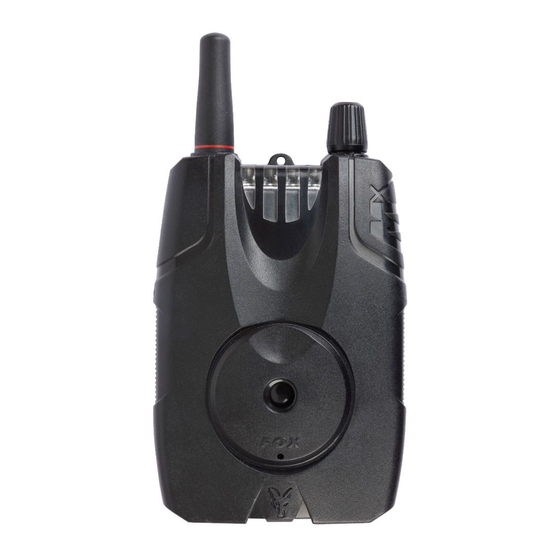
ENGLISH
Lanyard
Connection
High Quality
Cone Speaker
FITTING THE BATTERIES
STEP 1.
Turn o unit prior to tting or
replacing batteries.
STEP 2. Using a cross head
screwdriver unscrew the two
battery cover screws.
MICRON USER GUIDE
Power and
Volume Control
LED
Light Pipes
STEP 3.
Lift the up the battery cover
from the bottom corners to remove.
STEP 4.
Take care removing the batteries.
Insert new batteries and ensure
correct polarity.
DO NOT over tighten the battery compartment screws,
excessive force will damage the screw threads.
www.foxint.com
FEATURES
• Low Battery Drain
• I-Com®
• Digital Circuitry
• Weatherproof Sealed Case
• Easy Micron Registration
• Multicoulour LED's
Micron
Registration Button
STEP 5.
For best weatherproo ng, ensure
battery cover has a good seal by rmly
pushing lip into the top edge of the case
and pivoting it into position.
STEP 6.
Re- t cover and screws.
Advertisement

Subscribe to Our Youtube Channel
Related Manuals for Fox digital Micron MX Receiver


Summary of Contents for Fox digital Micron MX Receiver
- Page 1 ENGLISH www.foxint.com MICRON USER GUIDE Power and Volume Control Lanyard FEATURES Connection Light Pipes • Low Battery Drain • I-Com® • Digital Circuitry • Weatherproof Sealed Case • Easy Micron Registration • Multicoulour LED’s Micron High Quality Registration Button Cone Speaker FITTING THE BATTERIES STEP 1.
- Page 2 When the alarm low battery warning changes the microns LED colour to cyan (blue-green) the receiver will do You can register a warranty for this product online at the Fox website. Log in or create an account to start the registration process.
Need help?
Do you have a question about the digital Micron MX Receiver and is the answer not in the manual?
Questions and answers