Table of Contents
Advertisement
Quick Links
Advertisement
Table of Contents

Subscribe to Our Youtube Channel
Related Manuals for Wood-mizer Accuset 2


Summary of Contents for Wood-mizer Accuset 2
- Page 1 ACCUSET 2 OVERVIEW...
- Page 2 NEW FEATURES • Improved Accuracy • Improved Speed • Improved Display Screen and Larger Fonts • Improved Button Function and Feel • A Diagnostic Screen • Defaults to Manual Mode If Failure of Front Display, Transducer or Cables...
- Page 3 Basic operation of Accuset 2 has not changed. No need to learn a new system. A couple changes to Accuset 2 are: The removal of the Auto Bump Up Mode • The addition of Down Button/Inch Position • Memory Card/Future software Changes...
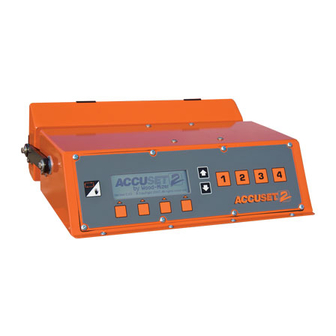
- Page 4 The Accuset 2 front panel looks the same.
- Page 5 It has a new boot up screen and an easier to read display. Does not dim in sunlight.
- Page 6 To adjust the contrast of the screen…..
- Page 7 Screen format is still the same. Manual screen….
- Page 8 Auto Down/Auto Up screen….
- Page 9 Pattern screen….
- Page 10 The increment, to change, is highlighted in black. The arrow shows head position as related to the last 6 cuts.
- Page 11 Accessing the Diagnostic screen. From the Manual screen, press the up arrow….
- Page 12 Then press the Other button….
- Page 13 Then the Diagnostic button….
- Page 14 The Diagnostic screen is displayed. You use the arrow buttons to scroll through the Diagnostic screen….
- Page 15 The H-Bridge….
- Page 16 DIAGNOSTICS...
- Page 17 The Front Panel diagnostic lights….
- Page 18 The Front Panel diagnostic lights….
- Page 19 The Front Panel diagnostic lights….
- Page 20 The H-Bridge diagnostic lights….
- Page 21 The H-Bridge diagnostic lights…. Key on.
- Page 22 The H-Bridge diagnostic lights…. Fault condition.
- Page 23 The H-Bridge diagnostic lights…. Transducer shorted.
- Page 24 The H-Bridge diagnostic lights…. Head UP command.
- Page 25 The H-Bridge diagnostic lights…. Head DOWN command.
- Page 26 The Dual Axis H-Bridge diagnostic lights….
- Page 27 The Dual Axis H-Bridge diagnostic lights…. The status light on a Dual Axis H-bridge used on an Accuset 2 without Dual Axis….is green with a momentary flashing red id everything is good. It is a red with a momentary flashing...
- Page 28 The Dual Axis H-Bridge diagnostic lights….
- Page 29 The Dual Axis H-Bridge diagnostic lights….
- Page 30 The Dual Axis H-Bridge diagnostic lights….
- Page 31 The Dual Axis diagnostic screen is different. You still use the arrow buttons to scroll through the Diagnostic screen….
- Page 32 Error Messages • Check Breaker and Cable • Transducer Error • Current Error...
- Page 33 Set-Up and Operation...
- Page 34 Button Functions…. Toggle button.
- Page 35 Button Functions…. Program buttons.
- Page 36 Button Functions…. Arrow button.
- Page 37 Button Functions…. Increment buttons.
- Page 38 Programming • Language • Gradient • 12 Inch • Kerf • Pid Values • Auto Down • Pattern...
- Page 39 Language….
- Page 40 Language….
- Page 41 Language….
- Page 42 Language….
- Page 43 Language….
- Page 44 Language….
- Page 45 Gradient number location….
- Page 46 Gradient ….
- Page 47 Gradient ….
- Page 48 Gradient ….
- Page 49 12 Inch …. • Set Blade Height • Adjust Blade Height Scale...
- Page 50 12 Inch ….
- Page 51 12 Inch ….
- Page 52 Kerf ….
- Page 53 Kerf ….
- Page 54 Kerf ….
- Page 55 PID Values...
- Page 56 PID Values DC Sawmills…. Electric LT70 PID’s are: Up Ticks Up Distance 17000 Up Minimum Down Ticks Down Distance 17000 Dowm Minimum 2...
- Page 57 Auto Down….
- Page 58 Auto Down….
- Page 59 Auto Down….
- Page 60 Pattern….
- Page 61 Pattern….
- Page 62 Pattern….
- Page 63 Pattern….
- Page 64 Pattern….
- Page 65 Pattern….
- Page 66 Units of Measure….
- Page 67 Units of Measure….
- Page 68 Questions...
Need help?
Do you have a question about the Accuset 2 and is the answer not in the manual?
Questions and answers