
Related Manuals for Molecular Devices GenePix 4300A

Summary of Contents for Molecular Devices GenePix 4300A
- Page 1 GenePix 4300A/4400A ® High-Resolution Microarray Scanner User Guide 0112-0173 B October 2010...
- Page 2 Molecular Devices equipment, software, reagents, and consumables. This document is copyright protected and any reproduction of this document, in whole or any part, is strictly prohibited, except as Molecular Devices may authorize in writing. Software that may be described in this document is furnished under a license agreement.
- Page 3 GenePix Microarray Scanner User Guide Licensing Notice Molecular Devices is not licensed under any patents owned by Oxford Gene Technology Limited (“OGT”), covering oligonucleotide arrays and methods of using them to analyze polynucleotides. The purchase of Molecular Devices products does not convey any license under any of OGT’s patent rights, including any right to make or use oligonucleotide...
- Page 4 0112-0173 B...
-
Page 5: Table Of Contents
Contents Foreword ........7 Who This Manual Is For . - Page 6 Contents Appendix A Warranty and Service ....35 Standard Warranty ......35 Out-of-Warranty Repair Service .
-
Page 7: Foreword
Note: Provides essential information for the completion of a procedure. Related Documentation The customer documentation for the GenePix 4300A/4400A Microarray Scanner includes the GenePix Pro Software Reference Guide, Safety ®... - Page 8 Foreword 0112-0173 B...
-
Page 9: Chapter 1 Introduction
Introduction The GenePix 4300A/4400A Microarray Scanner uses a laser-excitation ® based fluorescence scanning and imaging system. The laser-based scanning system uses a patent-pending mechanical design, and operates by slowly moving the slide in the Y–direction, while the slide is rapidly scanned in the X–direction. The design of the scanner allows scanning up to four wavelengths of a 25 mm by 75 mm slide at: •... -
Page 10: Scanner Components
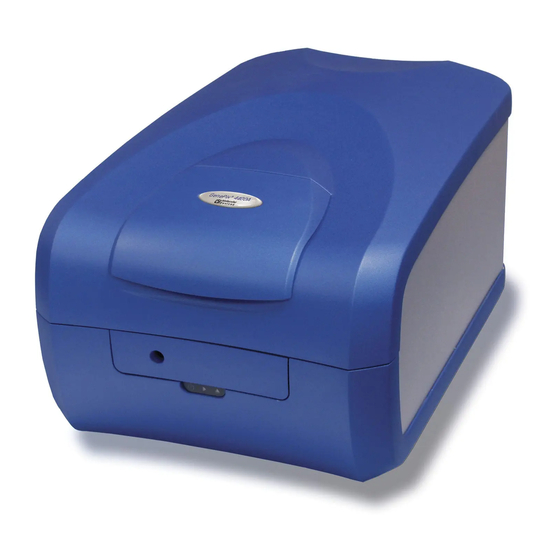
Introduction Scanner Components The main components of the GenePix 4300A/4400A Microarray Scanner are: • Protective enclosure • Optics • Lasers • Optical Path • Emission Filters • PMT (photo-multiplier tube) • Status lights Figure 1-1 GenePix 4300A/4400A Microarray Scanner Protective enclosure The protective enclosure protects the user from exposure to laser radiation, high voltage, and moving parts. -
Page 11: Optics
GenePix Microarray Scanner User Guide Optics The GenePix 4300A/4400A Microarray Scanner uses a laser-excitation based fluorescence scanning and imaging system. The optical system can be considered in terms of excitation light, mirrors, lenses, filters, and photo-detection. Lasers In the GenePix 4300A/4400A Microarray Scanner standard configuration, laser excitation is provided by individual 532 nm and 635 nm lasers. -
Page 12: Emission Filters
Introduction Emission Filters The GenePix 4300A/4400A Microarray Scanner is available in standard configuration with either two or four lasers. The scanner can be custom configured with one to four lasers. Each laser (red, yellow, green, and blue) includes a matching emission filter pre-installed in the sixteen- position filter cartridge. -
Page 13: Status Lights
GenePix Microarray Scanner User Guide Status Lights Three lights on the front of the GenePix 4300A/4400A Microarray Scanner indicate status. • Device standby • Scanning • Eject Table 1-1 Status lights Item Name Description Device standby The scanner is powered up and ready to scan a... -
Page 14: Scanner Specifications
Introduction Scanner Specifications Table 1-2 Specifications Sample type Standard microscope slides (1 inch by 3 inches, 25 mm by 75 mm; 0.9 to 1.2 mm thick) Maximum scan area 22 mm by 72 mm Maximum resolution 5 m for the 4300A, 2.5 m for the 4400A Scan mode and Sequential scan of user-configured wavelengths order... -
Page 15: Site Requirements
GenePix Microarray Scanner User Guide Site Requirements Table 1-3 Site Requirements Temperature 50 to 86º F (15 to 30º C) Humidity 5 to 95% non-condensing Power Universal input 50 to 60 Hz, 100 to 240 VAC, 2A max Space 25.6 inches deep by 16.9 inches wide by 13.4 inches high (65 cm by 43 cm by 34 cm). - Page 16 Introduction 0112-0173 B...
-
Page 17: Chapter 2 Installation
Insert a slide Unpacking the scanner and positioning it on the bench The GenePix 4300A/4400A Microarray Scanner is packed in a specially designed crate. Retain the crate and the packing materials. In the event the scanner requires repair, you must return it to Molecular Devices in the original packaging. - Page 18 Installation To unpack the scanner and position it on the bench 1. Open the crate and remove any foam blocks used to protect the scanner from excessive shock and vibration during shipping. CAUTION! Do not touch or loosen any screws or parts other than those specifically described in the instructions.
- Page 19 USB type B port 4. Plug the mains power cable into the port on the back of the scanner, and the lab’s power outlet. Molecular Devices recommends you use a surge protector between the mains power cable and the power outlet. 0112-0173 B...
-
Page 20: Installing The Software
Installation Installing the Software Before operating the scanner, you must install the GenePix Pro Microarray Software on a Windows based control computer. To install the software 1. Locate the GenePix Pro Software CD. Note: You must be fully aware of the information contained in the GenePix Pro Software Reference Guide to ensure a ®... -
Page 21: Turning On The Scanner
2. Turn on the scanner power switch. 3. Turn on the control computer. 4. Click Start > Programs > Molecular Devices > GenePix Pro, and then click the Report tab. 5. Click Functional Checkout, and follow the steps in the Wizard. - Page 22 Installation Table 2-3 Slider holder Name Description Slide door In raised position Slide holder In load position Slide Place feature-side down Barcode Barcode is facing the front of the scanner 3. Close the slide door. The slide holder moves into the scan position. 0112-0173 B...
-
Page 23: Shutting Down The Scanner
GenePix Microarray Scanner User Guide Shutting Down the Scanner Proper shutdown of the GenePix 4300A/4400A Microarray Scanner ensures the scanner or software are not damaged. To shut down the scanner 1. Close the GenePix Pro Software. 2. Turn off the scanner power switch. - Page 24 Installation 0112-0173 B...
-
Page 25: Chapter 3 Maintenance & Troubleshooting
WARNING! Biohazardous Material. It is your responsibility to decontaminate the scanner, as well as any accessories, before requesting service from Molecular Devices representatives, or before returning the scanner or any components to Molecular Devices. WARNING! Biohazardous Material. Never perform any maintenance procedures on the scanner in an environment where potentially damaging gases or liquids are present. -
Page 26: Moving The Scanner
Moving the Scanner If the GenePix 4300A/4400A Microarray Scanner must be moved within the lab, or returned to Molecular Devices for service, the scanner must be prepared for transport. If you do not have the original shipping crate, contact Molecular Devices and a new crate can be provided for an additional charge. -
Page 27: Installing Custom Filters
8. If the scanner is to be moved within the lab or returned to Molecular Devices for service, pack the scanner in its original shipping crate. Otherwise, have two people lift the scanner or place it on a rolling cart to transport it to the new location. - Page 28 Maintenance & Troubleshooting To install custom filters 1. Turn off the power switch on the scanner. 2. Insert the 5/32 inch Allen wrench into the filter door latch, turn the wrench counterclockwise to release the latch, and then pull the filter door down. Table 3-1 Filter door Item Name Filter door...
- Page 29 GenePix Microarray Scanner User Guide 3. Use the handle to pull the filter cartridge from the scanner. Table 3-2 Filter cartridge Item Name Description Filter cartridge Filter cartridge handle Filter door In open position 4. Rotate the filter wheel until an open access port is visible in the top of the filter cartridge.
- Page 30 5. Record the filter position in the GenePix Pro Software. See record the filter information on page 33. Note: If using a filter not supplied by Molecular Devices, consult the manufacturer’s documentation in order to determine the correct filter orientation.
- Page 31 GenePix Microarray Scanner User Guide 6. Place the filter in the access port with the orientation arrow on the filter pointing down. Make sure the filter is seated properly. Table 3-4 Filter arrow pointing down into access port Item Name Description Filter Lower filter into access port with...
- Page 32 Maintenance & Troubleshooting 8. Insert the filter ring tool into the access port, making sure it locks into the grooves on the filter ring, and then rotate the filter ring tool clockwise to tighten the filter ring down onto the filter. Table 3-5 Filter, filter ring, and filter ring tool Item Name Description...
- Page 33 To record the filter information 1. Turn on the scanner power switch. 2. Turn on the control computer. 3. Click Start > Programs > Molecular Devices > GenePix Pro > Filter Tool. The Filter Tool for GenePix 4300A/4400A window appears 4.
-
Page 34: Interlock Failure Symptoms
Fuses If the GenePix 4300A/4400A Microarray Scanner does not start up, a fuse may no longer be functioning. If you suspect a fuse has stopped functioning, contact Molecular Devices Technical Support. - Page 35 Warranty and Service Molecular Devices is committed to ensuring the highest quality of our products and customer service. If you have any problems with your GenePix 4300A/4400A Microarray ® Scanner, contact our Technical Support group. In the U.S., contact us at 1-800-635-5577.
- Page 36 Once you register your name, you can then register your instrument. If you require advice on the use of your GenePix 4300A/4400A Microarray Scanner, do not hesitate to contact Molecular Devices Technical Support. Visit the website http://support.moleculardevices.com...
Need help?
Do you have a question about the GenePix 4300A and is the answer not in the manual?
Questions and answers