Advertisement
Quick Links
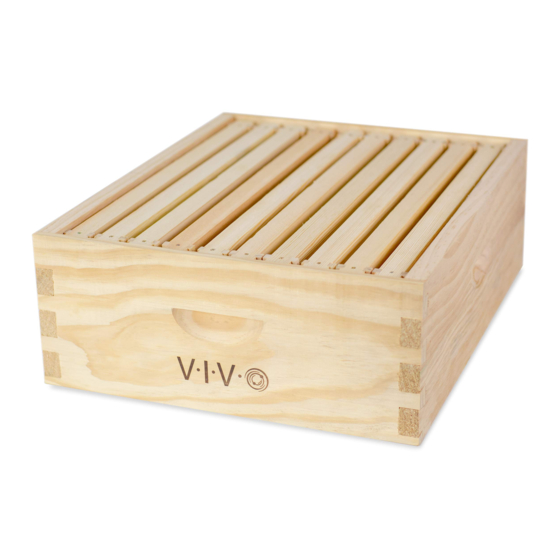
Shallow Super Beehive Box
Instruction Manual
SKU: BEE-HV02
Scan the QR code with your mobile device or follow the link
for helpful videos and specifications related to this product.
https://vivo-us.com/products/bee-hv02
GET IN TOUCH | Monday-Friday from 7:00am-7:00pm CST
help@vivo-us.com
www.vivo-us.com
Chat live with an agent!
309-278-5303
Advertisement

Subscribe to Our Youtube Channel
Related Manuals for Vivo BEE-HV02

Summary of Contents for Vivo BEE-HV02
- Page 1 Shallow Super Beehive Box Instruction Manual SKU: BEE-HV02 Scan the QR code with your mobile device or follow the link for helpful videos and specifications related to this product. https://vivo-us.com/products/bee-hv02 GET IN TOUCH | Monday-Friday from 7:00am-7:00pm CST help@vivo-us.com www.vivo-us.com...
-
Page 2: Package Contents
WARNING: IMPORTANT SAFETY INFORMATION READ AND FOLLOW ALL SAFETY REQUIREMENTS KEEP THIS MANUAL IN A SAFE AND DRY PLACE FOR FUTURE REFERENCE If you do not understand these directions, or if you have any doubts about the safety of the installation, please call a qualified technician. - Page 3 ASSEMBLY STEPS: Hive Boxes STEP 1 Option A: Assembling Without Nails After gathering the tools and package contents, dry fit the 2 side panels and 2 end panels (B1 & B2) together to make a box. Use a hammer and block or rubber mallet to secure tightly.
- Page 4 STEP 2 OPTION 2: Assembling With Nails The super can be nailed together but is not re- quired. Pre-drill holes in the center of each “leg” of the pre-cut joint to prevent wood splitting. Then hammer in one nail (B3) at a time. Check to make sure box is still aligned every so often.
- Page 5 STEP 2 Insert plastic foundation (F4) into the groove of the top bar. STEP 3 Put a small dab of wood glue on each ends of the end panel. Attach the bottom bar (F5) into the final notches of the frame. Push down until the fit is snug. Bottom Bar View from Bottom...
- Page 6 STEP 4 Place two gray nails (F3) at one end of the top bar, spaced evenly, and hammer into the end panels. Hammer another two gray nails on the opposite end of the top frame bar in same manner. Aerial View of Top Bar with 2 long Side View of nails nailed down...
-
Page 7: Warranty
ASSEMBLY STEPS: Stack Hive STEP 1 Now that you have assembled the boxes and frames, place the frames in the boxes. Push the frames together in the middle. Optional Step: Hammer the bottom board to the bottom of the deep box using spare nails left in the package to secure hive when transporting or during heavy winds. - Page 8 - 92% within < 3hr www.vivo-us.com : < 15 M AVG. RESOLUTION TIME (within office hrs) Chat live with an agent! : 5M 4S 309-278-5303 AVG. RESOLUTION TIME (within office hrs) FOR MORE VIVO PRODUCTS, CHECK OUT OUR WEBSITE AT: www.vivo-us.com...
Need help?
Do you have a question about the BEE-HV02 and is the answer not in the manual?
Questions and answers