Table of Contents
Advertisement
Quick Links
Quick Installation Guide
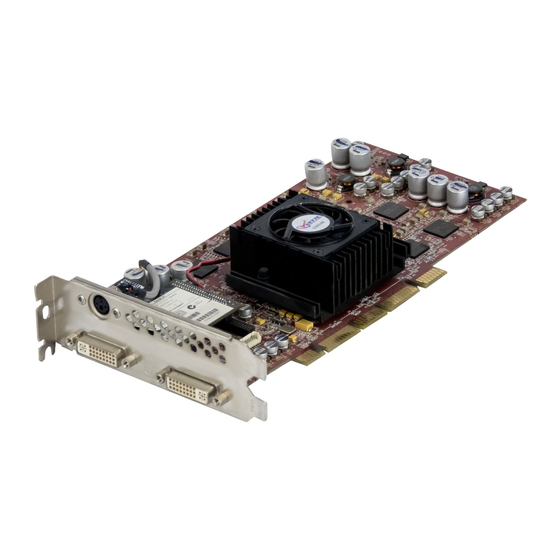
Congratulations
You are now the owner of a high-performance ATI FireGL™ workstation graphics accelerator. This guide provides a quick
overview of the steps required to install your new graphics card. Complete documentation for your FireGL card is available
as an Portable Document Format (PDF) file on the FireGL driver CD, or available for download at www.ati.com/FireGL.
Register Online
To activate your warranty and become eligible for customer service, please register your FireGL product on the ATI web
site at www.ati.com/FireGL. To complete the product registration, you will need to know the part number of FireGL card you
purchased, and the serial number. These numbers are listed on a sticker on the back of the card, and on the box. For
future reference, write this information in the space provided below before installing the card:
Part Number: __________________ Serial Number: ____________________ Purchase Date: ___________________
Installation Requirements
•
Workstation with a free AGP slot (AGP Pro required for FireGL X1-256p)
•
128MB of system memory (256MB recommended for better performance)
•
CD-ROM drive or Internet connection for software driver installation
•
Supported operating systems:
- Windows® 2000 with Service Pack 1 (or higher) or Windows® XP
- Linux XFree86 4.2.0, XFree86 4.3.0
Installing the Card
1.
Turn off your workstation and monitor(s).
2.
Disconnect any existing monitor cable(s) from the
back of your workstation.
3.
Remove the workstation cover. If necessary, consult
your workstation manual for assistance.
4.
Discharge any static electricity by touching the metal
surface of the workstation chassis.
5.
Remove any existing graphics card(s) from your
workstation. Save the screw used to secure the card.
6.
Locate the AGP or AGP PRO slot, and if necessary,
remove the metal cover from the slot. Save the screw.
7.
Align your FireGL card with the AGP or AGP Pro slot,
then press it in firmly until the card is fully seated.
When handling the card, hold it by its edges, and
avoid touching its circuitry.
8.
Replace the screw on the top of bracket to fasten the
card in place.
Connecting Power to the Card
Due to their parallel processing architecture, some ATI
graphics accelerators require more power than the average
graphics card. These AGP FireGL accelerators include a
power cable with three connectors.
1.
With your workstation still turned off, locate the cable
connecting the power supply to the hard disk drive or
CD-ROM drive, and disconnect it at the drive.
2.
Attach the small connector (A) of the supplied cable
to the FireGL card in the upper right hand corner.
3.
Attach the middle connector (B) of the supplied cable
to the cable that was disconnected in step 1.
4.
Attach the remaining end connector (C) to the drive
that was disconnected in step 1.
5.
Replace the cover of your workstation.
Note: The FireGL X1-256p uses the AGP Pro slot, so
no additional power cable is required.
www.ati.com/FireGL
Note: The bracket of the FireGL X1-256p covers the
slot next to the AGP Pro slot, so the adjoining metal
cover will also need to be removed.
™
B
B
C
C
A
A
HARD DRIVE
HARD DRIVE
Advertisement
Table of Contents

Subscribe to Our Youtube Channel
Related Manuals for ATI Technologies FIRE GL X1-256


Summary of Contents for ATI Technologies FIRE GL X1-256
- Page 1 ™ Quick Installation Guide www.ati.com/FireGL Congratulations You are now the owner of a high-performance ATI FireGL™ workstation graphics accelerator. This guide provides a quick overview of the steps required to install your new graphics card. Complete documentation for your FireGL card is available as an Portable Document Format (PDF) file on the FireGL driver CD, or available for download at www.ati.com/FireGL.
- Page 2 Copyright © 2003 All rights reserved. No reproduction of this document in any form is permitted without prior written authorization from ATI Technologies Inc. All registered trademarks are the property of their respective owners.
Need help?
Do you have a question about the FIRE GL X1-256 and is the answer not in the manual?
Questions and answers