
Related Manuals for Makita XPK02


Summary of Contents for Makita XPK02
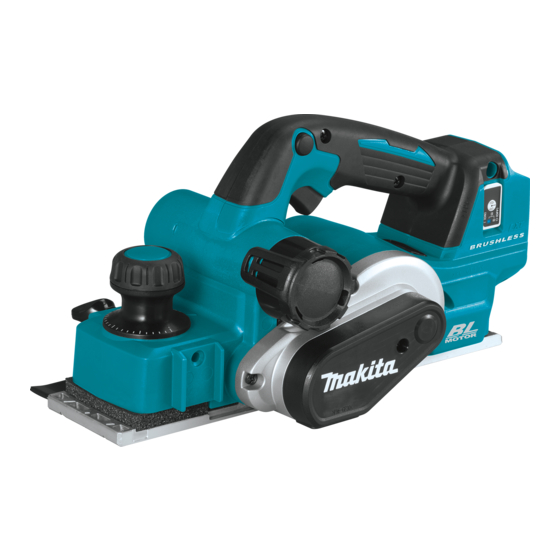
- Page 1 INSTRUCTION MANUAL MANUAL DE INSTRUCCIONES Cordless Planer Cepillo Inalámbrico XPK02 IMPORTANT: Read Before Using. IMPORTANTE: Lea antes de usar.
-
Page 2: Specifications
ENGLISH (Original instructions) SPECIFICATIONS Model: XPK02 Rated voltage D.C. 18 V Planing width 82 mm (3-1/4") Planing depth 3 mm (1/8") Shiplapping depth 25 mm (1") No load speed 12,000 /min Overall length 366 mm (14-3/8") Net weight 3.3 - 3.6 kg (7.3 - 7.9 lbs) •... - Page 3 Personal Safety Maintain power tools and accessories. Check for misalignment or binding of moving parts, break- Stay alert, watch what you are doing and use age of parts and any other condition that may common sense when operating a power tool. affect the power tool’s operation.
- Page 4 MISUSE or failure to follow the safety rules stated causing fires, personal injury and damage. It will in this instruction manual may cause serious also void the Makita warranty for the Makita tool and personal injury. charger. 4 ENGLISH...
- Page 5 25. When storing the wireless unit, keep it in the supplied case or a static-free container. Do not disassemble or tamper with the wire- 26. Do not insert any devices other than Makita less unit. wireless unit into the slot on the tool.
-
Page 6: Functional Description
Overheat protection FUNCTIONAL DESCRIPTION When the tool is overheated, the tool stops automati- cally, and the battery indicator blink about 60 seconds. CAUTION: Always be sure that the tool is In this situation, let the tool cool down before turning the switched off and the battery cartridge is removed tool on again. -
Page 7: Adjusting Depth Of Cut
Electric brake This tool is equipped with an electric brake. If the tool consistently fails to quickly stop after the switch trigger is released, have the tool serviced at a Makita service center. 7 ENGLISH... -
Page 8: Removing Or Installing Planer Blades
Use gloves or rags to protect your fingers or hands when removing or installing the blades. Overload CAUTION: Use only the Makita wrench pro- alert vided to remove or install the blades. Failure to do so may result in overtightening or insufficient tighten- ing of the installation bolts. - Page 9 For tool with conventional planer Tighten two screws on the adjusting plate while the adjusting plate being pressed. blades To remove the conventional planer blades from the tool, unscrew the installation bolts with the box wrench. The drum plate and the conventional planer blade with adjusting plate come off.
- Page 10 For tool with mini planer blades Loosen the screws one turn on the adjusting plate. To remove the mini planer blades from the tool, loosen the installation bolts one turn with the box wrench. ► 1. Screw 2. Adjusting plate 3. Set plate Clean out all chips or foreign matter adhering to the set plate with adjusting plate and the mini ►...
- Page 11 Slip the heel of the adjusting plate into the groove of the drum. ► 1. Drum groove 2. Heel 3. Drum plate 4. Installation bolt Screw all the installation bolts with the box wrench. Then install the mini planer blade. For the correct planer blade setting Your planing surface will end up rough and uneven, unless the blade is set properly and securely.
- Page 12 ► 1. Fastener NOTE: If you connect a Makita vacuum cleaner to this tool, more efficient and cleaner operations can be ► 1. Stopper performed.
-
Page 13: Planing Operation
Elbow Shiplapping (Rabbeting) Optional accessory Use of elbow allows change of chip discharge direction to perform cleaner work. Insert the elbow into the chip discharge opening. To remove it, just pull it out. To make a stepped cut as shown in the figure, use the edge fence (guide rule). - Page 14 NOTICE: The blade edge should be made to protrude outside slightly (0.2 - 0.4 mm(1/64")) for shiplapping. 0.2-0.4mm(1/64”) ► 1. V groove (medium amount of chamfering) 2. V groove (small amount of chamfering) 3. V groove (great amount of chamfering) Use of chamfering rule (optional accessory) assures more tool stability when chamfering.
- Page 15 Open the lid on the tool as shown in the figure. WIRELESS ACTIVATION FUNCTION What you can do with the wireless activation function The wireless activation function enables clean and com- fortable operation. By connecting a supported vacuum cleaner to the tool, you can run the vacuum cleaner automatically along with the switch operation of the tool.
- Page 16 Tool registration for the vacuum cleaner NOTE: A Makita vacuum cleaner supporting the wireless activation function is required for the tool registration. NOTE: Finish installing the wireless unit to the tool before starting the tool registration.
- Page 17 Connect the hose of the vacuum cleaner with the tool. NOTE: The wireless activation lamp on the tool will stop blinking in blue when there is no operation for 2 hours. In this case, set the stand-by switch on the vacuum cleaner to "AUTO"...
- Page 18 Description of the wireless activation lamp status ► 1. Wireless activation lamp The wireless activation lamp shows the status of the wireless activation function. Refer to the table below for the meaning of the lamp status. Status Wireless activation lamp Description Color Duration...
- Page 19 If the cancellation is performed successfully, the wire- Cancelling tool registration for the less activation lamps will light up in red for 2 seconds vacuum cleaner and start blinking in blue. NOTE: The wireless activation lamps finish blinking in Perform the following procedure when cancelling the red after 20 seconds elapsed.
- Page 20 Before asking for repairs, conduct your own inspection first. If you find a problem that is not explained in the manual, do not attempt to dismantle the tool. Instead, ask Makita Authorized Service Centers, always using Makita replace- ment parts for repairs.
-
Page 21: Maintenance
To maintain product SAFETY and RELIABILITY, repairs, any other maintenance or adjustment should be performed by Makita Authorized or Factory Service Centers, always using Makita replacement parts. Chip discharge opening cleaning Clean the chip discharge opening regularly. -
Page 22: Especificaciones
ESPAÑOL (Instrucciones originales) ESPECIFICACIONES Modelo: XPK02 Tensión nominal 18 V c.c. Ancho de cepillado 82 mm (3-1/4″) Profundidad de cepillado 3 mm (1/8″) Profundidad de rebajado 25 mm (1″) Velocidad sin carga 12 000 r/min Longitud total 366 mm (14-3/8″) - Page 23 No maltrate el cable. Nunca utilice el cable Si dispone de dispositivos para la conexión de para transportar, jalar o desconectar la herra- equipos de extracción y recolección de polvo, mienta eléctrica. Mantenga el cable alejado del asegúrese de conectarlos y utilizarlos debida- calor, aceite, objetos cortantes o piezas móvi- mente.
- Page 24 útil de la herramienta. herramienta eléctrica utilizando sólo piezas de repuesto idénticas. Esto asegura que se man- 16. Utilice sólo las cuchillas Makita especificadas tenga la seguridad de la herramienta eléctrica. en este manual. Nunca dé servicio a baterías que estén daña- 17.
- Page 25 Si el tiempo de operación se ha acortado en lesiones personales y daños. Asimismo, esto inva- exceso, deje de operar de inmediato. Podría lidará la garantía de Makita para la herramienta y el correrse el riesgo de sobrecalentamiento, cargador Makita.
-
Page 26: Descripción Del Funcionamiento
26. No inserte ningún otro dispositivo que no sea Utilice la unidad inalámbrica solamente con la unidad inalámbrica de Makita en la ranura de herramientas de Makita. la herramienta. No exponga la unidad inalámbrica a la lluvia ni 27. -
Page 27: Protección Contra Sobrecarga
Para quitar el cartucho de batería, deslícelo de la herra- Indicación de capacidad restante de la batería mienta mientras desliza el botón sobre la parte delan- tera del cartucho. Si jala el gatillo interruptor, el indicador de batería mos- Para colocar el cartucho de batería, alinee la lengüeta trará... -
Page 28: Ajuste De La Profundidad De Corte
Lleve la herramienta a un centro de servicio Makita para las reparaciones NOTA: Dependiendo de las condiciones de uso y apropiadas ANTES de continuar su uso. la temperatura ambiente, la indicación podrá diferir El botón de desbloqueo es suministrado para evitar... - Page 29 Función de cambio de velocidad automática Después de la operación de corte, eleve el lado poste- rior de la herramienta de manera que el pie por debajo Esta herramienta cuenta con “modo de alta velocidad” y del nivel de la base trasera. Esto evita que las cuchillas “modo de alta torsión”.
- Page 30 PRECAUCIÓN: Utilice sólo la llave Makita provista para extraer o instalar las cuchillas. El no hacerlo podría hacer que los pernos de instalación quedaran demasiado apre- tados o no lo suficiente. Esto podría además causar lesiones.
- Page 31 Apriete todos los pernos de instalación de manera Afloje los tornillos una vuelta en la placa de ajuste. uniforme y alternada con la llave de bujías. Repita los procedimientos anteriores para la otra cuchilla del cepillo convencional. Para herramienta con minicuchillas del cepillo Para extraer las minicuchillas del cepillo de la herramienta, afloje los pernos de instalación una...
- Page 32 Deslice el talón de la placa de ajuste hacia la ranura del tambor. ► 1. Ranura del tambor 2. Talón 3. Placa del tambor 4. Perno de instalación Atornille todos los pernos de instalación con la llave de bujías. Posteriormente instale la minicuchilla del cepillo. Colocación correcta de la cuchilla del cepillo Su superficie de cepillado quedará...
- Page 33 ► 1. Parte rebajada 2. Protuberancia ► 1. Sujetador NOTA: Si conecta un aspirador Makita a esta herra- mienta, podrá realizar operaciones más eficaces y limpias. 33 ESPAÑOL...
-
Page 34: Operación
Cuando desee realizar una operación de cepillado con lim- dad que no provocará atascos con las astillas. Para cortes pieza, conecte una aspiradora de Makita a la herramienta. ásperos, se puede aumentar la profundidad de corte, mien- Conecte la manguera de la aspiradora a la abertura de tras que para un buen acabado debe reducir la profundidad descarga para astillas, tal como se muestra en la figura. - Page 35 Al cepillar, mueva la herramienta con la guía lateral Achaflanado alineada con la parte lateral de la pieza de trabajo. De lo contrario, obtendrá un cepillado disparejo. Para realizar un corte de achaflanado como se muestra en la figura, alinee una de las tres ranuras "V" en frente de la herramienta con el borde de la pieza de trabajo y cepíllela.
- Page 36 Al estar realizando una gran cantidad de achaflanado, Instalación de la unidad inalámbrica coloque el borde de la regla de achaflanado de tal forma que haga contacto con la pieza de trabajo y Accesorio opcional realice muchas pasadas de cepillado como se muestra en la figura.
- Page 37 Registro de la herramienta para la aspiradora NOTA: Para el registro de la herramienta, se requiere una aspiradora Makita compatible con la función de activación inalámbrica. NOTA: Termine de instalar la unidad inalámbrica en la herramienta antes de comenzar con el registro de la herramienta.
- Page 38 Oprima el botón de activación inalámbrica en la NOTA: Las luces indicadoras de activación inalám- herramienta durante un lapso breve. La luz indicadora brica terminarán parpadeando en verde después de de activación inalámbrica parpadeará en azul. un lapso de 20 segundos. Oprima el botón de acti- vación inalámbrica en la herramienta mientras la luz indicadora de activación inalámbrica en la aspiradora esté...
- Page 39 Descripción del estado de la luz indicadora de activación inalámbrica ► 1. Luz indicadora de activación inalámbrica La luz indicadora de activación inalámbrica muestra el estado de la función de activación inalámbrica. Consulte la tabla a continuación para ver qué significa el estado de la luz indicadora. Estado Luz indicadora de activación inalámbrica Descripción...
- Page 40 Si la cancelación se realiza exitosamente, las luces Cancelación del registro de la indicadoras de activación inalámbrica se encenderán herramienta para la aspiradora en rojo durante 2 segundos y comenzarán a parpadear en azul. Realice el siguiente procedimiento para cancelar el NOTA: Las luces indicadoras de activación inalám- registro de la herramienta para la aspiradora.
- Page 41 Antes de solicitar alguna reparación, primero realice una inspección por su cuenta. Si detecta algún problema que no esté explicado en el manual, no intente desensamblar la herramienta. En vez de esto, solicite la reparación a un centro de servicio autorizado de Makita, usando siempre piezas de repuesto Makita. Estado de la anomalía Causa probable (avería)
-
Page 42: Mantenimiento
Siempre mantenga afiladas las cuchillas para lograr el de servicio autorizados o de fábrica Makita, empleando mejor desempeño posible. Utilice el soporte para afi- siempre repuestos Makita. -
Page 43: Accesorios Opcionales
Ensamble de regla para biselado • Unidad inalámbrica • Batería y cargador originales de Makita NOTA: Algunos de los artículos en la lista pueden incluirse en el paquete de la herramienta como acce- sorios estándar. Éstos pueden variar de país a país. - Page 44 Para reducir la exposición a estos productos químicos: trabaje en un área bien ventilada y póngase el equipo de seguridad indicado, tal como las máscaras contra polvo que están especialmente diseñadas para filtrar partículas microscópicas. Makita Corporation 3-11-8, Sumiyoshi-cho, Anjo, Aichi 446-8502 Japan 885743-940...
Need help?
Do you have a question about the XPK02 and is the answer not in the manual?
Questions and answers