Chapters
Table of Contents

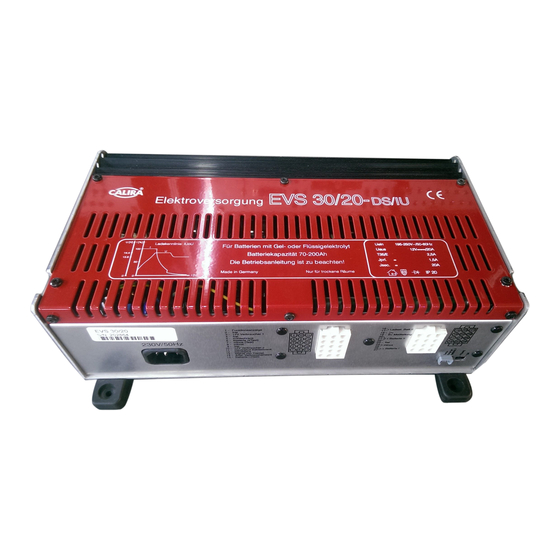
Related Manuals for Calira EVS 30/20-DS/IU


Summary of Contents for Calira EVS 30/20-DS/IU
- Page 1 Betriebsanleitung Operating Instructions Mode d´emploi Electric-System EVS 30/20-DS/IU EVS 30/30-DS/IU Lerchenfeldstr. 9 87600 Kaufbeuren Tel.: +49(0)8341 / 9764-0 Fax: +49(0)8341 / 67806...
-
Page 2: Table Of Contents
! "#$%# & $'( ) ! "#$"# & $'( Inhaltsverzeichnis Sicherheitshinweise ............3 Verwendungszweck............3 Beschreibung ..............4 Ladevorgang Versorgungsbatterie ......5 Ladevorgang Starterbatterie ........6 12 Volt Ausgänge............. 6 Technische Daten............8 Ladekennlinie............10 Montage ............... 10 Aufstellen ............... 11 Leitungslängen und Leitungsquerschnitte.... -
Page 3: Sicherheitshinweise
Ladegerät und einem Batterie- Trennautomaten. Sie dient der 12 Volt Stromverteilung Laden ausschließlich Volt Bleiakkumulatoren, bestehend aus 6 Einzelzellen (z.B. Autobatterie), mit einer Kapazität von 70 - 200 Ah bei der Elektroversorgung EVS 30/20-DS/IU und 100 - 300 Ah bei der Elektroversorgung EVS 30/30-DS/IU. Die Elektroversorgung universell einsetzbar für Dauerbetrieb, Lerchenfeldstr. -
Page 4: Beschreibung
! "#$%# & $'( ) ! "#$"# & $'( Parallelbetrieb und Pufferbetrieb ausgelegt. Das bevorzugte Einsatzgebiet der Elektroversorgung sind Batterien mit Gel- oder Flüssigelektrolyt. Die Elektroversorgung ist besonders für den Einsatz in Booten, Reisemobilen und Wohnwagen geeignet. Die Elektroversorgung darf nur in trockenen Räumen betrieben werden. -
Page 5: Ladevorgang Versorgungsbatterie
! "#$%# & $'( ) ! "#$"# & $'( wird eine besonders effektive und schonende Ladung der Batterie erreicht. Ohne Verwendung eines Temperaturfühlers regelt die Elektroversorgung den Ladevorgang wie bei einer Batterietemperatur von 20° C. Das Gerät ist für den Betrieb in einer Umgebungstemperatur bis 35° C ausgelegt. -
Page 6: Ladevorgang Starterbatterie
! "#$%# & $'( ) ! "#$"# & $'( Parallelbetrieb Wird während Nachladephase oder Erhaltungsladephase Verbraucherstrom entnommen, so wird dieser sofort nachgeladen. Ladevorgang Starterbatterie (Batterie I) Parallelschaltung Fahrbetrieb Im Fahrbetrieb wird die Starterbatterie (Batterie I) von der Lichtmaschine des Kraftfahrzeuges geladen. Solange die Lichtmaschine läuft und Spannung am Eingang D+ (Kontakt 18) der Elektroversorgungen anliegt, sind die Versorgungsbatterie Starterbatterie... - Page 7 ! "#$%# & $'( ) ! "#$"# & $'( Kühlschrank Bei laufendem Motor wird der Kühlschrank über die Lichtmaschine des Fahrzeuges versorgt. Das Kühlschrank-Relais trennt nach Abstellen des Motors den Kühlschrank (Kontakt 5) von der Versorgungsbatterie. Die Ansteuerung erfolgt über die Leitung vom D+ der Lichtmaschine (Kontakt 18). Ein Betrieb des Kühlschrankes mit 12 Volt ist somit nur während der Fahrt möglich.
-
Page 8: Technische Daten
Stromversorgung Wechselspannung 230 V / 50 Hz, einphasig Bereich ca. 195 V - 250 V / 50 – 60 Hz. Ausgangsstrom: Ladestrom EVS 30/20-DS/IU max. 20 A, Ladestrom EVS 30/30-DS/IU max. 30 A, (Ladestrom Batterie II) arithmetischer Mittelwert, elektronisch geregelt... - Page 9 Prüfzeichen: Verwendung Zum Laden von Batterien mit 12 V Nennspannung und einer Kapazität von 70 - 200 Ah und zur 12 V Stromver- EVS 30/20-DS/IU teilung. Verwendung Zum Laden von Batterien mit 12 V Nennspannung und einer Kapazität von 100 - 300 Ah und zur 12 V EVS 30/30-DS/IU Stromverteilung.
-
Page 10: Ladekennlinie
! "#$%# & $'( ) ! "#$"# & $'( Ladekennlinie HL = Hauptladephase NL = Nachladephase EL = Erhaltungsladephase Montage Sicherheitshinweise " Der Anschluss des Geräts an das Versorgungsnetzes muss in Übereinstimmung jeweils geltenden nationalen Installationsvorschriften vorgenommen werden. Dieses Gerät beinhaltet Bauteile, die möglicherweise Lichtbögen und Funken erzeugen. -
Page 11: Aufstellen
! "#$%# & $'( ) ! "#$"# & $'( Benutzen Sie zum Anschluss des Gerätes nur die mitgelieferten Teile sowie die vorgeschriebenen Leitungsquerschnitte und Sicherungen! Benutzen Sie nur geeignetes und einwandfreies Werkzeug. Schließen Sie das Gerät nur gemäß des mitgelieferten Anschlussplanes an! Aufstellen Den im Umkarton befindlichen Beipack (Zubehör) entnehmen und auf Vollständigkeit prüfen. -
Page 12: Leitungslängen Und Leitungsquerschnitte
! "#$%# & $'( ) ! "#$"# & $'( Wichtig Achten sie darauf, dass die Lüftungsschlitze frei bleiben! Der Mindestabstand soll rundum 100 mm betragen! Unzureichende Belüftung kann zur Überhitzung des Gerätes führen! Das Gerät ist für den Betrieb in einer Umgebungstemperatur bis 35°... -
Page 13: Montage Der Kontaktstifte
! "#$%# & $'( ) ! "#$"# & $'( Montage der Kontaktstifte Bereiten Sie die Anschlusskabel vor. Achten Sie darauf, dass die Kontaktstifte für den richtigen Leitungsquerschnitt fest auf die Kabelenden gepresst werden und sicher sitzen! Lose Kontakte können zum Kurzschluss sowie zu Kontaktproblemen führen. -
Page 14: Anschluss 15-Poliger Steckverbinder
! "#$%# & $'( ) ! "#$"# & $'( Anschluss 15-poliger Steckverbinder & ' " Die Abbildung (Bild 5) zeigt die im 15-poligen Steckver- binder zur Verfügung gestellten Kontakte. Schließen Sie den 15-poligen Steckverbinder laut Anschlussplan (Bild 6) an. Achten Sie darauf, dass die Kontaktstifte sicher im Steckverbinder einrasten! Lose Kontaktstifte können zu Fehlfunktionen oder zum Kurzschluss führen. -
Page 15: Anschluss 12-Poliger Steckverbinder
Kontakte 16 und 17 am Gerät und den Pluspol der Batterie II anschließen. Bei Leitungslängen über 1 m ist diese Leitung, nahe dem Pluspol der Batterie II, abzusichern! Bei der Elektroversorgung EVS 30/20-DS/IU mit einer 30 A Sicherung. Bei der Elektroversorgung EVS 30/30- Bild 7 DS/IU mit einer 40 A Sicherung. -
Page 16: Anschlussplan 12-Poliger Steckverbinder
! "#$%# & $'( ) ! "#$"# & $'( Die Leitung (braun 0,75 mm²) an den D+ Eingang Kontakt 18 am Gerät und den D+ Kontakt an der Lichtmaschine anschließen. Die Leitung ist, unbedingt nahe der Lichtmaschine, mit einer 2 A Sicherung abzusichern! Anschlussplan 12-poliger Steckverbinder "... -
Page 17: Anschluss Temperaturfühler
! "#$%# & $'( ) ! "#$"# & $'( Temperaturfühler Falls Sie einen Temperaturfühler für die Batterie II verwenden, kleben Sie den Temperaturfühler an die Stirnseite der Batterie II (Versorgungsbatterie). Hierzu entfernen Sie die Schutzfolie am Klebepunkt des Temperaturfühlers und drücken ihn kräftig auf die gewünschte Position an der Batterie II (siehe Beschreibung Temperaturfühler). - Page 18 Voraussetzungen Die Batterie muss eine Nennspannung von 12 Volt und eine Mindestkapazität von 70 Ah bei der EVS 30/20-DS/IU und von 100 Ah bei der EVS 30/30- DS/IU haben. Batterien unter dieser Mindestkapazität werden nur unzureichend geladen. Batterien mit einer zu hohen Kapazität werden zu langsam geladen.
-
Page 19: Wartungshinweise
Trautmann GmbH & CO. KG benen Störungen CALIRA- Apparatebau feststellen. Das Lerchenfeldstr. 9 Gerät arbeitet 87600 Kaufbeuren dennoch nicht. Telefon: +49(0)8341 976430 Fax: +49(0)8341 976470 Internet: www.calira.de E-Mail: service@calira.de Lerchenfeldstr. 9 87600 Kaufbeuren Tel.: +49(0)8341 / 9764-0 Fax: +49(0)8341 / 67806... -
Page 20: Instandsetzung
Beschreibung des Mangels unerlässlich. Detaillierte Hinweise erleichtern und beschleunigen die Bearbeitung. Service: Trautmann GmbH & Co. KG CALIRA-Apparatebau Lerchenfeldstrasse 9 D-87600 Kaufbeuren Telefon: +49(0)8341 976430 Fax: +49(0)8341 976470 Internet: www.calira.de E-Mail: service@calira.de Lerchenfeldstr. 9 87600 Kaufbeuren Tel.: +49(0)8341 / 9764-0 Fax: +49(0)8341 / 67806... - Page 21 ! "#$%# & $'( ) ! "#$"# & $'( Lerchenfeldstr. 9 87600 Kaufbeuren Tel.: +49(0)8341 / 9764-0 Fax: +49(0)8341 / 67806...
- Page 22 ! "#$%# & $'( ) ! "#$"# & $'( Table of contents Safety instructions ............23 Purpose ................ 23 Description..............24 Supply battery charging procedure ......25 Starter battery charging procedure ......26 12 volt outputs............26 Technical data.............. 28 Charging characteristic curve.........
-
Page 23: Safety Instructions
! "#$%# & $'( ) ! "#$"# & $'( Please read general safety information carefully! Attention! The following important safety instructions must be observed when using electric devices, as protection against electric shock, injury and fire hazard. Please read and follow these instructions before using the device. Setting up Please ensure that the device is placed securely and cannot fall down or tip over. -
Page 24: Description
! "#$%# & $'( ) ! "#$"# & $'( The power supply is particularly suitable for the use in boats, caravans and mobile homes. The power supply must only be operated in dry spaces. Inappropriate use The power supply must not be used to charge 6 volt lead batteries. If batteries with a rated voltage of 6 volt are charged with the power supply, gas production starts immediately and explosive oxyhydrogen gas is generated. -
Page 25: Supply Battery Charging Procedure
! "#$%# & $'( ) ! "#$"# & $'( The device is designed for operation in ambient temperatures of up to 35° C. If the temperature inside the device rises due to a lack of air circulation or due to high ambient temperature, the charging current is automatically reduced in steps. -
Page 26: Starter Battery Charging Procedure
! "#$%# & $'( ) ! "#$"# & $'( Starter battery charging procedure (battery I) Parallel circuit Driving operation During driving operation, the starter battery (battery I) is charged by the generator of the vehicle. As long as the generator is running and there is a voltage on the input D+ (contact 18) of the power supply, the supply battery and the starter battery are in parallel operation. - Page 27 ! "#$%# & $'( ) ! "#$"# & $'( vehicle is parked, the refrigerator can only be run on gas or mains voltage. This prevents the supply battery running down. For compressor refrigerators, the contact 11 is a permanent positive. Lerchenfeldstr.
-
Page 28: Technical Data
Alternating voltage 230 V / 50 Hz, single phase Range approx. 195 V - 250 V / 50 – 60 Hz. Output current: Charging current EVS 30/20-DS/IU max. 20 A, Charging current EVS 30/30-DS/IU max. 30 A, (Charging current for... - Page 29 For charging batteries with a rated voltage 12 V and a capacity of 70-200 Ah and for 12 V current distribution. EVS 30/20-DS/IU For charging batteries with a rated voltage 12 V and a capacity of 100-300 Ah and for 12 V current distribution.
-
Page 30: Charging Characteristic Curve
! "#$%# & $'( ) ! "#$"# & $'( Charging characteristic curve HL = Main charging phase NL = Post charging phase EL = Holding charge phase " " * " Assembly Safety instructions Connecting the device to the power supply must comply with the applicable national installation regulations. -
Page 31: Setting Up
! "#$%# & $'( ) ! "#$"# & $'( Only use suitable and undamaged tools. Only connect the device according to the supplied connection diagram! Setting up Remove the items packed separately (accessories) from the main carton, and check them for completeness. 1 connecting cable 230 V, 1 m. -
Page 32: Cable Lengths And Cross-Sections
! "#$%# & $'( ) ! "#$"# & $'( lack of air circulation or due to high ambient temperature, the charging current is automatically reduced in steps. Cable lengths and cross-sections Positive Length up to 3 m Length up to 6 m Length over charging cable Cable cross... -
Page 33: Assembling The Contact Pins
! "#$%# & $'( ) ! "#$"# & $'( Assembling the contact pins Prepare the connecting cable. Ensure that the contact pins for the correct cable cross-section are pressed firmly onto the cable ends, and are securely attached! Loose contacts may lead to short circuiting and to poor connection. Cable ends designed for use with wire-end sleeves must not be soldered. -
Page 34: Connecting A 15-Pole Plug Connector
! "#$%# & $'( ) ! "#$"# & $'( Connecting a 15-pole plug connector & The illustration (Fig. 5) shows the contacts available in the 15-pole plug connector. Connect the 15-pole plug connector according to the connection diagram (Fig. 6). Make sure that the contact pins engage securely with the plug connector! Loose contact pins can lead to malfunctions or short-circuiting. -
Page 35: Connecting A 12-Pole Plug Connector
! "#$%# & $'( ) ! "#$"# & $'( Insert the plug connector into the socket provided on the device. The plug connectors can only be inserted and locked into the correct socket and in the correct position. Make sure that the locking engages securely. To withdraw the connector plug, the locking must be released by pressing the two wings together. -
Page 36: Connection Diagram 12-Pole Plug Connector
! "#$%# & $'( ) ! "#$"# & $'( Connect the cable (brown 0.75 mm²) to the D+ input, contact 18 of the device and to the D+ contact of the generator. It is essential to install a 2 A fuse near the generator! Connection diagram 12-pole plug connector + * "+% % * ++$... -
Page 37: Connecting The Temperature Sensor
! "#$%# & $'( ) ! "#$"# & $'( Temperature sensor If you are using a temperature sensor for the battery II, stick the temperature sensor to the face of the battery II (supply battery). To do so, remove the protective plastic film from the sticking spot of the temperature sensor and press it firmly to the desired position at battery II (see description of temperature sensor). - Page 38 ! "#$%# & $'( ) ! "#$"# & $'( Before breaking or making direct-current connections, e.g. the charging cable at the battery, the device be switched off at the mains. Pull out the mains plug. Charging a battery Explosive gases (oxyhydrogen) are produced if charging is carried out with a short-circuited battery, or when the power supply is non-operational.
-
Page 39: Maintenance Instructions
Trautmann GmbH & CO. KG seems to apply. CALIRA-Apparatebau But the device still Lerchenfeldstr. 9 does not work. 87600 Kaufbeuren Telephone: +49(0)8341 976430 Fax: +49(0)8341 976470 Internet:www.calira.de e-mail: service@calira.de Lerchenfeldstr. 9 87600 Kaufbeuren Tel.: +49(0)8341 / 9764-0 Fax: +49(0)8341 / 67806... -
Page 40: Repairs
This facilitates and expedites the processing. Service: Trautmann GmbH & Co. KG CALIRA-Apparatebau Lerchenfeldstrasse 9 D-87600 Kaufbeuren Telephone: +49(0)8341 976430 Fax: +49(0)8341 976470 Internet: www.calira.de e-mail: service@calira.de Lerchenfeldstr. 9 87600 Kaufbeuren Tel.: +49(0)8341 / 9764-0 Fax: +49(0)8341 / 67806... - Page 41 ! "#$%# & $'( ) ! "#$"# & $'( Lerchenfeldstr. 9 87600 Kaufbeuren Tel.: +49(0)8341 / 9764-0 Fax: +49(0)8341 / 67806...
- Page 42 + ) ), ! "#$%# & $'( ! "#$"# & $'( Avant le raccordement et la mise en service de l’appareil, lire impérativement le mode d’emploi ! Table des matières Consignes de sécurité ..........43 Usage prévu ..............44 Description..............44 Processus de chargement de la batterie d’alimentation ............
-
Page 43: Consignes De Sécurité
+ ) ), ! "#$%# & $'( ! "#$"# & $'( Lire attentivement les consignes de sécurité générales ! Attention ! Pour se protéger des risques de choc électrique, de blessure et d’incendie, liés à l’utilisation d’appareils électriques, il est nécessaire de respecter les mesures de sécurité... -
Page 44: Usage Prévu
6 cellules indépendantes (par ex. batterie automobile), avec une capacité de 70 – 200 Ah au cas de l’alimentation électrique EVS 30/20-DS/IU et de 100 – 300 Ah au cas de l’alimentation électrique EVS 30/30-DS/IU. Cette alimentation électrique peut être utilisée de manière universelle et elle a été... -
Page 45: Processus De Chargement De La Batterie D'alimentation
+ ) ), ! "#$%# & $'( ! "#$"# & $'( avec ménagement et sans surcharge dommageable pour les batteries. Cela permet ainsi de prolonger considérablement la durée de vie des batteries. Après avoir réalisé le raccordement de la batterie et celui au réseau, l’alimentation électrique est en service. -
Page 46: Processus De Chargement De La Batterie De Démarrage
+ ) ), ! "#$%# & $'( ! "#$"# & $'( Phase de charge principale (toutes les valeurs de tension se basent sur une température de batterie de 20 °C) Charge avec le courant de charge constant maximum jusqu’à atteindre une tension de batterie de quasiment 14,4 Volts. -
Page 47: Sorties 12 Volts
+ ) ), ! "#$%# & $'( ! "#$"# & $'( d’alimentation est elle aussi chargée par l’alternateur. Si l’alimentation électrique n’a pas de tension à l’entrée D+, la connexion en parallèle est supprimée lorsque la tension tombe en dessous de 13,2 Volts. Alimentation par secteur (toutes les valeurs de tension se basent sur une température de batterie de 20 °C) - Page 48 + ) ), ! "#$%# & $'( ! "#$"# & $'( batterie d’alimentation est ainsi exclue. Pour les réfrigérateurs à compresseur, le plus permanent est disponible au contact 11. Lerchenfeldstr. 9 87600 Kaufbeuren Tel.: +49(0)8341 / 9764-0 Fax: +49(0)8341 / 67806...
-
Page 49: Caractéristiques Techniques
Plage de tension comprise entre 195 V et 250 V environ / 50 – 60 Hz. Courant de sortie : Courant de charge EVS 30/20-DS/IU max. 20 A, courant de charge EVS 30/30-DS/IU max. 30 A, (courant de charge moyenne arithmétique, à régulation électronique selon la batterie II) courbe caractéristique de charge... - Page 50 : Utilisation Pour le chargement de batteries avec une tension nominale de 12 V et une capacité de 70 - 200 Ah; pour la EVS 30/20-DS/IU distribution de tension 12 V. Utilisation Pour le chargement de batteries avec une tension nominale de 12 V et une capacité...
-
Page 51: Courbe Caractéristique De Chargement
+ ) ), ! "#$%# & $'( ! "#$"# & $'( Courbe caractéristique de chargement HL = phase de charge principale phase de charge NL = complémentaire phase de charge de maintien EL = "+ " , " Montage Consignes de sécurité Le raccordement de l’appareil au réseau d’alimentation doit être réalisé... -
Page 52: Installation
+ ) ), ! "#$%# & $'( ! "#$"# & $'( Pour procéder au raccordement de l’appareil, utilisez uniquement les pièces livrées, de même que les sections de conducteurs et les fusibles prescrits ! Utilisez uniquement des outils appropriés et dans un état impeccable. Raccordez impérativement l’appareil en vous conformant au schéma de raccordement fourni ! Installation... -
Page 53: Longueurs Et Sections De Conducteurs
+ ) ), ! "#$%# & $'( ! "#$"# & $'( Important Veiller que les fentes de ventilation restent libres ! L’espace libre minimum doit être de 100 mm au moins tout autour ! Une ventilation insuffisante peut entraîner une surchauffe de l’appareil ! L’appareil a été conçue pour une utilisation à... -
Page 54: Montage Des Broches De Contact
+ ) ), ! "#$%# & $'( ! "#$"# & $'( Commande relais Au moins 0,25 mm² utilisateurs Test batterie I Au moins 0,25 mm² Montage des broches de contact Préparez les câbles de raccordement. Prenez garde à ce que les broches de contact, adaptées à... -
Page 55: Raccordement Du Connecteur Multibroches À 15 Pôles
+ ) ), ! "#$%# & $'( ! "#$"# & $'( Raccordement du connecteur multibroches à 15 pôles & 5 L’illustration (figure 5) montre les contacts mis à disposition sur le connecteur multibroches à 15 pôles. Raccordez le connecteur multibroches à 15 pôles, comme indiqué sur le schéma de raccordement (figure 6). - Page 56 + ) ), ! "#$%# & $'( ! "#$"# & $'( Enfichez le connecteur multibroches sur le branchement prévu de l’appareil. Les connecteurs multibroches ne peuvent être introduits et verrouillés qu’en position correcte, sur le bon branchement. Prenez garde à ce que le dispositif de verrouillage soit bien encliqueté.
-
Page 57: Raccordement Du Connecteur Multibroches À 12 Pôles
1 m, celui-ci doit être protégé par fusible près du pôle positif de la batterie II ! Dans le cas de l’alimentation électrique EVS 30/20-DS/IU avec un Figure 7 fusible 30 A. Dans le cas de l’alimentation électrique EVS 30/30-DS/IU avec un fusible 40 A. -
Page 58: Multibroches À 12 Pôles
+ ) ), ! "#$%# & $'( ! "#$"# & $'( Raccorder la câble (brun 0,75 mm²) à l’entrée D+ contact 18 de l’appareil et au contact D+ de l’alternateur. Le câble doit impérativement être protégé par un fusible de 2 A près de l’alternateur ! Schéma de raccordement du connecteur multibroches à... -
Page 59: Raccordement Du Capteur De Température
+ ) ), ! "#$%# & $'( ! "#$"# & $'( Capteur de température En cas d’utilisation d’un capteur de température pour la batterie II, coller ce capteur de température sur le côté frontal de la batterie II (batterie d’alimentation). Enlever pour ce faire le film de protection au point de collage du capteur de température et coller celui-ci en l’appuyant fortement à... - Page 60 La batterie doit avoir une tension nominale de 12 Volts ainsi qu’une capacité d’au moins 70 Ah avec EVS 30/20-DS/IU et de 100 Ah avec EVS 30/30- DS/IU. Les batteries qui ont une capacité minimale inférieure à ces valeurs ne seront qu’insuffisamment chargées.
-
Page 61: Consignes D'entretien
Trautmann GmbH & CO. KG décrites ci-dessus. CALIRA-Apparatebau Malgré tout, Lerchenfeldstr. 9 l’appareil ne D-87600 Kaufbeuren fonctionne pas. Téléphone: +49(0)8341 976430 Télécopie: +49(0)8341 976470 Internet: www.calira.de e-mail: service@calira.de Lerchenfeldstr. 9 87600 Kaufbeuren Tel.: +49(0)8341 / 9764-0 Fax: +49(0)8341 / 67806... -
Page 62: Réparation
Service : Trautmann GmbH & Co. KG CALIRA-Apparatebau Lerchenfeldstrasse 9 D-87600 Kaufbeuren Téléphone: +49(0)8341 976430 Télécopie: +49(0)8341 976470 Internet: www.calira.de e-mail: service@calira.de Lerchenfeldstr. 9 87600 Kaufbeuren Tel.: +49(0)8341 / 9764-0 Fax: +49(0)8341 / 67806... - Page 63 + ) ), ! "#$%# & $'( ! "#$"# & $'( Lerchenfeldstr. 9 87600 Kaufbeuren Tel.: +49(0)8341 / 9764-0 Fax: +49(0)8341 / 67806...
- Page 64 -. / $ D"+" $+$-"+" + " + %$E> + E$+6$ & E$ 6$+ '" ?/$)$% /$ ) $% B$-" +! 6$+ E"++" A *" )A /$ *"++ $6 ? -+ ? ? - +* "!$ ! $ *) !$6 $ +G-"+"...
Need help?
Do you have a question about the EVS 30/20-DS/IU and is the answer not in the manual?
Questions and answers
Tenho uma Auto Caravana tem esta montagem é uma KNAUS. Tem o cabo de alimentação desligado e não sei para que serve ou se posso ligar.
The power cable for the Calira EVS 30/20-DS/IU in a KNAUS motorhome is used to supply 12-volt power distribution and to charge 12-volt lead-acid batteries (with 6 cells) with a capacity of 70–200 Ah.
This answer is automatically generated