Table of Contents
Advertisement
Quick Links
MODEL
ESP-V SYSTEM
INSTALLATION,
OPERATION
& MAINTENANCE
MANUAL
Central Air Conditioning Series
2 to 5 Tons
Fan Coil Unit/Air Supply
Components
SECTION 1: INTRODUCTION
SpacePak System Design........................................
Code Compliance.....................................................
Air Distribution Requirements ..................................
Air Distribution Components.....................................
Warranty Information.................................
Shipment of Unit.......................................................
Step 1: Locating the Unit..........................................
Step 2: Cutting Return Air Opening..........................
Step 4: Setting the Unit.............................................
Step 5: Connecting Refrigerant Lines.......................
Step 6: Installing the Condensate Trap & Line........... 9
Step 7: Wiring the Unit.............................................. 10
Step 8: Installing Air Distribution Components......... 12
IN UNITED STATES: 260 NORTH ELM ST. WESTFIELD, MA 01085 (413) 564-5530/FAX (413) 564-5815
IN CANADA: 7555 TRANMERE DRIVE, MISSISSAUGA, ONTARIO, L5S 1L4 (905) 672-2991/FAX (905) 672-2883
2
Sequence of Operation............................................. 16
2
Prior to Start-Up ....................................................... 16
2
System Start-Up & Adjustments............................... 16
3
Charging Cooling Only Systems............................... 17
Back Page
Factors Affecting the Balance of the System............ 17
5
Before Each Cooling Season.................................... 18
6
If System Fails to Operate........................................ 18
7
Troubleshooting Guide.......................................... 19-23
8
Service/Troubleshooting Form.................................. 24
8
Parts List................................................................... 25
8
®
COPYRIGHT
1999
ESPV2-109
W30-WG0134-01
Advertisement
Table of Contents
Troubleshooting

Related Manuals for SpacePak ESPV2-109


Summary of Contents for SpacePak ESPV2-109
-
Page 1: Table Of Contents
2 to 5 Tons Fan Coil Unit/Air Supply Components SECTION 1: INTRODUCTION SECTION 3: START UP & OPERATION SpacePak System Design........Sequence of Operation..........16 Code Compliance............. Prior to Start-Up ............16 Air Distribution Requirements ........System Start-Up & Adjustments....... 16 Air Distribution Components........ -
Page 2: Spacepak System Design
Manual, SP9, to complete this information. A description tional air-to-air cooling system. of air distribution system components is shown in Figure 1.1. The SpacePak system is covered by the following U.S. Patents: 3,507,354; 3,575,234; 3,596,936; 3,605,797; 3,685,329; 4,045,977; 4,698,982; 926,673 and Canadian Patents: 891,292; 923,935; 923,936. -
Page 3: Air Distribution Components
PLENUM END CAP BM-3003 PLENUM TEE BM-3002 KWIK CONNECT PLENUM DUCT (4FT LENGTH) WALL ELBOW BM-3001 SUPPLY TUBING AC-KCWE PLENUM TAKE-OFF KIT 90° PLENUM ELBOW BM-3004 KWIK CONNECT BM-6818 SOUND ATTENTUATING TUBE TERMINATOR PLATE WINTER SUPPLY AIR SHUT-OFF BALANCING ORIFICE INSTALLATION KIT COMPONENTS PLENUM ADAPTOR... - Page 4 Plenum Duct For systems designed with a bullhead tee installed as on The plenum duct can be run in practically any location Unit No. 1 (Figure 1.3), the best results are obtained if not accessible for the attachment of the supply tubing (see more than 60% of the total number of system outlets are suggested layouts in Figure 1.2).
-
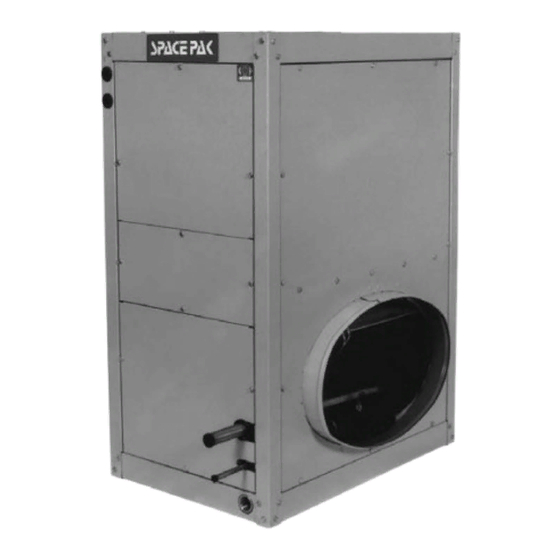
Page 5: Shipment Of Unit
Installation of horizontally discharged terminators is assisted with the SpacePak 90˚ wall elbow (see page 12). Two excellent spots for horizontal discharge are in the soffit area above kitchen cabinets (see Figure 1.5) and in the top portion of closets (see Figure 1.6). -
Page 6: Section 2: System Installation
SECTION 2: SYSTEM INSTALLATION When selecting a location, consider the location of the NOTICE: Before proceeding with the installa- unit in relation to the return air box or filter box as shown tion, we recommend reading through this sec- in Figures 2.3, 2.4. The return air duct should have at tion of the manual for an overall understanding least one 90°... -
Page 7: Step 2: Cutting Return Air Opening
For wall return applications, cut the return air opening to SpacePak optionally supplies Direct Mount Filter Box accommodate the return air box. Do not place the Models SPC-3B for ESP-2430V, SPC-4B for ESP-3642V opening on a straight path to the return air panel. -
Page 8: Step 3: Attaching Supply Air Plenum Adaptor
(2PSI) of dry nitrogen to avoid scale or PLENUM ADAPTOR blockage in the piping system is recommended while brazing. SpacePak also recommends installing a sight Refer to Figure 2.6 and duct installation instructions glass on the liquid line outside of the unit as an aid for supplied with fan coil unit. -
Page 9: Step 6: Installing The Condensate Trap & Line
FIGURE 2.7: MOUNTING PLATFORMS FOR VERTICAL INSTALLATIONS STEP 6: INSTALLING THE CONDENSATE TRAP & LINE NOTICE: It is a requirement of the International NOTICE: Never connect condensate line to a closed Mechanical Code (307.2.3) to install a secondary drain system. drain or and auxiliary drain pan where damage to any building components will occur as a result of over- flow from the equipment drain pan or stoppage in the... -
Page 10: Step 7: Wiring The Unit
STEP 7: WIRING THE UNIT Turn off electrical power supply The low voltage transformer in the unit has a 208 volt tap before servicing. Contact with live electric compo- in the primary winding (color coded RED). If unit is to be operated with 208 volt electrical service, remove the 230 nents can cause shock or death. - Page 11 FIGURE 2.9: MODEL ESP-V WIRING SCHEMATIC...
-
Page 12: Step 8: Installing Air Distribution Components
(see Figure 2.13). The result would be unacceptable noise SOUND SOUND ATTENUATOR ATTENUATOR OPTION: Using a SpacePak Kwik Connect Wall Elbow FOR APP APPLICATIONS ICATIONS WITH (Model Number: AC-KCWE) addresses this condition THICKER... - Page 13 At the plenum, all supply tubing connections must be a NOTICE: Do not shorten sound attenuating tube length. The result would be unacceptable noise. minimum of 18" from any plenum tee, plenum elbow or the fan coil unit. Push the free end of the sound attenuating tube through Individual supply tubing runs must be a minimum of the 4"...
- Page 14 Wrap connection securely with tape. interior of the duct. Using the SpacePak pliers, snap the fasteners into place until they lock in place (see Figure 2.22).
- Page 15 Return Air Box & Duct Installation Direct Mount Filter Box & Ductless Returns Remove the return air grill from the return air box and Center filter box over the eliptical flange of fan coil unit remove the air filter from the return air grill. (see Figure 2.26).
-
Page 16: Section 3: Start Up & Operation
SECTION 3: START-UP & OPERATION SEQUENCE OF OPERATION 4. Check that system static pressure is within acceptable limits (minimum 1.2" W.C. - maximum 1.5" W.C.). Static The fan coil unit is equipped with a protective device called readings must be taken in the plenum a minimum of 18" an anti-frost control which will automatically stop the (in both plenums for ESP-4860V) from the fan coil unit, outdoor unit (while the indoor unit continues to run) if ice... -
Page 17: Charging Cooling Only Systems
NOTICE: The number of outlets and average length of the supply tubing has a significant effect on the over- all system performance. It is highly recommended that the adjustment factors outlined in the SpacePak Application Manual are accounted for prior to any installation. -
Page 18: Section 4: Maintenance
SECTION 4: MAINTENANCE The SpacePak system has been designed to provide 3. Check that unit condensate drain is clear and free years of trouble-free performance in normal installations. running, and plug is in cleanout. Examination by the homeowner at the beginning of each cooling season, and in mid-season should assure 4. -
Page 19: Troubleshooting Guide
TROUBLESHOOTING GUIDE CONDITION: ESP-V & CONDENSING UNITS RUN, BUT COOLING INSUFFICIENT POSSIBLE CAUSE VERIFICATION SOLUTION Low Suction Pressure Check blower motor as described on If defective, replace motor. page 23 in this manual. Check that filter in return air box is Clean air filter. - Page 20 CONDITION: ESP-V UNIT & CONDENSING UNIT WILL NOT START POSSIBLE CAUSE VERIFICATION SOLUTION Thermostat Not Level Check level of thermostat If necessary, level thermostat. Defective Thermostat With volt meter, check resistance of If resistance, thermostat is O.K. thermostat contacts. If no resistance, replace thermostat. Loose Low Voltage Wiring Check all wiring connections for Tighten all loose connections.
- Page 21 CONDITION: ESP-V UNIT WILL NOT START, BUT CONDENSING UNIT CYCLES POSSIBLE CAUSE VERIFICATION SOLUTION Incorrect Low Voltage Connections Check low voltage connections Correct low voltage connections. against wiring diagram. Loose Low Voltage Connections Check all wiring connections for Tighten all loose connections. tightness.
- Page 22 CONDITION: SWEATING AT ESP-V UNIT SUPPLY OUTLET POSSIBLE CAUSE VERIFICATION SOLUTION Air Leak At Supply Air Plenum Check taped joint at adaptor. Tape joint properly. Adaptor Insulation at Outlet Not Installed Check for insulation at outlet. Install insulation. CONDITION: EXCESSIVE NOISE AT TERMINATOR POSSIBLE CAUSE VERIFICATION SOLUTION...
- Page 23 CHECKING ESP-V BLOWER MOTOR 2. With a volt meter, check 24v across terminals G and C on the low voltage terminal block. 1. With volt meter, check voltage at terminals L1 and L2 a. If read 24v, proceed to Step 3. on line voltage terminal block.
-
Page 24: Service/Troubleshooting Form
Temp: °F; Superheat: °F Equipment Data: Approximate time running before taking readings: Hrs. SPACEPAK Model # ESP / WCSP - Did you adjust the TXV? (Y/N); (If yes, explain): SPACEPAK Serial # SPACEPAK Date of Installation: Cond Unit Mfr:... -
Page 25: Parts List
REF. REFRIGERANT UNIT PART PART DESCRIPTION TYPE SIZE NUMBER Front Panel does not apply 2430 BM-2513 Front Panel does not apply 3642 BM-2514 Front Panel does not apply 4860 BM-2515 Left/Top Access Panel does not apply All Sizes BM-2517 Left/Center Access Panel does not apply All Sizes BM-2518... - Page 26 NOTES:...
- Page 27 NOTES:...
- Page 28 LIMITED WARRANTY Central Air Conditioning Products The “Manufacturer” warrants to the original owner at the original installation site that the Central Air Conditioning Products (the “Product”) will be free from defects in material or workmanship for a period not to exceed one (1) year from the startup or eighteen (18) months from date of shipment from the factory, whichever occurs first.
Need help?
Do you have a question about the ESPV2-109 and is the answer not in the manual?
Questions and answers