Advertisement
Available languages
Available languages
FAILURE TO POSITION THE LOGS IN ACCORDANCE WITH THESE DIAGRAMS OR FAILURE TO USE
ONLY LOGS SPECIFICALLY APPROVED WITH THIS APPLIANCE MAY RESULT IN PROPERTY
LOGS MUST BE PLACED IN THEIR EXACT LOCATION IN THE APPLIANCE. DO NOT MODIFY THE
PROPER LOG POSITIONS, SINCE APPLIANCE MAY NOT FUNCTION PROPERLY AND DELAYED
THE LOGS ARE FRAGILE AND SHOULD BE HANDLED WITH CARE.
TM
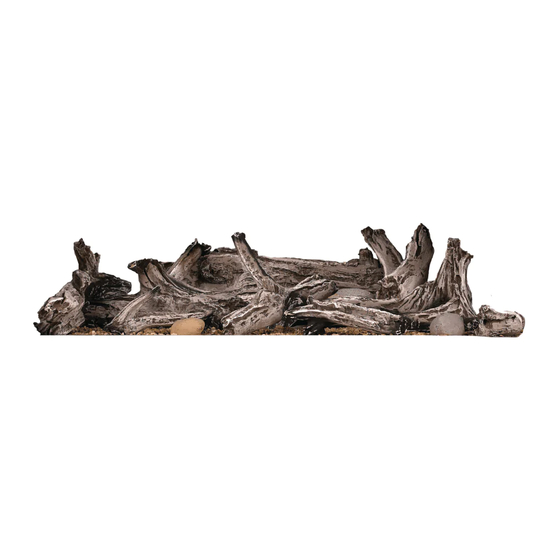
PHAZER
logs and glowing embers exclusive to Napoleon® Appliances, provide a unique and realistic glow-
ing effect that is different in every installation.
Log colours may vary. During the initial use of the appliance, the colours will become more uniform as colour
pigments burn in during the heat activated curing process.
2
Combustion Air Slots
1.
Remove and discard all glass media.
2.
Remove and discard the far left screw behind the burner ports.
3.
Install a total of 7 screws and spacers into the locations as shown.
4.
Spread sand evenly on the media tray taking care not to spill it into the combustion air slots or on
the burner port.
DL45 DRIFTWOOD LOG SET
FOR USE WITH LHD45 / CLHD45
!
DAMAGE OR PERSONAL INJURY.
IGNITION MAY OCCUR.
WARNING
76.1A
Advertisement
Table of Contents

Related Manuals for Napoleon DL45


Summary of Contents for Napoleon DL45
- Page 1 76.1A PHAZER logs and glowing embers exclusive to Napoleon® Appliances, provide a unique and realistic glow- ing effect that is different in every installation. Log colours may vary. During the initial use of the appliance, the colours will become more uniform as colour pigments burn in during the heat activated curing process.
- Page 2 Place log #1 as shown onto the corresponding posts on the media tray. Place log #2 peg into the hole on log #1 as shown, and onto the corresponding post on the media tray. Place log #3 onto the corresponding post on the media tray and lean the tapered end of the log into the groove in log #1.
- Page 3 ENSEMBLE DE BÛCHES DE BOIS FLOTTÉ DL45 POUR EMPLOI AVEC LE LHD45 / CLHD45 AVERTISSEMENT OMETTRE DE POSITIONNER LES BÛCHES CONFORMÉMENT AUX SCHÉMAS OU OMETTRE D’UTILISER UNIQUEMENT DES BÛCHES SPÉCIFIQUEMENT APPROUVÉES POUR CET APPAREIL PEUT CAUSER DES DOMMAGES MATÉRIELS OU DES BLESSURES CORPORELLES.
- Page 4 Placez la bûche #1 comme illustré sur les vis/ espaceurs correspondants sur le plateau à braises. Placez la tige de la bûche #2 dans le trou de la bûche #1 comme illustré puis sur la vis/ espaceur correspondant sur le plateau à braises.
Need help?
Do you have a question about the DL45 and is the answer not in the manual?
Questions and answers