Advertisement
Quick Links
Please Contact Moen First
For Installation Help, Missing or
Replacement Parts
(USA)
1-800-BUY-MOEN (1-800-289-6636)
WWW.MOEN.COM
(Canada)
1-800-465-6130
WWW.MOEN.CA
Por favor, contáctese primero
con Moen
Para obtener ayuda de instalación, piezas
faltantes o de recambio
011 52 (800) 718-4345
WWW.MOEN.MX
Veuillez d'abord contacter Moen
en cas de problèmes avec l'installation, ou pour obte-
nir toute pièce manquante ou de rechange
1-800-465-6130
WWW.MOEN.CA
HELPFUL TOOLS
HERRAMIENTAS ÚTILES
For safety and ease of
Para que el cambio de la
faucet replacement, Moen
llave sea fácil y seguro,
recommends the use of
Moen le recomienda usar
these helpful tools.
estas útiles herramientas.
Sealant
Sellador
Mastic
TWO HANDLE LAVATORY FAUCET
MEZCLADORA PARA LAVABO
DE DOS MANERALES
ROBINET DE LAVABO À
DEUX POIGNÉES
OUTILS UTILES
Par mesure de sécurité et
pour faciliter l'installation,
Moen suggère l'utilisation
des outils suivants.
Lubricant
Lubricante
Lubri ant
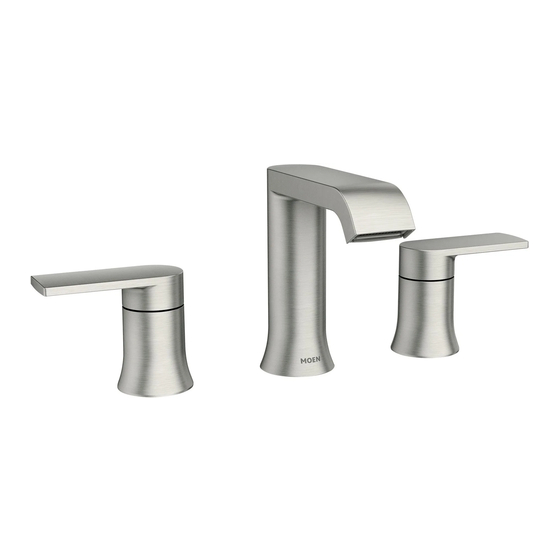
Image is for reference only
(Style varies by model)
La imagen es sólo como referencia
(El estilo varía por el modelo)
Cette image n'est offerte qu'à titre indicatif seulement
(Le style varie selon le modèle)
Record Purchased Model Number:
Registro del número de modelo comprado:
Consigner ici le numéro du modèle acheté :
_______________________
(Save instruction sheet for future reference)
(Guarde la hoja de instrucciones para futura referencia)
(Garder ces directives pour référence ultérieure)
Register Online:
Regístrese en línea:
S'enregistrer en ligne :
www.moen.com/product-registration
INS10626A - 10/18
Advertisement

Related Manuals for Moen 84763


Summary of Contents for Moen 84763
- Page 1 INS10626A - 10/18 TWO HANDLE LAVATORY FAUCET Please Contact Moen First MEZCLADORA PARA LAVABO For Installation Help, Missing or Replacement Parts DE DOS MANERALES ROBINET DE LAVABO À (USA) 1-800-BUY-MOEN (1-800-289-6636) DEUX POIGNÉES WWW.MOEN.COM (Canada) 1-800-465-6130 WWW.MOEN.CA Por favor, contáctese primero con Moen Para obtener ayuda de instalación, piezas...
-
Page 2: Parts List
Parts List A. Handle (x2) H. Spout B. Valve Clip (x2) Mounting Bracket C. Upper Mounting Washer (x2) J. Mounting Nut D. Lower Mounting Washer (x2) K. Cold Valve Body E. Mounting Nut (x2) L. Hose F. Hot Valve Body M. - Page 3 Moen recommends cleaning the Spot Resist fi nish with Moen recomienda limpiar el acabado Spot Resist con un Moen recommande de nettoyer le fi ni Spot Resist avec a mild soap, rinsing thoroughly with warm water and jabón suave, enjuagarlo cuidadosamente con agua du savon doux puis de rincer soigneusement à...
- Page 4 Place the Spout Assembly (H) into center opening in sink. From below the sink, slide the Mounting Bracket (I) onto the threaded Spout Waterway (N). Coloque el conjunto del surtidor (H) en la abertura central del fregadero. Por debajo del fregadero, deslice la ménsula de montaje (I) sobre el canal roscado del surtidor (N).
- Page 5 INS10626A - 10/18 Sealant Clip Groove 1/2" Sellador Ranura Mastic del clip Rainure de l'étrier Apply a generous bead of sealant to underside of the upper mounting washers (C). A sealant Thread Lower Mounting Nuts (E) onto the Hot and Cold Valve Bodies (F & K) far enough to groove is provided for this purpose.
- Page 6 Slide Clip (B) into the groove on each Valve Body. Check to see that each Valve Body outlet Hold Valve Body (F) with one wrench and tighten the Lower Mounting Nut (E) using a 2nd connection below the deck points towards the Spout Waterway (N) as shown. wrench.
- Page 7 INS10626A - 10/18 Rotate the red stem extension on the Hot Valve Body (F) clockwise and the blue stem Position with Handles (A) pointing in the off direction as shown. Holding the lever of the Handle Assembly (A) stationary with one hand, thread the base of the Handle Assembly (A) extension on the Cold Valve Body (K) counterclockwise until they stop.
- Page 8 SÍ Rotate pivot rod opening on side of drain body (R) to face towards wall as illustrated. Install lift rod (O) into opening on the back of the faucet. Slide the lift rod strap (Q) onto lift rod Haga girar la abertura del pivote en el costado del cuerpo del desagüe (R) para que mire hacia and tighten the bolt finger tight.
- Page 9 INS10626A - 10/18 1. Loosen nut on strap (Q) to allow lift rod to rest in faucet. Push pivot rod (U) down. Slide one side of clamp (W) onto pivot rod. Insert pivot rod through closest hole on strap (Q) with pivot rod down. Squeeze clamp and slide other side of clamp 2.
- Page 10 Cold Frio Froid Caliente Chaud Place product ID label (G) here. Coloque la etiqueta de identi cación del producto (G) aquí. Placer l'étiquette d'identi cation du produit (G) ici. Turn hot and cold water stop valves to the on position. Check for leaks. Attach product ID label Installation complete.
- Page 11 INS10626A - 10/18 Filter Filtro Filtre Sec. Flush filter at separate faucet. Remove the Spout Waterway (N) adapter by holding the Spout Waterway (N) with one wrench and turning counter-clockwise on the adapter with a second wrench. Remove filter. Enjuague el filtro en otra mezcladora. Retire el adaptador del canal del surtidor (N) sujetando el canal del surtidor (N) con una Rincer le filtre sous l’...
- Page 12 à suivre pour soumettre une réclamation. Il suffit d’écrire à Moen and telephone number. de un estado a otro o de una provincia o nación a otra. Moen inc. à l’adresse indiquée ci-dessous, pour expliquer le défaut, lo asesorará en el procedimiento a seguir para hacer válida esta d’inclure une preuve d’achat, d’inscrire son nom, son adresse ainsi...
Need help?
Do you have a question about the 84763 and is the answer not in the manual?
Questions and answers
The drain plug does not set high enough to allow adequate draining. How can I remedy this flaw?
To fix the issue of the Moen 84763 drain plug not setting high enough for adequate draining, adjust the pivot rod and lift rod strap connection:
1. Make sure the pivot rod (U) is properly inserted into the drain body (R) and secured with the pivot rod nut (V).
2. Adjust the lift rod (O) and the lift rod strap (Q) so that when the lift rod is pulled up, the pivot rod moves down enough to raise the drain plug (N) higher.
3. If needed, reposition the clip (W) on the pivot rod to change the height at which the plug opens.
This adjustment allows the drain plug to open higher for better water flow.
This answer is automatically generated
How to remove handle if there is no allen screw?
The provided context does not contain specific instructions on removing the Moen 84763 handle without an Allen screw. However, in general, Moen faucet handles without an exposed screw may have a decorative cap that can be gently pried off to access a hidden screw. If no screw is found, the handle may be a pull-off type that requires careful wiggling and pulling upwards. If resistance is encountered, a handle puller tool may help.
This answer is automatically generated