Table of Contents
Advertisement
Advertisement
Table of Contents

Related Manuals for G-FITNESS TZ-5000B

Summary of Contents for G-FITNESS TZ-5000B
- Page 1 Commercial Treadmill User Manual( LED Screen Model:TZ-5000B...
-
Page 2: Table Of Contents
Catalogue Caution............................3 The Parameter of Technology.....................4 Drawing.............................5 Assembly Instruction......................6 Instrument operation guide....................10 Mechine debugging process....................14 Adjustment Instructions / Maintenance................15 Explode View·..........................18 Parts List·..........................18... -
Page 3: Caution
caution Read all precautions and instructions in this manual before using this equipment. 1.The machine is suitable for commercial fitness clubs, clubhouse fitness, bodybuilding training, sports training, physical education and so on. 2. The machine must be reliable grounding, forbidden without grounding line using the treadmill. -
Page 4: The Parameter Of Technology
15.Never touch any parts of running treadmill with your finger 16.People with long hair should pay attention to the safety of hair when using. 17.When you feel uncomfortable and unusual, pls stop at once and consult to the doctor. 18.There is the emergency buttom inthe middle of front handle .If there are something emergency , pls press it quickly and the machine will stop at once. -
Page 5: Drawing
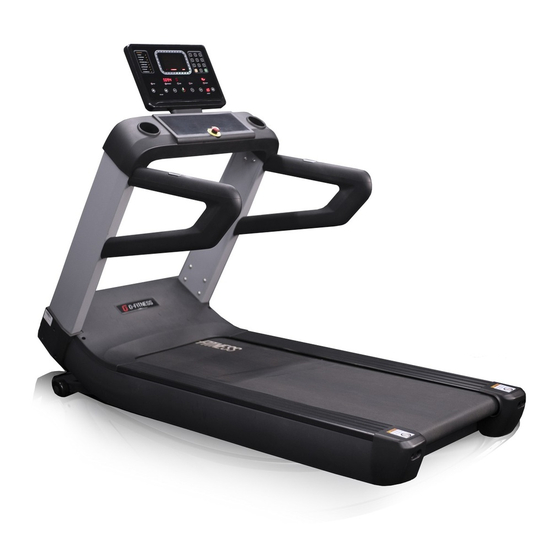
Drawing: TZ—5000B 18.5 inches Shelf Acrylic board Heart rate Emergency stop switch Hand Colum Side Lifting Motor roller Rear tail cover... -
Page 6: Assembly Instruction
Assembly Instruction: Make the assembly work easier. This section of User Manual only to ensure that the treadmill can be assembled correctly and easily. In fact, if you assemble the Treadmill base on the user manual, the work will finish smoothly. - Page 7 Step 1: Connect to communication line and assembly support Instruction: 1)Take down the packing material of support 2)Fix the support on the frame as the picture Attention: Connect the communicate line below. Communicati line connection (the only corresponding interface communicatio )...
- Page 8 Step 2: Connect the communication line and heart rate line,leave interspace to put hear rate assemble the table frame line ,communication line and power line , : Assembly instructions : 1) butt joint communication lines in support and frame 2) Fix the case to the corresponding position of the column, and fasten the combination of the table frame and the column connection bolt.
- Page 9 Step 3: Assemble display;Connect the communication line and the heart rate line 1) Connect the display the communication line and the table frame combination communication line 2) After docking communication line and heart rate line , Place the display and the combination of the table frame,Fix the display on the following ;...
-
Page 10: Instrument Operation Guide
Treadmill operation instructions The treadmill panel adopts the capacitive touch screen, and the user can just tip it. and the touch effect is comparable to that of the mobile phone screen. The surface of the panel is made of acrylic, which is wear-resistant and durable, and has a beautiful color and appearance. - Page 11 “REST”return key:Press this key can return standby Interface; 3. START/STOP”: If the power is switched on and safe lock is ok,the treadmilll can be started or stopped “ by pressing this key at anytime 4. “SPEED+” and “SPEED-” are speed addition and subtraction keys: standby state, used to adjust the set value.
- Page 12 system will issue "B iB i- B The 3" prompts of i", the treadmill steadily slows down and stops running. Seventh, program description and program diagram 4.SPEED stands for speed and INCLINE stands for slope. Each program divides the exercise time into 24 equal parts, each with a corresponding speed and slope.
-
Page 13: Mechine Debugging Process
Eighth.the range of numerical values: Program settings: parameter initial value Setting range Display range time(min:sec) 30:00 5:00-99:00 0:00-99:59 gradient(segment) 0-15 0-15 speed(KM/H) 1.0-20 1.0-20 distance(kM) 0.5-99.0 0.00-99.9 Heart rate(times/min) 50-200 calorie(KCAl) 10-990 0-999 Security lock function: In any situation, pulling off the safety lock can stop the treadmill from running urgently. When the treadmill is in an emergency stop, the bee sounder screams and the window displays “safe”;... - Page 14 and the running belt will increase, and the load output power will increase. As a result, the running board may be caused and the running belt surface is severely worn. (Motor, inverter, roller, motor belt, etc.) The entire drive system is seriously damaged. This damage is not covered by the warranty. 2.
-
Page 15: Adjustment Instructions / Maintenance
corrected in time 8. The overall elastic adjustment method of the running belt: If the running belt is loose overall, the user may have “slip phenomenon during running, or the running belt is too tight (the power output of the inverter and the motor will be greatly increased) Need to adjust the running belt accordingly. - Page 16 1 Digital Screen Stand 1 3 lower cover of Digital Screen Stand 2 Cross Slot Source wood screw 8 4 Operating circuit board 5 Cross Slot Source wood screw 6 gasket 7 left stand column 8 Cross Slot Source wood screw 9 handrail 10 heart rate sensor 11 heart rate sensor handle...
- Page 17 1 Digital Screen 2 Display Back Cover 4 Interface board 3 Display front cover 5 Cross Wood screw...
-
Page 18: Explode View
1 Running Platform Assemble 1 2 Left side Cover 3 Motor Back Cover 4 Three Core Socket 5 Cross Slot Source wood screw 2 6 Overload Protector 7 Switch 8 Cross Slot Source wood screw 3 9 Motor Up Cover 10 Hexagon head cap screws 11 Right side cover 12 swash plate round head bolt 8... - Page 19 1 Hexagon head cap screws 2 gasket 3 Combination parts 4 Digital screen combination 5 Hexagon head cap screw 6 Running Platform Assemble...
Need help?
Do you have a question about the TZ-5000B and is the answer not in the manual?
Questions and answers