Table of Contents
Advertisement
Quick Links
AUTOMATE
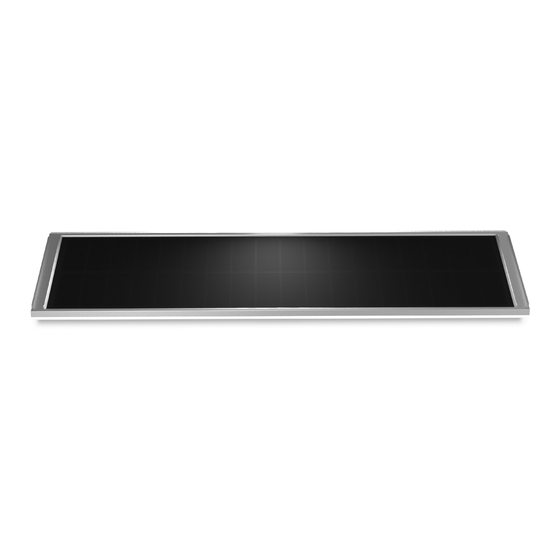
Solar Panel 2.0
AUTOMATE | Solar Panel 2.0 provides supplemental power to all Li-ion wirefree motors
or rechargeable battery packs. The monosilicon/crystal solar panel provides power in
varied conditions including low light situations.
Users can refer to the AUTOMATE Solar Guide for direction related to regional solar
conditions and expected performance available at https://www.rolleaseacmeda.com
FEATURES:
•
Plug n' play for all 5V & 12V AUTOMATE Li-ion motors & rechargeable battery packs
•
Sleek design allows for unobtrusive placement behind most headrails
•
Monosilicon/crystal technology allow for up to 12% more efficiency than alternatives
•
Low light harvesting technology supports power generation in varied conditions
•
Panel Charges when Partially Shaded
INSTR. MT03-0302-067001 V1.0 FEB 2019
™
Soft Stop
Battery Check
SOLAR
POWERED
USB Charge
USB CHARGE
Advertisement
Table of Contents

Subscribe to Our Youtube Channel
Related Manuals for rollease acmeda AUTOMATE Solar Panel 2.0

Summary of Contents for rollease acmeda AUTOMATE Solar Panel 2.0
- Page 1 AUTOMATE ™ Solar Panel 2.0 Soft Stop Battery Check USB Charge SOLAR USB CHARGE POWERED AUTOMATE | Solar Panel 2.0 provides supplemental power to all Li-ion wirefree motors or rechargeable battery packs. The monosilicon/crystal solar panel provides power in varied conditions including low light situations. Users can refer to the AUTOMATE Solar Guide for direction related to regional solar conditions and expected performance available at https://www.rolleaseacmeda.com FEATURES:...
-
Page 2: Table Of Contents
ASSESSING THE INSTALLATION LOCATION 5.1 Pre-installation Assessment 5.2 Example of Pre-installation Assessment INSTALLATION 6.1 Mounting Options 6.2 Installation Process 6.3 Bending Bracket 6.4 Connecting Solar Panel 2.0 with Motor DIMENSIONS TROUBLE SHOOTING ROLLEASE ACMEDA 2 | Automate Programming Instructions | MT03-0302-067001 ™... -
Page 3: Compliance Statement
3. Cable: Male Micro USB to male Micro USB Connector Cable 4. Cable: Male barrel to male 2 pin SMR 5. Alcohol Wipe Cloths (Twin Pack) 6. Dual Lock Type 250 fastener 7. Slot & Screw Cover Stickers/Label Set (2+1) ROLLEASE ACMEDA 3 | Automate Programming Instructions | MT03-0302-067001 ™... -
Page 4: Safety Instructions
• For use with Li-ion Motors and Re-chargeable battery packs only. • Do not cut power cables. • Use only Rollease Acmeda hardware. • NOT suitable for exterior application. • Do not drill into motor body or Solar panel body. -
Page 5: Solar Panel Installation Location Guide
NORTHERN HEMISPHERE SOUTHERN HEMISPHERE SOUTHERN HEMISPHERE SOUTHERN HEMISPHERE NORTHERN HEMISPHERE SOUTHERN HEMISPHERE Dec 21 (summer solstice) Mar 21, Sep 21 (equinox) June 21 (winter solstice) (90° - Local Latitude) Avoid Shadowing ROLLEASE ACMEDA Programming Instructions | MT03-0302-067001 | 5 Automate ™... -
Page 6: Sun's Seasonal Performance
Sun’s seasonal performance NORTHERN HEMISPHERE NORTHERN HEMISPHERE SOUTHERN HEMISPHERE NORTHERN HEMISPHERE SOUTHERN HEMISPHERE ROLLEASE ACMEDA 6 | Automate Programming Instructions | MT03-0302-067001 ™... -
Page 7: Light Transmission
Light transmission can vary widely with the number of window panes and types of coatings. The type of glass needs to be assessed. Approximate transmission factors are: GLASS TYPE TRANSMISSION FACTORS Single panel Double panel Double panel with bronze tint Double panel with selective low-e coating 45-57% ROLLEASE ACMEDA Automate Programming Instructions | MT03-0302-067001 | 7 ™... -
Page 8: Assessing The Installation Location
Step 1: Measuring sunlight through the window Hold the Lux meter directly against the window glass indoors, in the location you wish to mount the solar panel, and observe the KLux Reading. LUX METER ROLLEASE ACMEDA 8 | Automate Programming Instructions | MT03-0302-067001 ™... - Page 9 8:00pm 0.00 0.00 9:00pm 0.00 0.00 10:00pm 0.00 0.00 11:00pm 0.00 0.00 12:00am 0.00 0.00 Note: 0.00 coefficient means that the sunlight intensity is too low to be measured accurately. ROLLEASE ACMEDA Programming Instructions | MT03-0302-067001 | 9 Automate ™...
- Page 10 SOLAR PANEL CHARGING CURVE Sunlight intensity at noon, KLux M25 Motor, min threshold 13KLux M28 Motor, min threshold 19KLux M45 Motor,min th reshold 42KLux M25 motors cycles M28 motor cycles M45 motor cycles ROLLEASE ACMEDA 10 | Automate Programming Instructions | MT03-0302-067001 ™...
-
Page 11: Example Of Pre-Installation Assessment
Sunlight intensity at noon, KLux PLOTTED M25 Motor, min threshold 13KLux M28 Motor, min threshold 19KLux M45 Motor,min th reshold 42KLux AGAINST M25 motors cycles M28 motor cycles M45 motor cycles ROLLEASE ACMEDA Programming Instructions | MT03-0302-067001 | 11 Automate ™... -
Page 12: Installation
INSTALLATION 6.1 Mounting Options OPTION A. Attaching Mounting Bracket to Window Frame OPTION B. Attaching Solar Panel via Velcro Strip to a Window or surface ROLLEASE ACMEDA 12 | Automate Programming Instructions | MT03-0302-067001 ™... - Page 13 NOT ACCEPTABLE NOT ACCEPTABLE ACCEPTABLE ACCEPTABLE The back of the bracket should not be facing The back of the bracket should be facing towards opposite to the window. the window. ROLLEASE ACMEDA Programming Instructions | MT03-0302-067001 | 13 Automate ™...
- Page 14 ACCEPTABLE ACCEPTABLE VELCRO STRIPS VELCRO STRIPS Use velcro strips to stick the bracket on the Use velcro strips to stick the bracket on the window (horizontal orientation). window (vertical orientation). ROLLEASE ACMEDA 14 | Automate Programming Instructions | MT03-0302-067001 ™...
-
Page 15: Installation Process
Install mounting bracket to wall/mounting point. Fix Solar panel to mounting bracket using screw. iii. Apply stickers onto the Solar Panel to seal unused mounting holes. Screw Stickers Possible Orientations Top Fix Side Fix ROLLEASE ACMEDA Programming Instructions | MT03-0302-067001 | 15 Automate ™... - Page 16 Press firmly onto fixing surface. Apply hand pressure for 5 seconds and check if firmly attached. IMPORTANT! Any partial or total covering of any solar panel cell will degrade solar panel performance. ROLLEASE ACMEDA 16 | Automate Programming Instructions | MT03-0302-067001 ™...
-
Page 17: Bending Bracket
The bracket should be bent at a distance of 22mm, 36mm or 48mm from the base of the bracket as shown below: 22mm 36mm 48mm IMPORTANT! Ensure the bend angle is between 150° to 180° Make sure that the solar panel has adequate exposure to sunlight 150° - 180° ROLLEASE ACMEDA Programming Instructions | MT03-0302-067001 | 17 Automate ™... -
Page 18: Connecting Solar Panel 2.0 With Motor
Equivalent Connector AUTOMATE | 12V Li-ion Charger MTDCB-CBLXT48 Cable ext 48”/1220mm AUTOMATE | 12V Li-ion Charger MTDCB-CBLXT6 Cable ext 6”/155mm AUTOMATE | 12V Li-ion Charger MTDCB-CBLXT96 Cable ext 96”/2440mm ROLLEASE ACMEDA 18 | Automate Programming Instructions | MT03-0302-067001 ™... -
Page 19: Dimensions
0.85in 1.02in 22mm 26mm SPECIFICATION TABLE Parameters Value Max Output Power 2.73W (Under 1 SUN - 1200W/m²) Vmax 12.6V Round Connector Imax 220mA USB Connector Imax 300mA IP Rating IP40 ROLLEASE ACMEDA Automate Programming Instructions | MT03-0302-067001 | 19 ™... -
Page 20: Trouble Shooting
Disconnect the motor from the No output of USB connector battery motor round connector ROLLEASE ACMEDA | USA 200 Harvard Avenue Stamford, CT 06902 6320 T +1 203 964 1573 | F +1 203 964 0513 ROLLEASE ACMEDA | AUSTRALIA...
Need help?
Do you have a question about the AUTOMATE Solar Panel 2.0 and is the answer not in the manual?
Questions and answers