Table of Contents
Advertisement
Quick Links
Advertisement
Table of Contents

Related Manuals for Power Inspired VFI1000QS

Summary of Contents for Power Inspired VFI1000QS
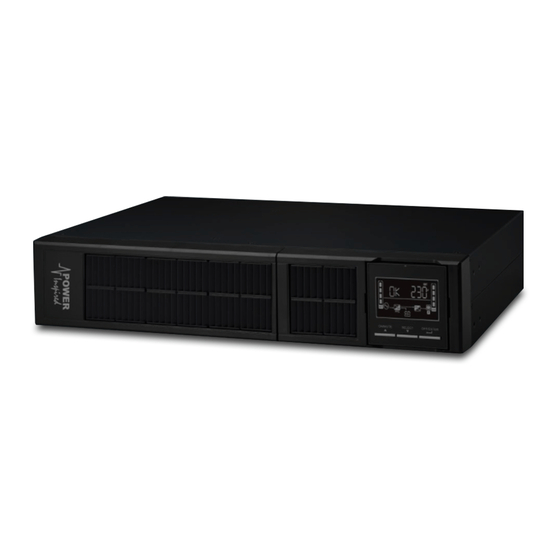
- Page 1 User Manual VFI1000QS Online Double Conversion Silent UPS System Version: 1.0...
-
Page 2: Table Of Contents
3.4. Rack-mount / Horizontal Installation ..............6 3.5. Tower Installation ..................... 7 3.6. UPS Location ....................7 3.7. UPS Connections....................8 3.8. Starting Up the VFI1000QS ................10 3.9. Start up on battery (cold start) ................ 10 3.10. Switching off the UPS................... 10 3.11. -
Page 3: Important Safety Warning
Important Safety Warning Please comply with all warnings and operating instructions in this manual. Save this manual and read carefully the following instructions before installing the unit. Do not operate this unit before reading through all safety information and operating instructions. 1.1. -
Page 4: Maintenance, Service And Faults
Ensure no fluids or other foreign objects can enter the UPS system. 1.5. Maintenance, service and faults The UPS system operates with hazardous voltages. Repairs may be carried out only by qualified maintenance personnel. Caution - risk of electric shock. Even after the unit is disconnected from the mains (building wiring outlet), components inside the UPS system are still connected to the battery and electrically live and dangerous. -
Page 5: Principles Of Operation
Principles Of Operation. The VFI1000QS is a true online double conversion UPS System providing the highest degree of power protection for your load. 2.1. Protection Features In the event of a power cut, the VFI1000QS will seamlessly transfer to battery power. -
Page 6: Cooling
Thus, at low loads and temperatures the fans will run at low speeds making the units practically inaudible. This makes the VFI1000QS suitable for applications where the highest degrees of power quality and... -
Page 7: Installation And Setup
Installation and setup 3.1. Packaging Contents The unit packaging comprises the following: VFI1000QS Silent UPS System Vertical support brackets Left & Right Rack Ears and affixing screws Input Mains Lead Product Manual Software CD & USB lead ... -
Page 8: Rear Panel View
Adjustable rack sliders are available as an option. The VFI1000QS can be positioned horizontally on a desk or similar. Rubber feet have been provided to avoid surface scratching. Position these on the base of the unit toward the corners. Note when in horizontal placement the UPS should be placed off the floor to avoid excessive... -
Page 9: Tower Installation
3.5. Tower Installation Step 1 Step 2 Step 3 Carefully position the UPS in the Make up the vertical Note the LCD should be support brackets. Pop out the LCD and support brackets at the top. rotate into vertical orientation if required. -
Page 10: Ups Connections
The power cord is supplied in the UPS package. In the UK, circuit protection is provided via the plug fuse, in other areas ensure that the circuit feeding the VFI1000QS has over current protection in place not exceeding 16A (e.g. a circuit breaker). - Page 11 3.7.6. Emergency Power Off (EPO) function The VFI1000QS is equipped with Emergency Power Off (EPO) function. The EPO port is located on the rear panel (refer to section 3.3 Rear Panel) and consists of a plug and socket arrangement. When shipped the factory default is to have the plug fitted with a shorting link and this is inserted and screwed to the socket.
-
Page 12: Starting Up The Vfi1000Qs
Starting Up the VFI1000QS Apply mains power to the unit. The unit is equipped with ultra quiet cooling fans controlled by Power Inspired’s ASC controller. When power is first applied, in order to ensure proper fan start up, the fans will spin up to full speed and hold for several seconds before reverting to a quiet low speed setting. -
Page 13: Battery Replacement
3.12. Battery Replacement NOTICE: This UPS is equipped with internal batteries that the user can replace without shutting down the UPS or connected loads (hot-swappable battery design). Replacement is a safe procedure, isolated from electrical hazards. CAUTION!! Consider all warnings, cautions, and notes before replacing batteries. Note: Upon battery disconnection, equipment is not protected from power outages. -
Page 14: Battery Kit Assembly
3.13. Battery Kit Assembly NOTICE: Please assemble battery kit first before installing it inside of UPS. Step 1: Remove adhesive tapes. Step 2: Connect all battery terminals by following below diagram. Tapes Tapes Step 3: Put assembled battery packs on Step 4: Cover the other side of plastic shell as one side of plastic shells. -
Page 15: Operations
4. Operations 4.1. Button operation Button Function Turn on the UPS: Press and hold ON/Mute button for at least 2 seconds to turn on the UPS. Mute the alarm: With the UPS in battery mode, press and hold this button for at least 3 seconds to disable or enable the alarm system. -
Page 16: Lcd Panel
4.2. LCD Panel Display Function Backup time information Indicates the estimated backup time. H: hours, M: minute, S: second. Configuration and fault information Indicates the configuration items, and the configuration items are listed in details in section 4-5. Indicates the warning and fault codes, and the codes are listed in details in section 4-7 and 4-8. -
Page 17: Audible Alarm
Display Function Indicates charging status Indicates the bypass circuit is working. Indicates the ECO mode is enabled. Indicates the AC to DC circuit is working. Indicates the inverter circuit is working. Indicates the UPS is working in converter mode Indicates the output is working. Battery information Indicates the battery level by 0-24%, 25-49%, 50-74%, and 75-100%. - Page 18 Abbreviation Display content Meaning Output isolation transformer Estimated autonomy time Running autonomy time Converter Shut down Over input current Temperature Charger Bypass frequency unstable Battery Replace EEPROM error...
-
Page 19: Ups Setting
4.5. UPS Setting There are two parameters to set up the UPS. Parameter 1: Setting ID. Refer to below table. Parameter 2: Options values for each setting. 01: Output voltage setting Interface Setting Parameter 3: Output voltage You may choose the following output voltage: 200: presents output voltage is 200Vac 208: presents output voltage is 208Vac 220: presents output voltage is 220Vac... - Page 20 05: ECO voltage range setting Interface Setting Parameter 2: Set the acceptable high voltage point and low voltage point for ECO mode by pressing Down key or Up key. HLS: High loss voltage in ECO mode in parameter 2. The setting range in parameter 3 is from +7V to +24V of the nominal voltage.
- Page 21 08: Bypass frequency range setting Interface Setting Parameter 2: Set the acceptable high frequency point and acceptable low frequency point for Bypass mode by pressing the Down key or Up key. HLS: Bypass high frequency point For 50Hz output frequency models: 51-55Hz: setting the frequency high loss point from 51Hz to 55HZ(Default: 53.0Hz) For 60Hz output frequency models:...
- Page 22 12: Battery total AH setting Interface Setting Parameter 2: Set up the battery total AH of the UPS. 7-999: setting the battery total capacity from 7-999 in AH. Please set the correct battery total capacity if external battery bank is connected. 13: Maximum charger current setting ...
- Page 23 17: External output isolation transformer connection Interface Setting Parameter 2: External output isolation transformer connection (the UPS output voltage will rise at higher loads to compensate for transformer regulation) ENA: An external output isolation transformer is connected. DIS: An external output isolation transformer is not connected.
-
Page 24: Operating Mode Description
4.6. Operating Mode Description Operating mode Description LCD display Online mode When the input voltage is within acceptable range, the UPS will provide pure and stable AC power to output. The UPS will also charge the battery. ECO mode Energy saving (Economy) mode: When the input voltage is within voltage regulation range, the UPS will bypass voltage to output for energy saving. -
Page 25: Faults Reference Code
4.7. Faults Reference Code Fault event Fault code Icon Fault event Fault code Icon Bus start fail Battery voltage too high Bus over Battery voltage too low Bus under Charger output short Inverter soft start fail Over temperature Inverter voltage high Overload Inverter voltage Low Charger failure... -
Page 26: Troubleshooting
Troubleshooting If the UPS system does not operate correctly, please solve the problem by using the table below. Symptom Possible cause Remedy No indication and alarm even The AC input power is not Check if input power cord though the mains is normal. connected well. - Page 27 Symptom Possible cause Remedy Fault code 14 is shown on LCD The UPS shut down Check output wiring and if display and alarm is continuously automatically because connected devices are in sounding. short circuit occurs on the short circuit status. UPS output.
-
Page 28: Storage And Maintenance
Storage and Maintenance The UPS system contains no user-serviceable parts. If the battery service life has been exceeded, the batteries must be replaced. In this case, please contact your dealer. Battery service life is typically around 3 years, however the following factors can reduce this: ... -
Page 29: Specifications
Specifications CAPACITY* 1000VA/1000W INPUT 160VAC/140VAC/120VAC/110VAC ± 5 % Low Line Transfer ( based on load percentage 100% - 80 % / 80 % - 70 % / 70 - 60 % / 60 % - 0) Low Line Voltage 175VAC/155VAC/135VAC/125VAC ± 5 % Comeback Range High Line Transfer... - Page 30 Battery Pack Specification Model BV2U-48-18 Battery Type 12V 9Ah Battery Numbers Battery Voltage Capacity 18Ah Dimensions (DxWxH) mm 480 x 438 x 88 Net Weight(kgs) Advanced Speed Control (ASC) Specification Fan Qty Type PWM Controlled 80mm Minimum RPM Maximum RPM 2200 Noise Output Minimum <10dB(A)
-
Page 31: Limited Factory Warranty
Limited Factory Warranty Power Inspired Ltd (PI), warrants its products to be free from defects in materials and workmanship for a period of two (2) years from the date of purchase. This warranty excludes the batteries which are classed as a consumable item. The PI obligation under this warranty is limited to repairing or replacing, at its sole discretion, any such defective products or parts thereof.
Need help?
Do you have a question about the VFI1000QS and is the answer not in the manual?
Questions and answers