Table of Contents
Advertisement
Quick Links
Advertisement
Chapters
Table of Contents

Summary of Contents for Klemsan Meastro-R
-
Page 2: Table Of Contents
Digital Astronomic Timer İÇİNDEKİLER BÖLÜM 1 GENEL ÖZELLİKLER.............................4 Genel Özellikler......................................5 Teknik Özellikler......................................6 Doğru Kullanım ve Güvenlik Şartları..............................6 Genel Görünüm, Bağlantı ve Boyutlar (mm).............................7 BÖLÜM 2 KONTROL................................8 Manuel Test Modu......................................9 BÖLÜM 3 MENÜLER VE AYARLAR............................10 Ayar Menüleri......................................11 3.1.1 Haberleşme Ayarları....................................11 3.1.2 Saat ve Tarih Ayarları....................................11 3.1.3 Yaz Saati Ayarları.......................................12... - Page 3 Digital Astronomic Timer Kurulum-6 Konfigürasyon Programı Kısayolları ..........................27 Cihaz Seçimi ......................................28 Meastro Cihaz Seçimi .................................... 28 Bağlantı türleri seçimi ................................... 29 5-10 Cihazın Bağlı Olduğu Sanal Seri Port ...............................30 5-11 Cihazın Bağlı Olduğu Sanal Seri Port .............................. 30 5-12 Meastro Kullanıcı...
-
Page 4: Bölüm 1 Genel Özelli̇kler
Digital Astronomic Timer... -
Page 5: Genel Özellikler
Digital Astronomic Timer Meastro 121 Meastro 221 Meastro 321 Meastro 122 Meastro 222 Meastro 322 270 702 270 703 270 704 270 705 270 706 270 707 Ray Tipi Ray Tipi Ray Tipi Ray Tipi Ray Tipi Ray Tipi ✓ ✓... -
Page 6: Teknik Özellikler
Digital Astronomic Timer IP20 • • • • • •... -
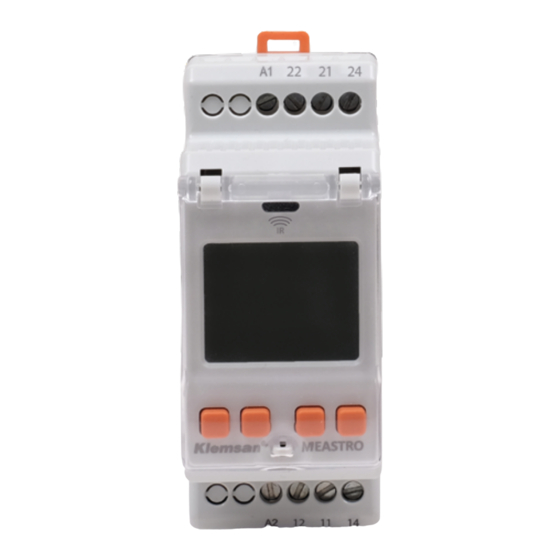
Page 7: Genel Görünüm, Bağlantı Ve Boyutlar (Mm)
Digital Astronomic Timer Bargraf C1/C2 Haftanın günlerini gösterir Yaz saati uygulamasını gösterir. Oturum kapalı Tarihi gösterir. Zamanı gösterir 1. röleyi gösterir. 2. röleyi gösterir Geri / Manual mod Onay tu u 1.röle tatil modu 2.röle tatil modu Sol yön ve / - tu ları Sağ... - Page 8 Digital Astronomic Timer...
-
Page 9: Bölüm 2 Kontrol
Digital Astronomic Timer BÖLÜM 2 KONTROL Haberleşme, saat, tarih, yaz saati, tatil, cihaz, konum, namaz ayarlarının yapıldığı menüdür. Program ekleme-değiştirme, silme veya tümünü silme seçeneklerinin bulunduğu menüdür. Oturum açmadan ayarlar ve program menülerine manual olarak erişim sağlanamaz! Şifrenin ön değeri 0001’dir. 2.1 Manuel Test Modu Manuel test modu, roleleri test etmek için kullanılır. -
Page 10: Bölüm 3 Menüler Ve Ayarlar
Digital Astronomic Timer... -
Page 11: Ayar Menüleri
Digital Astronomic Timer HABERLESME 3.1.1 Haberleşme Ayarları Bu menüde Köle ID ve Baud rate ayarları yapılır. HABERLESME HABERLESME HABERLESME KOLE ID BAUDRATE Ayarlanmak istenilen Baud rate değeri bu menüden şeçilip, onaylanır. Ayarlanmak istenilen Köle ID değeri bu menüden şeçilip, onaylanır. 3.1.2 Saat ve Tarih Ayarları... -
Page 12: Yaz Saati Ayarları
Digital Astronomic Timer 3.1.3 Yaz Saati Ayarları... - Page 13 Digital Astronomic Timer -11 -10 -9 -8 -7 -6 -5 -4 -3 -2 -1 0 +1 +2 +3 +4 +5 +6 +7 +8 +9 +10 +11 +12 21:00 22:00 23:00 01:00 02:00 03:00 OSLO ROMA ANKARA MOSKOVA STOCKHOLM ISTANBUL TAHRAN BRASILIA VARŞOVA IZLANDA...
-
Page 14: Tatil Ayarları
Digital Astronomic Timer 3.1.4 Tatil Ayarları... -
Page 15: Cihaz Ayarları
Digital Astronomic Timer 3.1.5 Cihaz Ayarları... -
Page 16: Konum (Koordinat Ve Bölge) Ayarları
Digital Astronomic Timer 3.1.6 Konum (Koordinat ve Bölge) Ayarları... -
Page 17: Namaz Ayarları
Digital Astronomic Timer 3.1.7 Namaz Ayarları Bu ayar ile ikindi namaz vakti bulunan konuma göre değişiklik gösterecektir.Hanefi mezhebi için 2 derece,diğer mezhepler için 1 derece ayarı yapılır. -
Page 18: Program Ekle-Değiştir
Digital Astronomic Timer... -
Page 19: İzleme
Digital Astronomic Timer... -
Page 20: Oturum
Digital Astronomic Timer... -
Page 21: Bölüm 4
Digital Astronomic Timer BÖLÜM 4 MEASTRO-R (KIZILÖTESİ KUMANDA) -
Page 22: Kullanımı
Digital Astronomic Timer BÖLÜM 4 MEASTRO-R (KIZILÖTESİ KUMANDA) Kumandadan cihaza/Cihazdan kumandaya program verisi aktarımı Kızılötesi veri aktarımı Kumandadan cihaza/Cihazdan kumandaya tarih-zaman verisi aktarımı Onay tuşu Kumandadan cihaza/Cihazdan kumandaya konum verisi aktarımı Seçim tuşu USB giriş / Şarj Kumandadan cihaza/Cihazdan kumandaya... -
Page 23: Cihazdaki Verileri Kumandaya Aktarma
Digital Astronomic Timer Zaman, Konum ve Namaz verisi aktarmak için ‘SELECT’ tuşu kullanılarak yüklemek istenilen veri ledinin sabit yandığından emin olduktan sonra ‘OK’ tuşu ile veri aktarımı gerçekleştirilir. 4.1.1 Cihazdaki verileri kumandaya aktarma: Program ledi sabit yanarken seçim tuşuna 4 kere basıldığında 1 döngü tamamlanmış olur ve program ledi yanıp sönmeye başlar, bu cihazdaki verileri kumandaya aktarma modudur. - Page 24 Digital Astronomic Timer BÖLÜM 5 MEASTRO KULLANICI ARAYÜZ PROGRAMI...
-
Page 25: Bölüm 5 Meastro Kullanici Arayüz Programi
Digital Astronomic Timer BÖLÜM 5 MEASTRO KULLANICI ARAYÜZ PROGRAMI 5.1 Kurulum • Kurulumu başlatmak için, Meastro kullanıcı arayüz programı setup dosyasına çift tıklanır. • Yükleme dosyasını çalıştırdığınızda aşağıda yer alan ekran belirir. Lütfen ‘Next’ tuşuna tıklayın. Şekil 5-1 Kurulum-1 • Daha sonra ekranınızda kurulumun yapılacağı... -
Page 26: Kurulum-3
Digital Astronomic Timer • Yapılan tercihlere göre yüklemeden önce ayarlarınızı gözden geçireceğiniz ekran belirir. Eğer tüm ayarlar doğru ise, yüklemeyi başlatmak için lütfen “Install” tuşuna tıklayın. Şekil 5-3 Kurulum-3 • Yükleme başladığında, işletim sisteminiz size uygulamanın yüklenmesi için sizden izin isteyecektir. -
Page 27: Meastro Kullanıcı Arayüz Programı
Digital Astronomic Timer • Kurulumu tamamlamak ve kurulum ekranından çıkmak için lütfen “Finish” tuşuna tıklayınız. Şekil 5-5 Kurulum-5 • Masaüstünde Meastro kısayolu ile programı çalıştırabilirsiniz. Şekil 5-6 Kurulum-6 Konfigürasyon Programı Kısayolları 5.2 Meastro Kullanıcı Arayüz Programı Kullanımı Kullanmış olduğunuz Meastro cihazını arayüz programı ile yapılandırabilirsiniz. Meastro cihazına USB veya TCP/IP ile bağlantı... -
Page 28: Meastro (Infrared) Cihazıylameastro Kullanıcı Arayüz Programı
5.2.1 Meastro (Infrared) cihazıyla Meastro Kullanıcı Arayüz Programı Kullanımı Arayüz programı ile tarih, zaman, program, konum, namaz ayarları oluşturulur.Oluşturulan programları Kızıl Ötesi Kumandanıza (Meastro-R’ye) yazabilir daha sonra kumanda ile cihazınıza yükleyebilirsiniz. Kullanıcı arayüz programı açılış sayfasından Meastro (Infrared) cihazını seçiniz. -
Page 29: Bağlantı Türleri Seçimi
Digital Astronomic Timer Şekil 5-9 Bağlantı türleri seçimi ‘‘USB ile Bağlan’’ butonuna tıklanarak Meastro-R ile bağlantı sağlanır. ‘‘USB ile Bağlan’’ butonuna basıldığında USB üzerinden seri olarak cihaz ayarları okunur ve yazılır. -
Page 30: Cihazın Bağlı Olduğu Sanal Seri Port
‘‘COM X’’ seçildikten sonra ‘‘Bağlan’’ butonuna tıklanır. Şekil 5-11 Cihazın Bağlı Olduğu Sanal Seri Port Meastro-R cihazına bağlantı gerçekleştikten sonra alt sağ köşede bulunan ‘Bağlantı Yok’ yazısı ‘USB ile Bağlandı’ şeklinde gözükecektir. Cihaz ile bağlantı yapıldığında ekranda Bağlantıyı Kes, Oku, Yaz, Program, Konum, Namaz, Tarih -... -
Page 31: Meastro Kullanıcı Arayüz Programı Bağlantı Program Sekmesi
Bağlantı gerçekleştiğinde kullanıcı arayüz programında ‘Program’ sekmesi ekrana gelecektir. Bu sekmede Meastro’nun Program Ayarları yapılmaktadır. • Program sekmesinde kayıt edilecek programlar oluşturulur, Meastro-R’ye (Kızıl Ötesi Kumandaya) yazılır ve Meastro’ya yüklenir. • Ayarlanacak olan programlar kızıl ötesi kumanda ile cihaza eklenebilir,güncellenebilir veya kaldırılabilir. -
Page 32: Meastro Kullanıcı Arayüz Programı Bağlantı Program Sekmesi
Digital Astronomic Timer Ekle kutusuna tıklanır ve Şekil 5-13’de görüldüğü üzere program detayı sayfası ekrana gelir. İlgili rölelerin ayarları yapıldıktan sonra ‘Programı Kaydet’ butonuna tıklanır.Program kayıt edildikten sonra aşağıdaki gibi gözükecektir. No: Oluşturulan program numarası. 100 adete kadar program oluşturmak mümkündür. Röle: Devreye alınması... -
Page 33: Meastro Kullanıcı Arayüz Programıbağlantı Konum Sekmesi
Digital Astronomic Timer Şekil 5-15 Meastro User Interface Program Bağlantı Konum Sekmesi Bu sekmede Meastro’nun çalışacağı Konum Ayarları yapılmaktadır. Konum sekmesinde cihaza kayıt edilmek istenilen konum ayarları oluşturulur, Meatro-R’ye yazılır ve cihaza aktarılır. Konum sekmesi altında bulunan seçenekler Listeden Seçim, Özel ve Gün Işığından Yararlanma şeklinde 3 kısımdan oluşmaktadır. -
Page 34: Meastro Kullanıcı Arayüz Programı Bağlantı Namaz Sekmesi
Gölge açısı 1 ° ve 2 ° olarak ayarlanabilir. Gecikme Süresi: İmsak, öğle, ikindi, akşam ve yatsı zamanı için gecikme süreleri yazılır. Değerleri girildikten sonra kaydet butonuna tıklanır.Düzenlenen namaz ayarları ‘Yaz’ butonuna tıklanarak Meastro-R (kızıl ötesi kumanda) üzerine yazılır kızıl ötesi ile cihaza aktarılır. -
Page 35: Meastro Kullanıcı Arayüz Programı Tarih & Zaman Sekmesi
Kumanda Tarih Zamanı: Kızıl ötesi kumandada yazılı olan tarihi ve saati göstermektedir. Sistem Tarih Zamanı: Kızıl ötesi kumandanın (Meastro-R) bağlı olduğu bilgisayarın güncel tarih ve zamanını göstermektedir. Zaman Farkı: Sistem ve Kızıl ötesi kumanda (Meastro-R) arasındaki zaman farkını göstemektedir. -
Page 36: Meastro Kullanıcı Arayüz Programı Bağlantı Tarih & Zaman Sekmesi
Digital Astronomic Timer Şekil 5-18 Meastro Kullanıcı Arayüz Bağlantı Hakkında Sekmesi Hakkında sekmesinde versiyon,Klemsan web adresi,Genel Merkez e-posta adresi ve Genel Merkez adres bilgilerine ulaşılabilir. Çevrimdışı Mod, Şekil 5-19 Meastro User Interface Program Bağlantı Hakkında Sekmesi Çevrimdışı Mod özelliği, cihazı kullanıcı arayüz programına bağlamaya gerek duymadan yukarıda bahsedilen tüm ayarların yapılmasını... -
Page 37: Meastro-Rs485 Cihazıyla Meastro Kullanıcı Arayüz Programı
5.2.2 Meastro-RS485 cihazıyla Kullanıcı Arayüz Programı Kullanımı Kullanıcı arayüz programı ile yapılan her ayar TCP/IP üzerinden cihaza yazılabilir veya okunabilir- Log,cihaz bilgisi ve hakkında sekmeleri kayıt,cihaz ve Klemsan iletişim bilgilerini içermektedir. • Arayüz programından Meastro-RS 485 cihazını seçiniz. Şekil 5-20 Meastro Kullanıcı Arayüz İle Meastro-RS485 Cihaz Seçimi Meastro-RS 485 görseline tıkladıktan sonra aşağıdaki ekran karşınıza gelecektir. -
Page 38: Meastro Kullanıcı Arayüz Programı Usb Bağlantı
Digital Astronomic Timer USB ile Bağlan, Şekil 5-22 Meastro Kullanıcı Arayüz ile USB Bağlantı Seri bağlantı üzerinden USB kablosu ile PC’ye bağlantı yapıldıktan sonra doğru port listede görünmüyorsa “Yenile” düğmesine basılarak listenin güncellenmesi sağlanabilir.COM X seçildik- ten sonra bağlan butonuna tıklanır. Köle No: Meastro-RS 485’in bağlı... -
Page 39: Meastro Kullanıcı Arayüz Programıtcp/Ip Bağlantı
Digital Astronomic Timer TCP/IP ile Bağlan, ‘TCP/IP üzerinden Bağlan’ butonuna tıklayınız. Tıkladıktan sonra aşağıdaki ekran görüntüsü gelecektir. Şekil 5-23 Meastro Kullanıcı Arayüz Programı TCP/IP Bağlantı Bu sekmede, Meastro- RS485 cihazının bağlı olduğu haberleşme cihazının değerleri girilir. IP adresi: Meastro RS 485’in bağlı olduğu haberleşme cihazının IP değeri girilir. Port : Meastro-RS 485’in bağlı... -
Page 40: Meastro Kullanıcı Arayüz Programı Tarih&Zaman Sekmesi
Digital Astronomic Timer Şekil 5-24 Meastro Kullanıcı Arayüz Programı Tarih&Zaman Sekmesi Bu sekmede Tarih Saat ayarları yapılmaktadır.Ayarlar kullanılan bilgisayardan (sistemden) güncel olarak alınır. Cihaz Tarih Zamanı: Cihaz tarih ve saatini gösterir. Sistem Tarih Zamanı: Cihazın bağlı olduğu bilgisayarın (sistemin) güncel tarih ve zamanını gösterir. -
Page 41: Meastro Kullanıcı Arayüz Programı Program Kayıt Sekmesi
Digital Astronomic Timer Program Ayarları aşağıdaki şekilde yapılır, Şekil 5-26 Meastro Kullanıcı Arayüz Programı Program kayıt Sekmesi Ekle kutusuna tıklandığında Şekil 5-26’da görüldüğü üzere program detayı sayfası ekrana gelir. Program kayıt edildiğinde ekran Şekil-27’deki gibi gözükecektir. No: Oluşturulan program numarası. 100 adete kadar program oluşturmak mümkündür. Röle: Devreye alınması... -
Page 42: Meastro Kullanıcı Arayüz Programıprogram Sekmesi
Digital Astronomic Timer İlgili rölelerin ayarları yapıldıktan sonra ‘Programı Kaydet’ butonuna tıklanır.Program kayıt edildikten sonra ekran aşağıdaki gibi gözükecektir Şekil 5-27 Meastro Kullanıcı Arayüz Programı Program Sekmesi Not: Kayıt edilen program tipine göre sağ üst köşede bulunan cihaz isimleri ayarlanan program tipini destekliyorsa turuncu renkte gözükecektir.Eğer ayarlanan program tipini cihaz desteklem- iyorsa gri olarak gözükecektir. -
Page 43: Meastro Kullanıcı Arayüz Programı Konum Sekmesi
Digital Astronomic Timer Şekil 5-28Meastro Kullanıcı Arayüz Programı Konum Sekmesi Bu sekmede Meastro’nun çalışacağı Konum Ayarları yapılmaktadır. Konum sekmesi altında bulunan seçenekler Listeden Seçim , Özel ve Gün Işığından Yararlanma şeklinde 3 kısımdan oluşmaktadır. Konum Ayarları aşağıdaki şekilde yapılır. Yeni kutusuna tıklanır ve butonlar etkinleşir. Profil: Oluşturulacak konum ayarının adı... -
Page 44: Meastro Kullanıcı Arayüz Programı Namaz Sekmesi
Digital Astronomic Timer Şekil 5-29Meastro Kullanıcı Arayüz Programı Namaz Sekmesi Bu sekmede Meastro’nun çalışacağı Namaz Ayarları yapılmaktadır. Namaz sekmesinde cihaza kayıt edilmek istenilen namaz ayarları oluşturulur. Not: Namaz ayarları Meastro-322 ile desteklenmektedir. Bulunan konuma göre yapılacak hesaplama metodu/gölge açısı ve gecikme süreleri bu sekme- de girilir. -
Page 45: Meastro Kullanıcı Arayüz Programı Cihaz Ayarları Sekmesi
Digital Astronomic Timer Şekil 5-30Meastro Kullanıcı Arayüz Programı Cihaz Ayarları Sekmesi Bu sekmede Meastro-RS485’in çalışacağı Cihaz Ayarları yapılmaktadır. Sekme altında Genel,Haberleşme,Tatil Ayarları Röle 1 – Tatil Ayarları Röle 2 ve Komutlar bulun- maktadır. Genel • Dil: Cihazın dil ayarları buradan yapılabilir. Arayüz ekranının sol alt köşesinde bulunan Dili Değiştir butonu arayüz programının dil ayarıdır. -
Page 46: Meastro Kullanıcı Arayüz Programı Log Sekmesi
Digital Astronomic Timer Haberleşme Cihazın haberleşme ayarlarının yapıldığı kısımdır. Komutlar Arayüz ile röle ayarlarının kontrolü Komutlar kısmında sağlanmaktadır. Operasyon Modu: Otomatik ve Elle ayarla seçenekleri bulunmaktadır. Otomatik Mod: Tatil Ayarı Röle 1 ve Tatil Ayarı Röle 2 kısmında ayarlanan ayarlara göre otomatik olarak çalışmaktadır. -
Page 47: Meastro Kullanıcı Arayüz Programı Cihaz Bilgisi Sekmesi
Digital Astronomic Timer Şekil 5-32 Meastro Kullanıcı Arayüz Programı Cihaz Bilgisi Sekmesi Bu sekmede Cihaz bilgileri bulunmaktadır. Cihaz bilgisi sekmesinde ; Seri Numarası, Sipariş Numarası, Üretim Tarihi , Röle Anahtarlama Sayısı, Röle Aktif-Pasif Olma Süresi, Gündoğumu/Günbatımı Zamanları, Namaz Vakit gibi bilgiler- in tek bir ekran üzerinden okunabilmesini sağlamaktadır. - Page 48 Digital Astronomic Timer...
- Page 49 Monitoring........................................66 Login..........................................67 SECTION 4 IR CONTROLLER AND USER INTERFACE PROGRAM..................69 Usage Mods........................................69 4.1.1 Transferring data to MEASTRO-R from the relay.......................... 70 SECTION 5 Meastro User Interface Program USER INTERFACE..................72 Setup..........................................72 UsingMeastro User Interface Program............................75 5.2.1 UsingMeastro User Interface Program with Meastro........................75 5.2.2...
- Page 50 Digital Astronomic Timer FIGURES Configuration Program Shortcuts...............................74 Select device......................................75 Select Meastro fromMeastro User Interface Program........................ 75 Connection Types....................................76 5-10 Virtual Serial Port......................................77 5-11 Virtual Serial Port..................................... 77 5-12 Meastro User Interface Program Program Tab..........................78 5-13 Meastro User Interface Program Program Save Tab ........................78 5-14 Meastro User Interface Program Program Tab..........................
- Page 51 Digital Astronomic Timer...
-
Page 52: General Features
Digital Astronomic Timer SECTION 1 GENERAL FEATURES 1.1 General Features Meastro is an astonomic time relay which calculates sunrise and sunset times for the given coordinates or city selections and turns the relay contacts on and off to control connected systems without any need of photocells or external sensors. -
Page 53: Technicial Specifications
Digital Astronomic Timer 1.2 Technicial Specifications Operating voltage 180-265VAC Supply terminals A1-A2 Number of contacts 2X (AgSnO2) Rated current 16A/250VAC Power Consumption AC Maks. 11 VA Accuracy 1 sec/day Renewal period 0,5sec Display type Display size 1.5” Number of program Duration of the battery reserve 7 years Protection class... -
Page 54: General View, Connections & Definitions(Mm)
Digital Astronomic Timer Bargraf C1/C2 Day of week Summer tiime Password Needed Date Time 1st Relay 2nd relay Back / Run Manual mode Con rmation 1st relay holiday mode 2nd relay holiday mode Left and / - buttons Right and / + buttons Manual Mode Power Supply Besleme Terminali (A1-A2) -
Page 55: Control
Digital Astronomic Timer... -
Page 56: Manual Test Mode
Digital Astronomic Timer Without login, programs and settings menus are not available for access manually! Default password is 0001. 2.1 Manual Test Mode Manual test mode using for relay testing. When you press the button for 4 seconds, flashing symbol becomes permanent light and, icons will appear on the screen.That means C1 and C2 relays are passive condition directional keys, respectively, C1 and C2 relays can... -
Page 57: Menus And Settings
Digital Astronomic Timer... -
Page 58: Settings Menus
Digital Astronomic Timer COMM 3.1.1 Communication Settings In this menu, Slave Id and Baud Rate are set. SETTINGS SETTINGS SETTINGS COMM SLAVE ID BAUDRATE In this menu Baud rate is set and confirmed. In this menu Slave ID is set and confirmed. 3.1.2 Date and Time Settings In this menu, Date and time are set. -
Page 59: Daylight Saving Time Settings
Digital Astronomic Timer... - Page 60 Digital Astronomic Timer -11 -10 -9 -8 -7 -6 -5 -4 -3 -2 -1 0 +1 +2 +3 +4 +5 +6 +7 +8 +9 +10 +11 +12 21:00 22:00 23:00 01:00 02:00 03:00 OSLO ROME ANKARA MOSCOW STOCKHOLM ISTANBUL TEHERAN BRASILIA WARSAW IZMIR...
-
Page 61: Holiday Settings
Digital Astronomic Timer... -
Page 62: Device Settings
Digital Astronomic Timer 3.1.5 Device Settings... -
Page 63: Location (Coordinate And Region) Settings
Digital Astronomic Timer 3.1.6... -
Page 64: Prayer Settings
Digital Astronomic Timer... -
Page 65: Add Or Modify Programs
Digital Astronomic Timer... -
Page 66: Monitoring
Digital Astronomic Timer Logs, programs,operating time and switching counters of the relay can be monitored. Also sunrise-sunset, prayer time, holiday and location settings, memory status and the software version of the device can be monitored from this menu. -
Page 67: Login
Digital Astronomic Timer This menu is used by user to actived the device or to check the status of the device. - Page 68 Digital Astronomic Timer SECTION 4 MEASTRO-RS 485 (IR CONTROLLER)
-
Page 69: Ir Controller And User Interface Program
Digital Astronomic Timer SECTION 4 MEASTRO-RS 485 (IR CONTROLLER) Transferring program data to relay from the MEASTRO-R / to MEASTRO-R from the relay IR data transmission Transferring time data to relay from the MEASTRO-R / to MEASTRO-R from the relay... -
Page 70: Transferring Data To Meastro-R From The Relay
Digital Astronomic Timer... - Page 71 Digital Astronomic Timer SECTION 5 MEASTRO USER INTERFACE PROGRAM...
-
Page 72: Meastro User Interface Program User Interface
Digital Astronomic Timer SECTION 5 MEASTRO USER INTERFACE PROGRAM 5.1 Setup To start the installation, double-click the Meastro user interface program setup file The following screen appears when you run the installation file. Please click ‘’Next’’ button. Figure 5-1 Setup-1 •... -
Page 73: Setup-3
Digital Astronomic Timer • According to the preferences made, the screen to review your settings appears before you upload. If all settings are correct, please click ‘Install’ to start the installation. Figure 5-3 Setup-3 • Figure 5-4 Setup-4... -
Page 74: Setup-5
Digital Astronomic Timer • Figure 5-5 Setup-5 User can run the program with the Meastro shortcut on the desktop. Figure 5-6 Configuration Program Shortcuts... -
Page 75: Usingmeastro User Interface Program
5.2.1 Using Meastro User Interfacewith Meastro Device With interface program; the date, time, program, location, prayer settings can be configurated. User can write the created programs to Infrared Remote Control (Meastro-R) and then user can install it to Meastro. Figure 5-8 Select Meastro from Meastro User Interface Program To access the user interface program, connect the Meastro-R to your computer with a USB cable. -
Page 76: Connection Types
Digital Astronomic Timer Figure 5-9 Connection Types Click ‘Connect with USB’ button to connect Meastro-R device. When user clicks ‘Connect with USB’ button, device settings are read and written in series via USB. -
Page 77: Virtual Serial Port
’Refresh’ button, the list will be updated by clicking on it. After ‘COM X’ is selected, click the ‘Connect’ button. Figure 5-11 Virtual Serial Port After connection to Meastro-R, ‘Disconnect’ appearance in the lower right corner will appear as ‘Connected via USB’ . When connected to device; Disconnect, Read, Write, Program, Location, Prayer, Date-Time and... -
Page 78: Meastro User Interface Program Program Tab
Settings are made. Programs to be saved in the Program tab are created. It is written to Meastro-R (Infrared Controller) and uploaded to Meastro. Programs to set can be added, updated or removed via infrared control. Program settings, desired days of the week Standard, Astro, Prayer time types Relay 1 (C1) - Relay 2 (C2) can be set as active and passive. -
Page 79: Meastro User Interface Program Program Tab
Digital Astronomic Timer Click the Add box and the ‘Program Detail Page’ in the screenshot above appears. Click ‘Save Program Detail’ button after setting the relevant relays.After registering the program it will look like the following. Nr: The created program number. It is possible to create up to 100 programs. Relay: The relay is activated or deactivated when the relay is selected. -
Page 80: Meastro User Interface Program Location Tab
Digital Astronomic Timer Figure 5-15 Meastro User Interface Program Location Tab In this tab, Meastro, Location Settings are set. On the Location tab, the desired location settings are saved to the device, written to Meatro-R and transferred to the device. The options under the ‘Location’... -
Page 81: Meastro User Interface Program Pray Tab
Shadow angle can be set to 1 ° and 2 ° Delay Time: Fajr-Dhuhr-Asr-Maghrib-Isha delay times are written by user. After entering the values, click on ‘Save’ button. User can write all prayer settings on Meastro-R and user can upload Meastro. -
Page 82: Meastro User Interface Program Date&Time Tab
• In system date time setting, time and date cannot be changed by user. Date and time information directly come from system. • The values can be changed by the user in the Custom date and time setting. By clicking Write button, the system date and time are written to the infrared control (Meastro-R). -
Page 83: Meastro User Interface Program About Tab
Digital Astronomic Timer Figure 5-18 Meastro User Interface Program About Tab On About tab, user can find version of the device, Klemsan web address, mail address and office address information. Offline Mod, Figure 5-19 Connection Types Offline Configuration The Offline Mode feature sets all the settings mentioned above without being connected to the device. -
Page 84: Usingmeastro User Interface Program With Meastro-S485
User can configure Meastro with interface. Easy configuration with interface program for write date, time, program, location, prayer and device settings. User can load each setting via the interface to Meastro-RS 485. Also contains Log, Device information and Klemsan information. • Select Meastro-RS 485 from interface. -
Page 85: Connect With Usb
Digital Astronomic Timer Connect with USB, Figure 5-22 Connect with USB If the correct port does not appear in the list when connecting to PC via USB cable, the list can be updated by clicking ‘Refresh’ button. Click on connect button after ‘COM - X’ is selected. Slave Id: The Slave Number of the communication device to which the Meastro-RS 485 is con- nected must be entered. -
Page 86: Connect Over Tcp/Ip
Digital Astronomic Timer Connect over TCP/IP, Click ‘Connect via TCP / IP ‘ . After clicking, the following screenshot will appear. Figure 5-23 Connect over TCP/IP In this tab, values entered for the device that helps to communication between the computer and the device. -
Page 87: Meastro User Interface Program Date&Time Tab
Digital Astronomic Timer Figure 5-24 Meastro User Interface Program Date&Time Tab In this tab, Maestro-RS 485’s Date Time Settings are set. Device Date Time: It shows the date and time on Meastro-RS485. System Date Time: It shows the current date and time of the computer which communicated with device. -
Page 88: Meastro User Interface Program Program Save Tab
Digital Astronomic Timer Figure 5-26 Meastro User Interface Program Program Save Tab Click the ‘Add’ and the program detail page in the screenshot above appears. Click ‘Save Program Detail’ button after setting the relevant relay. Otherwise registering the program, it will look like the following screenshot. Nr: The created program number. -
Page 89: Meastro User Interface Program Program Tab
Digital Astronomic Timer Click ‘Save Program Detail’ button after setting the relevant relay. The screen will look like this after the program is registered, Figure 5-27 Meastro User Interface Program Program Tab Note: Depending on the type of program added, the device names in the upper right corner will appear orange if the set type supports it. -
Page 90: Meastro User Interface Program Location Tab
Digital Astronomic Timer Figure 5-28 Meastro User Interface Program Location Tab In this tab, Meastro-RS 485 Location Settings can configure. In this tab user can set location and write on Meastro-RS 485. The options under the Position tab consist of 3 parts: Selection from List, Custom and Daylight Saving. -
Page 91: Meastro User Interface Program Prayer Tab
Digital Astronomic Timer Figure 5-29 Meastro User Interface Program Prayer Tab In this tab, Meastro’s Prayer Settings can configure. The calculation metod/shadow angle and delay times are set according to the position. Prayer Settings will be set as follows, Click ‘New’ and the buttons are activated. Calculation Method / Shadow Angle: The name of the region is selected where device is working. -
Page 92: Meastro User Interface Program Device Setting Tab
Digital Astronomic Timer Figure 5-30 Meastro User Interface Program Device Setting Tab In this tab, Meastro-RS485’s Device Settings can configure. Under the tab General, Communication, Holiday Settings Relay 1 - Holiday Settings - Relay 2 and Commands consists of 4 adjustment parts. General, •... -
Page 93: Meastro User Interface Program Log Tab
Digital Astronomic Timer Communication It is the section where the communication settings of the device are made. Commands Relay control via the interface is provided in the Commands section. Operation Mode: Automatic mode, control of Relay 1 (C1) and Relay 2 (C2) buttons is automat- ically adjusted. -
Page 94: Meastro User Interface Program Device Informationtab
Digital Astronomic Timer Figure 5-32 Meastro User Interface Program Device Informa- tionTab This tab contains Device information. On the Device info tab; Serial Number, Order Number, Production Date, Number of Relay Switching, Relay On-Off Time, Sunrise / Sunset Times, Prayer Time can be read on single screen. Figure 5-33 Meastro User Interface Program Write Tab In this tab, the pre-recorded program, location and prayer status are selected. - Page 95 Digital Astronomic Timer BÖLÜM 6 MODBUS Protokolü SECTION 6 MODBUS Protocol...
-
Page 96: Modbus Tablosu
Digital Astronomic Timer • 03H fonksiyonu/function: Bu fonksiyon ile modbus tablosundaki okuma yapılabilen adresler okunur./Reads the binary contents of holding registers (4X references) in Meastro. • 6H fonksiyonu/function: Bu fonksiyon ile modbus tablosundaki tek yazma yapılabilen adresler yazılır./Presets a value into a single holding register (4X references). •... - Page 97 Digital Astronomic Timer Sayı Adres Parametre Fonksiyon Okuma Veri Tipi Açıklama Örnek/Example /Item /Address / Variable /Function /Read /Type /Description Değer Açıklama Yazma /Value /Description /Write Programlar 1-16/ 0x03 unsigned 0-Atanmamış/Not assigned Assigned programs 1-Atanmış/Automatic 1 -16 Programlar 17-32/ 0x03 unsigned 0-Atanmamış/Not assigned Assigned programs...
- Page 98 Digital Astronomic Timer Sayı Adres Parametre Fonksiyon Okuma Veri Tipi Açıklama Örnek/Example /Item /Address / Variable /Function /Read /Type /Description Değer Açıklama Yazma /Value /Description /Write Olay 1 Tipi /Event 1 0x03 unsigned 0: Boş/Empty Type 1:Röle 1 açık/Relay 1 on 2:Röle 2 açık/ Relay2 on Röle 2 aktif/ 3: Röle 1 kapalı/Relay1 off...
- Page 99 Digital Astronomic Timer Sayı Adres Parametre Fonksiyon Okuma Veri Tipi Açıklama Örnek/Example /Item /Address / Variable /Function /Read /Type /Description Yazma Değer Açıklama /Write /Value /Description Olay 19 Tipi / Event 19 Type 0x03 unsigned 0:Boş/Empty 1:Röle 1 açık/Relay 1 on 2:Röle 2 açık/ Relay2 on 3: Röle 1 kapalı/...
- Page 100 Digital Astronomic Timer Sayı Adres Parametre Fonksiyon Okuma Veri Tipi Açıklama Örnek/Example /Item /Address / Variable /Function /Read /Type /Description Yazma Değer Açıklama /Write /Value /Description Olay 20 Ay/Event 20 Month 0x03 unsigned 1 - 12 Olay 20 Yıl/Event 20 Year 0x03 unsigned 0 -99...
- Page 101 Digital Astronomic Timer Sayı Adres Parametre Fonksiyon Okuma Veri Tipi Açıklama Örnek/Example /Item /Address / Variable /Function /Read /Type /Description Yazma Değer Açıklama /Write /Value /Description İkindi Saat/Asr Hour 0x03 unsigned 1 - 23 Öğle/Asr İkindi Dakika/Asr Minute 0x03 unsigned 0- 59 16:35:00 İkindi Saniye/Asr Second...
- Page 102 Digital Astronomic Timer Sayı Adres Parametre Fonksiyon Okuma Veri Tipi Açıklama Örnek/Example /Item /Address / Variable /Function /Read /Type /Description Yazma Değer Açıklama /Write /Value /Description Address Program durumu/Program 0x03 - 0x10 unsigned 0- Program deaktif/ Program + 13 state Program deactive aktif/ 1-Program aktif/...
- Page 103 Digital Astronomic Timer Sayı Adres Parametre Fonksiyon Okuma Veri Tipi Açıklama Örnek/Example /Item /Address / Variable /Function /Read /Type /Description Değer Açıklama Yazma /Value /Description /Write Baudrate 0x03 - 0x10 unsigned 0- 1200 Saat/Time 1- 2400 11:21:00 2- 4800 3- 9600 7- 19200 5- 38400 6- 57600...
- Page 104 Digital Astronomic Timer Sayı Adres Parametre Fonksiyon Okuma Veri Tipi Açıklama Örnek/Example /Item /Address / Variable /Function /Read /Type /Description Yazma Değer Açıklama /Write /Value /Description Seçili olan ilçe/Selected 0x03 - 0x10 unsigned Subregion DINAR subriegion count of selected region Konum Tipi/Location type 0x03 - 0x10 unsigned...
- Page 105 Digital Astronomic Timer Bu tablo 920 ve 928. adres değerleriyle ilgilidir/This table refers to address 920 and 928. Numara/ İller/ County Counts Counties Numara/ İller/Turkish County Counts Counties Number Turkish (Subregion) Number Citys (Region) (Subregion) Citys (Region) ADANA MERKEZ KONYA MERKEZ FEKE AKSEHIR...
- Page 106 Digital Astronomic Timer Numara/ İller/Turkish County Counties Numara/ İller/Turkish County Counts Counties Number Citys (Region) Counts Number Citys (Region) (Subregion) (Subregion) BITLIS MERKEZ SAKARYA MERKEZ ADILCEVAZ BOLU MERKEZ SAMSUN MERKEZ GOYNUK VEZIRKOPRU BURDUR MERKEZ SIIRT MERKEZ ALTINYAYLA BURSA MERKEZ SINOP MERKEZ HARMANCIK INEGOL...
- Page 107 Digital Astronomic Timer Numara/ İller/Turkish County Counties Numara/ İller/Turkish County Counts Counties Number Citys (Region) Counts Number Citys (Region) (Subregion) (Subregion) GUMUSHANE MERKEZ KARAMAN MERKEZ HAKKARI MERKEZ KIRIKKALE MERKEZ HATAY MERKEZ BATMAN MERKEZ ISKENDERUN ISPARTA MERKEZ SIRNAK MERKEZ YALVAC MERSIN MERKEZ BARTIN MERKEZ...
- Page 108 Digital Astronomic Timer Sayı Adres Parametre Fonksiyon Okuma Veri Tipi Açıklama Örnek/Example /Item /Address / Variable /Function /Read /Type /Description Değer Açıklama Yazma /Value /Description /Write Yaz Saati Uygulaması/Daylight Saving Time (Dst) Settings Mod/Mode 0x03 - 0x10 unsigned 0- Kapalı/Off 0-Yaz saati uygulaması...
- Page 109 Digital Astronomic Timer Sayı Adres Parametre Fonksiyon Okuma Veri Tipi Açıklama Örnek/Example /Item /Address / Variable /Function /Read /Type /Description Yazma Değer Açıklama /Write /Value /Description NOT: Bu sayfadaki parametreler 13 lü grup halinde okunmalıdır / yazılmalıdır. Aksi taktirde cihaz “Invalid data adress” hatası verecektir. Start ve end verileri her zaman yazılmalıdır.
- Page 110 Digital Astronomic Timer Sayı Adres Parametre Fonksiyon Okuma Veri Tipi Açıklama Örnek/Example /Item /Address / Variable /Function /Read /Type /Description Değer Açıklama Yazma /Value /Description /Write Programlar/Programs 2000 P1 Zaman 0x03 - unsigned Standart /Type Standart: değeri 1/ 0x10 Hour (0 - 23) P1 Time Astronomik/Type Astro: value 1...
- Page 111 Digital Astronomic Timer Sayı Adres Parametre Fonksiyon Okuma Veri Tipi Açıklama Örnek/Example /Item /Address / Variable /Function /Read /Type /Description Değer Açıklama Yazma /Value /Description /Write 2008 P1 Program 0x03 - 0x10 unsigned 0-Program kapalı/ Program Durumu/ Deactive program açık/Activate P1 Program 1-Program açık/Activate program...
- Page 112 Digital Astronomic Timer Sayı Adres Parametre Fonksiyon Okuma Veri Tipi Açıklama Örnek/Example /Item /Address / Variable /Function /Read /Type /Description Değer Açıklama Yazma /Value /Description /Write 3001 1 program 0x06 unsigned Program number Programdaki değer sil/1 program (1 - 100) direk silinebilir./ clear Value in the program...
- Page 113 Digital Astronomic Timer Kızılüzüm Mahallesi Kemalpaşa Kızılüzüm Cad. No:15 - 35730 Kemalpaşa - İzmir / TURKEY Tel: (+90 232) 877 08 00 Fax: (+90 232) 877 08 06 www.klemsan.com / Revizion No: 15042019 info@klemsan.com.tr...
Need help?
Do you have a question about the Meastro-R and is the answer not in the manual?
Questions and answers