Samsung SyncMaster 2243LNX User Manual
Hide thumbs
Also See for SyncMaster 2243LNX:
- User manual (69 pages) ,
- Quick start manual (16 pages) ,
- Manual del usuario (206 pages)
Table of Contents
Advertisement
Advertisement
Table of Contents

Related Manuals for Samsung SyncMaster 2243LNX


Summary of Contents for Samsung SyncMaster 2243LNX
-
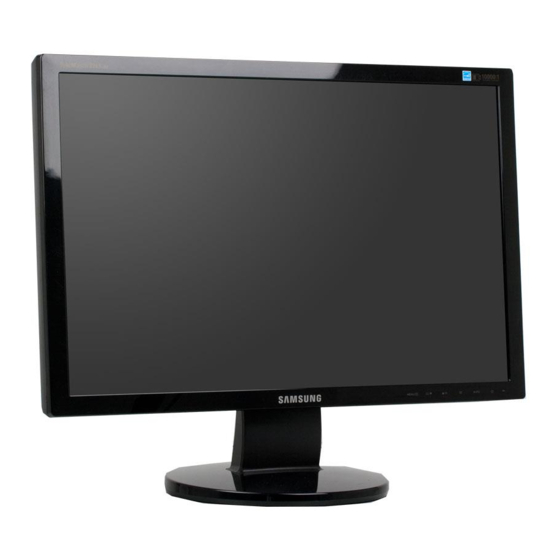
Page 1: Lcd Monitor
SyncMaster 2243LNX LCD Monitor User Manual... -
Page 2: Safety Instructions
Safety Instructions Notational Note These safety instructions must be followed to ensure your safety and prevent property damage. Make sure to read the instructions carefully and use the product in the correct manner. Warning / Caution Otherwise, it may result in death or personal injury. Otherwise, it may result in personal injury or property damage. -
Page 3: Installation
Ensure that the power plug is plugged into the power outlet firmly and correctly. • Do not forcefully bend or pull the power plug and do not place any heavy material on it. • Do not connect multiple appliances to the same power outlet. •... - Page 4 DO NOT PLACE CANDLES,MOSQUITO REPELLANT,CIGA- RETTES AND ANY HEATING APPLIANCES NEAR THE PROD- UCT. • Keep heating appliances as far away from the power cord or the prod- uct as possible. • Do not install it in a badly ventilated location such as a bookcase or closet.
- Page 5 Clean the product using a soft cloth with a monitor cleaner only. If you must use a cleaner other than the monitor cleaner, dilute it with water at a ratio of 1:10. When cleaning the power plug pins or dusting the power outlet, clean it with a dry cloth.
- Page 6 Safety Instructions When you drop the product or the case is broken, turn the power off and disconnect the power cord. Contact a Service Center. • Otherwise, this may result in electric shock or fire. If thunder or lightening is occurring, do not touch the power cord or antenna cable.
- Page 7 Safety Instructions If you continually move closer to the product screen, your eyesight may be failing. To ease eye strain, take at least a five-minute break after every hour of using the monitor. Do not install it in an unstable location such as an unstable rack or uneven surface or a location exposed to vibrations.
- Page 8 Safety Instructions Do not use a humidifier or kitchen table near the product. • Otherwise, this may result in electric shock or fire. When there is a gas leak, do not touch the product or the power plug but ventilate immediately. •...
-
Page 9: Package Contents
Introduction Package Contents Note Please make sure the following items are included with your monitor. If any items are missing, contact your dealer. Contact a local dealer to buy optional items. Unpacking Type 1 Monitor & Simple stand Note MagicRotation program can not be provided as Simple Stand does not support Pivot function. Type 2 Monitor &... -
Page 10: Your Monitor
Cables D-Sub Cable Others Cleaning Cloth Note This is only provided for highly polished black products as a product feature. Your Monitor Initial Settings Select the language using the up or down key. The displayed content will disappear after 40 seconds. Turn the Power button off and on. - Page 11 Front MENU button [MENU/ ] Opens the on-screen menu and exits from the menu. Also use to exit the OSD menu or return to the previous menu. Customized Key[ You can customize key assignment for the Custom button according to your pref- erences.
- Page 12 Power button [ Use this button for turning the monitor on and off. Power Indicator This light glows blue during normal operation, and blinking blue once as the mon- itor saves your adjustments. Note See PowerSaver described in the manual for further information regarding power saving functions.
- Page 13 Introduction Cable holding ring • Fix the cables using the holding ring, as shown in the figure.
-
Page 14: Connecting Cables
Connections Connecting Cables Connect the power cord for your monitor to the power port on the back of the monitor. Plug the power cord for the monitor into a nearby outlet. Use a connection appropriate for your computer. Using the D-sub (Analog) connector on the video card. •... -
Page 15: Attaching A Base
Using the Stand Monitor Assembly Simple Stand Monitor and Bottom Attaching a Base This monitor accepts a 100 mm x 100 mm VESA-compliant mounting interface pad. Simple Stand A. Monitor B. Mounting interface pad (Sold separately) Turn off your monitor and unplug its power cord. Lay the LCD monitor face-down on a flat surface with a cushion beneath it to protect the screen. - Page 16 Samsung is not liable for these kinds of accidents. • Samsung is not liable for product damage or personal injury when a non-VESA or non-specified wall mount is used or the consumer fails to follow the product installation instructions.
-
Page 17: Using The Software
Prepare a blank disk and download the driver program file at the Internet web site shown here. Internet web site : http://www.samsung.com/ (Worldwide) Installing the Monitor Driver (Automatic) Insert CD into the CD-ROM drive. Click "Windows". Choose your monitor model in the model list, then click the "OK" button. -
Page 18: Installing The Monitor Driver (Manual)
Note This monitor driver is under certifying MS logo, and this installation doesn't damage your system. The certified driver will be posted on Samsung Monitor homepage. http://www.samsung.com/ Installing the Monitor Driver (Manual) ® Microsoft Windows Vista™‚ Operating System Insert your Manual CD into your CD-ROM drive. - Page 19 Note This monitor driver is under certifying MS logo, and this installation doesn't damage your system. The certified driver will be posted on Samsung Monitor homepage. Click "Update Driver..." in the "Driver" tab. Check the "Browse my computer for driver software" checkbox and click "Let me pick from a list of device drivers on my computer".
- Page 20 Select the model that matches your monitor from the list of monitor models on the screen, and click "Next". 10. Click "Close" → "Close" → "OK" → "OK" on the following screens displayed in sequence. ® ® Microsoft Windows XP Operating System Using the Software...
- Page 21 Insert CD into the CD-ROM drive. Click "Start" → "Control Panel" then click the "Appearance and Themes" icon. Click "Display" icon and choose the "Settings" tab then click "Advanced...". Click the "Properties" button on the "Monitor" tab and select "Driver" tab. Click "Update Driver..."...
- Page 22 "OK" button. Note This monitor driver is under certifying MS logo, and this installation doesn't damage your system. The certified driver will be posted on Samsung Monitor homepage. http://www.samsung.com/ Click the "Close" button then click "OK" button continually. Using the Software...
- Page 23 10. Monitor driver installation is completed. ® ® Microsoft Windows 2000 Operating System When you can see "Digital Signature Not Found" on your monitor, follow these steps. Choose "OK" button on the "Insert disk" window. Click the "Browse" button on the "File Needed" window. Choose A:(D:\Driver) then click the "Open"...
- Page 24 Select the "Monitor" tab. Click the "Change" button in the "Monitor Type" area. Choose "Specify the location of the driver". Choose "Display a list of all the driver in a specific location..." then click "Next" button. Click the "Have Disk" button. Specify A:\(D:\driver) then click "OK"...
-
Page 25: How To Install The Natural Color Software
How to install the Natural Color software Insert the CD included with the Samsung monitor into the CD-ROM Drive. Then, the initial screen of the program Natural Color will be executed. Click Natural Color on the initial screen to install the Natural Color software. -
Page 26: Installation Problems
Installation Insert the installation CD into the CD-ROM drive. Click the MagicTune™ installation file. Note If the popup window to install the software for the main screen is not displayed, proceed with the installation using the MagicTune executable file on the CD. Select installation Language, Click "Next". - Page 27 Uninstall The MagicTune™ program can be removed only by using the "Add or Remove Programs" option of ® the Windows Control Panel. Perform the following steps remove MagicTune™. Go to [Task Tray] → [Start] → [Settings] and select [Control Panel] in the menu. If the program runs on Windows Click the "Add or Remove Programs"...
-
Page 28: Adjusting The Monitor
Adjusting the Monitor Direct Functions AUTO When the 'AUTO' button is pressed, the auto adjustment screen appears as shown in the animated screen on the center. Auto adjustment allows the monitor to self-adjust to the incoming Analog signal. The values of Fine, Coarse and Position are adjusted automatically. - Page 29 Adjusting the Monitor When pressing the MENU button after locking the OSD This is the function that locks the OSD in order to keep the current states of settings or prevent others from adjusting the current settings. Lock : Hold down the MENU button for more than five (5) seconds to activate the OSD adjustment lock function.
-
Page 30: Customized Key
Note Though the OSD adjustment lock function is activated, you can still adjust the brightness and contrast, and adjust Customized Key ( Customized key You can customize key assignment for the Custom button according to your preferences. To view the operating screen displayed when pressing the [ tomized key for a function, click the name of each function. -
Page 31: Osd Function
Brightness When OSD is not on the screen, push the Brightness ( OSD Function Picture Brightness Color MagicColor Color Tone Image Coarse Language Setup Reset Information Picture Brightness (Not available in MagicBright mode of Dynamic Contrast.) Adjusting the Monitor ) button to adjust brightness. Contrast MagicBright Color... - Page 32 You can use the on-screen menus to change the brightness according to personal preference. MENU → → → Contrast (Not available in MagicBright mode of Dynamic Contrast.) You can use the on-screen menus to change the contrast according to personal preference. ( Not available in MagicColor mode of Full and Intelligent.
- Page 33 MagicBright Push the button to circle through available preconfigured modes. MagicBright is a new feature providing optimum viewing environment depending on the contents of the image you are watching. Currently seven different modes are available: Custom, Text, Internet, Game, Sport, Movie and Dynamic Contrast. Each mode has its own pre-configured brightness value. You can easily select one of seven settings by simply pressing Customized Key control button.
- Page 34 Color (Not available in MagicBright mode of Dynamic Contrast.) MagicColor MagicColor is a new technology that Samsung has exclusively developed to improve digital image and to display natural color more clearly without disturbing image quality. • Off - Returns to the original mode.
-
Page 35: Color Tone
Color Tone The tone of the color can be changed and one of four modes can be selected. • Cool - Makes whites bluish. • Normal - Keeps whites white. • Warm - Makes whites reddish. • Custom - Select this mode when you want to adjust the image according to your preferences. ( Not available in MagicColor mode of Full and Intelligent. -
Page 36: Color Control
Color Control Adjusts individual Red, Green, Blue color balance. ( Not available in MagicColor mode of Full and Intelligent. ) MENU → → Color Effect You can change the overall mood by changing the screen colors. ( Not available in MagicColor mode of Full and Intelligent. ) Adjusting the Monitor →... - Page 37 • • • Off - This applies an achromatic color to the screen to adjust the screen effects. • Grayscale - The default colors of black and white are displayed. • Green - This applies the green color effect to a black and white screen. •...
- Page 38 Adjusting the Monitor Image Coarse Removes noise such as vertical stripes. Coarse adjustment may move the screen image area. You may relocate it to the center using the horizontal control menu. (Available in Analog mode only) MENU → → → →...
- Page 39 Fine Removes noise such as horizontal stripes. If the noise persists even after Fine tuning, repeat it after adjusting the frequency (clock speed). (Available in Analog mode only) MENU → → Sharpness Changes the clearance of image. Adjusting the Monitor →...
- Page 40 ( Not available in MagicColor mode of Full and Intelligent. ) MENU → → H-Position Changes the horizontal position of the monitor's entire display. (Available in Analog mode only) MENU → → V-Position Adjusting the Monitor → → → → MENU →...
- Page 41 Changes the vertical position of the monitor's entire display. (Available in Analog mode only) MENU → → Language You can choose one of nine languages. Note The language chosen affects only the language of the OSD. It has no effect on any software running on the computer.
- Page 42 H-Position You can change the horizontal position where the OSD menu appears on your monitor. MENU → → V-Position You can change the vertical position where the OSD menu appears on your monitor. MENU → → Adjusting the Monitor → →...
-
Page 43: Display Time
Transparency Change the transparency of the background of the OSD. • • MENU → → Display Time The menu will be automatically turned off if no adjustments are made for a certain time period. You can set the amount of time the menu will wait before it is turned off. Adjusting the Monitor →... - Page 44 • 5 sec • MENU → → Setup Reset Reverts the product settings to factory defaults. • • MENU → → Adjusting the Monitor 10 sec • 20 sec → → → → MENU → → → MENU • 200 sec...
-
Page 45: Off Timer
Customized Key You can specify a function which will be activated when the Customized Key ( MENU → → Off Timer The monitors will turn off automatically at the specified time. • • Adjusting the Monitor → → → →MENU )is pressed. -
Page 46: Image Size
MENU → → Image Size You can change the size of the screen displayed on your monitor. • Auto • • Auto - The screen is displayed in accordance with the screen aspect ratio of the input signals. • Wide - A full screen is displayed regardless of the screen aspect ratio of the input signals. Note •... - Page 47 Adjusting the Monitor Information Shows a video source, display mode on the OSD screen. MENU → →MENU...
-
Page 48: Troubleshooting
Troubleshooting Self-Test Feature Check Note Your monitor provides a self test feature that allows you to check whether your monitor is functioning properly. Self-Test Feature Check Turn off both your computer and the monitor. Unplug the video cable from the back of the computer. Turn on the monitor. -
Page 49: Check List
noisy, and video mode not supported, etc. In this case, first check the source of the problem, and then contact the Service Center or your dealer. Judging the monitor's working condition If there is no image on the screen or a "Not Optimum Mode", "Recommended Mode 1680 x 1050 60 Hz"... - Page 50 There is no image on the screen. Is the power indicator on the monitor blinking at 1 second intervals? The monitor is in PowerSaver mode. Press a key on the keyboard to activate the monitor and restore the image on the screen. If there is still no image, press the ' activate the monitor and restore the image on the screen.
-
Page 51: There Are Only 16 Colors Shown On The Screen. The Screen Colors Have Changed After Changing The Video Card
When you have a problem with the graphic card, visit our website to check the compatible graphic card list provided. http://www.samsung.com/monitor/magictune MagicTune™ doesn't work properly. Have you changed your PC or video graphic card? Download the latest program. The program can be downloaded http://www.samsung.com/mon- itor/magictune Did you install the program? Troubleshooting... -
Page 52: Check The Following Items If There Is Trouble With The Monitor
Reboot the computer after installing the program for the first time. If a copy of the program is already installed, remove it, reboot the computer, and then install the program again. You need to reboot the computer for it to operate normally after installing or removing the program. Note Visit the MagicTune™... - Page 53 Windows ME/2000: Set the resolution at the Control Panel → Display → Screen Saver. Set the function in the BIOS-SETUP of the computer. (Refer to the Windows / Computer Man- ual). How can I clean the outer case/LCD Panel? Disconnect the power cord and then clean the monitor with a soft cloth, using either a cleaning solution or plain water.
-
Page 54: Specifications
Specifications General General Model Name LCD Panel Size Display area Pixel Pitch Synchronization Horizontal Vertical Display Color 16.7M Resolution Optimum resolution Maximum resolution Input Signal, Terminated RGB Analog 0.7 Vp-p ± 5 % Separate H/V sync, Composite, SOG TTL level (V high ≥ 2.0 V, V low ≤ 0.8 V) Maximum Pixel Clock 146 MHz (Analog) Power Supply... - Page 55 VESA Mounting Interface 100 mm x 100 mm Environmental considerations Operating Storage Plug and Play Capability This monitor can be installed on any Plug & Play compatible system. The interaction of the monitor and the computer systems will provide the best operating conditions and monitor settings.
-
Page 56: Preset Timing Modes
This monitor is EPA ENERGY STAR ERGY2000 compliant when used with a computer equipped with VESA DPM functionality. ® As an ENERGY STAR Partner, SAMSUNG has determined that this product meets the ENERGY STAR energy efficiency. Horizontal Vertical Fre- Frequency... -
Page 57: For Better Display
Information For Better Display Adjust the computer resolution and screen injection rate (refresh rate) on the computer as described below to enjoy the best picture quality. You can have an uneven picture quality on screen if the best picture quality is not provided for TFT-LCD. •... - Page 58 when switching to a new video image. All display products, including LCD, are subject to image retention. This is not a product defect. Please follow the suggestions below to protect your LCD from image retention. Power Off, Screen Saver, or Power Save Mode •...
- Page 59 • Every 30 minutes, change the characters with movement. The best way to protect your monitor from Image retention is to set your PC or System to operate a Screen Saver program when you are not using it. Image retention may not occur when a LCD panel is operated under normal conditions. Normal conditions are defined as continuously changing video patterns.
- Page 60 Information Our LCD Monitor satisfies ISO13406-2 Pixel fault Class II...
-
Page 61: Contact Samsung Worldwide
Appendix Contact SAMSUNG WORLDWIDE Note If you have any questions or comments relating to Samsung products, please contact the SAMSUNG customer care center. U.S.A CANADA MEXICO ARGENTINE BRAZIL CHILE COLOMBIA COSTA RICA ECUADOR EL SALVADOR GUATEMALA HONDURAS JAMAICA NICARAGUA PANAMA PUERTO RICO REP. - Page 62 GERMANY 01805 - SAMSUNG(726-7864) (€ 0,14/Min) HUNGARY 06-80-SAMSUNG(726-7864) ITALIA 800-SAMSUNG(726-7864) LUXEMBURG 0035 (0)2 261 03 710 NETHERLANDS 0900 SAMSUNG(726-7864) (€ 0,10/Min) NORWAY 815-56 480 POLAND 0 801 801 881 022-607-93-33 PORTUGAL 80820-SAMSUNG(726-7864) REPUBLIC OF IRE- 0818 717 100 LAND SLOVAKIA...
- Page 63 U.A.E Terms Dot Pitch Vertical Frequency Horizontal Frequency Interlace Non-Interlace Methods Plug & Play Resolution Appendix Asia Pacific 1800-SAMSUNG(726-7864) http://www.samsung.com 1800-29-3232, 02-689-3232 http://www.samsung.com 0800-329-999 http://www.samsung.com/tw 1 800 588 889 http://www.samsung.com Middle East & Africa 0860-SAMSUNG(726-7864) http://www.samsung.com 444 77 11 http://www.samsung.com 800-SAMSUNG(726-7864) http://www.samsung.com...
-
Page 64: Correct Disposal
Reproduction in any manner whatsoever without the written permission of Samsung Electronics Co., Ltd. is strictly forbidden. Samsung Electronics Co., Ltd. shall not be liable for errors contained herein or for incidental or con- sequential damages in connection with the furnishing, performance, or use of this material.
Need help?
Do you have a question about the SyncMaster 2243LNX and is the answer not in the manual?
Questions and answers