Table of Contents
Advertisement
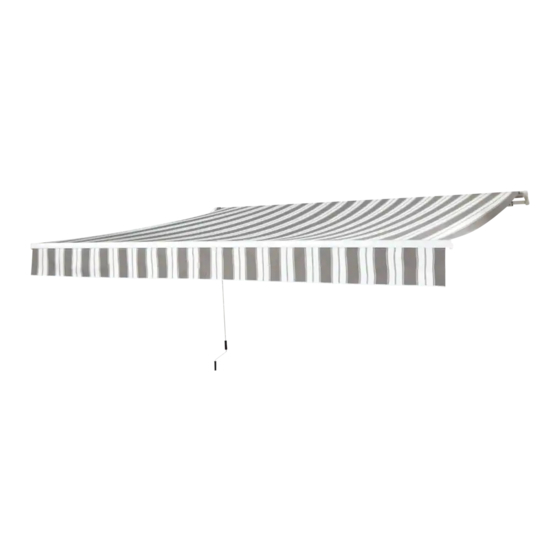
12 x 10' MOTORIZED AWNING
(3.7 x 3 m)
Product No. 088-1763-0
Assembly Instructions
Toll-free: 1-877-483-6759
Please read and understand this manual before any assembly or use of this product.
Before beginning assembly of product, make sure all parts are present.
Questions?
If you have any questions or need replacement parts, please call our toll-free helpline.
Advertisement
Table of Contents

Related Manuals for for Living 088-1763-0

Summary of Contents for for Living 088-1763-0
- Page 1 12 x 10’ MOTORIZED AWNING (3.7 x 3 m) Product No. 088-1763-0 Assembly Instructions Toll-free: 1-877-483-6759 Please read and understand this manual before any assembly or use of this product. Before beginning assembly of product, make sure all parts are present.
- Page 2 Product No. 088-1763-0 Table of Contents Features Technical Data Important Safety Instructions Packaging Contents Parts Location Before Installation Installation Operation Battery Replacement Cleaning and Maintenance Warranty Manual override motor with remote control for easy operation ● 10’ (3 m) projection with angle adjustment ●...
- Page 3 Warning! To reduce the risk of serious injury, read the following safety instructions before assembling and using the awning. CAUTION! Always keep children under close supervision when they are playing near the awning. Never leave children unattended. Keep children and pets away while setting up the awning. CAUTION! Check your municipal by-laws prior to setting up the awning.
- Page 4 Product No. 088-1763-0 Name Illustration Qty. Wall bracket Crank wand (spare part) Remote control Awning frame Expanding bolt Flat washer Spring washer M12 Nut Lead sleeve Fastening bolt set (with M10 nut) Drill bit Anchors (for remote control bracket) Screws...
- Page 5 Name Qty. Name Qty. Wall bracket Level Crank wand Front bar Remote control Left arm Awning frame Easy angle system Supporting bar Jack bolt Fabric Locking nut Right arm Plug Valance...
- Page 6 Product No. 088-1763-0 WARNING! Read the instructions carefully before beginning any assembly and make sure you ● understand each step. Keep children and pets away during assembly. This product contains small parts that ● can be swallowed by children. While assembling the awning, keep your fingers away from areas where they can be ●...
- Page 7 Choosing a Location for the Awning 1. Choose an appropriate place on the wall at least 10’ (3 m) above the ground. 2. Mark the chosen height and draw a 12’ (3.7 m) horizontal line matching the awning frame. Mark the left and right endpoints of the line. See figure below. ≥...
- Page 8 Product No. 088-1763-0 1. Installing the expanding bolts CAUTION! Before drilling, ensure that there are no electrical wires or water pipes behind the drill spots. ● Wear protective goggles, mask, and hearing protection while drilling the holes. ● Install all wall brackets supplied with your awning for secure mounting.
- Page 9 3. Installing the awning Lift the awning and insert the supporting bar (5) into the wall brackets (1). ● Make sure that the middle bracket is located at the centre of the supporting bar of the awning frame. ● CAUTION! When placing the awning on the wall, the crank loop should be facing downward, perpendicular to the ground.
- Page 10 Product No. 088-1763-0 5. Installing the remote control holder anchors Choose a spot on the wall and position the small bracket (J). Mark the location of the ● holes on the wall. Drill two holes in the wall for the anchors (H) using a φ5 mm drill bit (not included).
- Page 11 6. Mounting the bracket for the holder Align the holes of the bracket (J) with the protruding heads of the anchors (H). ● Hold the bracket (J) against the anchors (H). Insert one screw (I) into the hole and start to tighten. ●...
- Page 12 Product No. 088-1763-0 1. Turning the awning on Insert the plug (15) into an electric outlet after installing the awning. ● WARNING! ● The plug on this awning is not waterproof. It must be plugged into an outlet that is indoors ●...
- Page 13 2b. Opening and closing the awning using the crank wand (manual operation) Unplug the awning from the electric outlet. Wind and tie the cord to avoid damage. ● Insert the crank wand (2) into the crank loop. ● Turn the crank wand (2) clockwise to retract the fabric. ●...
- Page 14 Product No. 088-1763-0 Note: Make sure the crank handle is parallel to the wall. If the handle is angled, the awning will ● not open or close. Always remove the crank wand from the crank loop and store it in a safe place when ●...
- Page 15 1. Installing the battery Turn the remote control (3) and locate the battery compartment cover. ● Push the cover downward and slide it off. ● Install a size 27 A, 12 V battery. ● Place the lid over the compartment and slide upward to lock. ●...
- Page 16 Product No. 088-1763-0 WARNING! Disconnect the plug from the power supply before doing any cleaning and maintenance to avoid the risk of severe personal injuries or death. Cleaning the awning frame Use a clean cloth soaked in mild detergent and warm water to clean the frame. Do not use ●...
- Page 17 This product carries a one (1) year warranty against defects in workmanship and materials. Trileaf Distribution agrees to replace the defective product free of charge within the stated warranty period, when returned by the original purchaser with proof of purchase. This product is not guaranteed against wear or breakage due to misuse and/or abuse.
Need help?
Do you have a question about the 088-1763-0 and is the answer not in the manual?
Questions and answers