Table of Contents
Advertisement
Quick Links
Advertisement
Table of Contents

Subscribe to Our Youtube Channel
Related Manuals for Unior 266 Series


Summary of Contents for Unior 266 Series
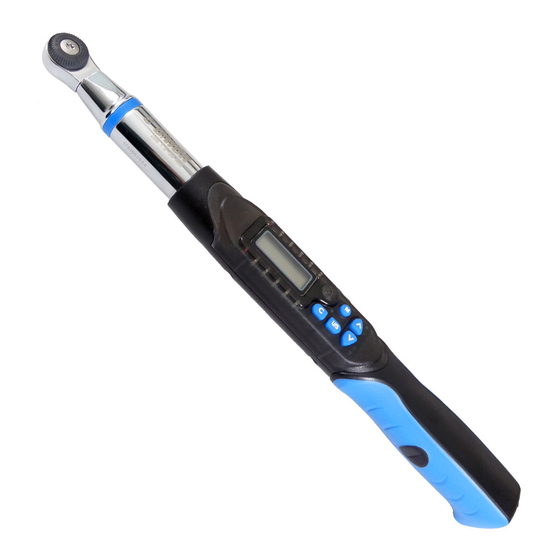
- Page 1 OWNER’S MANUAL Electronic Torque Wrench 266 Series...
-
Page 2: Main Features
Dear Users, Thank you for purchasing our electronic torque wrench. This manual will help you to use the many features of your new electronic torque wrench. Before operating the torque wrench, please read this manual completely, and keep it nearby for future reference. -
Page 3: Selection Guide
SELECTION GUIDE ○ ○ ○ MODEL NO: 266 1.5~30 266 6.8~135 266 10~200 ○ ,1: Square Model Max. Torque drive (inches) 30 N-m / 22.12 ft-lb / 266 1.5~30 265.5 in-lb / 306.1 kg-cm 135 N-m / 99.5 ft-lb / 266 6.8~135 1195 in-lb / 1378 kg-cm 200 N-m / 147.5 ft-lb /... -
Page 4: Specifications
SPECIFICATIONS Torque Max. Square Model Measuring Length Torque Drive Range (mm) (N-m) (inches) (N-m) 1.5~30 266 1.5~30 266 6.8~135 6.8~135 All Models Torque Accuracy *1 CW:±2% CCW:±3% Data memory size PC Connectivity *2 9 sets Pre-setting No. 12LEDs Bright LED (2 Red+10 Green) Peak Hold / Track Operation Mode... - Page 5 SPECIFICATIONS Torque Max. Square Model Measuring Length Torque Drive Range (mm) (N-m) (inches) (N-m) 266 10~200 10~200 All Models Torque Accuracy *1 CW:±2% CCW:±3% Data memory size PC Connectivity *2 9 sets Pre-setting No. 12LEDs Bright LED (2 Red+10 Green) Peak Hold / Track Operation Mode N-m, ft-lb, in-lb, kg-cm...
- Page 6 Note: *1: The accuracy of the readout is guaranteed from 20% to 100% of maximum range + /- 1 increment. The torque accuracy is a typical value. Calibration line is at the middle line of the dark spot on the rubber handle.
-
Page 7: Battery Installation
BEFORE USING THE WRENCH BATTERY INSTALLATION Remove the battery cap. Insert two AA batteries matching the -/+ polarities of the battery to the battery compartment. Put on the battery cap and rotate it tightly according to the following figures. Direction of Battery and Cap Installation POWER ON AND RESETTING THE WRENCH ... - Page 8 ACTIVATION DURING SLEEP MODE The wrench will auto sleep after about 5 minutes idle for power saving. Press to wake up the wrench during the sleep mode. CAUTIONS: During communication period (Send appears), the sleep function is disabled. RESETTING THE WRENCH ...
- Page 9 SETUP Power On/Clear Unit Selection/Setting Up/Down Button Pre-Setting No. STEP 1: PRE-SETTING NO. Pre-setting: M1 Press STEP 1: PRE-SETTING NO. Pre-setting: M2 Press Pre-setting: M3 ‧ ‧ ‧ *Note1, 2, 3 Pre-setting: M9 Note: 1. If is appeared, that means this wrench has ever been applied more than 110% of torque of the spec.
-
Page 10: Step 2: Unit Selection
STEP 2: UNIT SELECTION Pre-setting Unit: N-m Press Unit Selection: in-lb Press Unit Selection: ft-lb Press Unit Selection: kg-cm STEP 3: SET TORQUE VALUE Pre-setting Torque Value Press Increase Target Torque Value Press Decrease Target Torque Value Note: 1. The “Unit Selection” is cyclic. - Page 11 STEP 4: PEAK HOLD /TRACK MODE SELECTION Track Mode Long Press Set Peak/Track mode Press for Selection Set Peak/Track mode Press *Note 1 Record No. Press *Note 1 Clear Record Press Peak Hold Mode Note: Please skip this procedure and continue to the next step.
- Page 12 TRACK MODE OPERATION START (System initial) *Note 1 Setting Target Torque Apply Torque Current Torque Value Reach 80% of Target Torque Current Torque Value *Note 2 ((…((… …))…)) ((…((… …)) …)) Green LED Buzzer Reach 80% of Target Torque Reach Target Torque *Note 3 (((((((( ))))))))
- Page 13 PEAK HOLD MODE OPERATION START (System initial) *Note 1 Setting Target Torque *Note 2 Recording Apply Torque Released Apply Torque Flashing Current Torque Value (Peak Hold) Reach 80% of Target Torque *Note 3 ((…((… …))…)) ((…((… …)) …)) Green LED Buzzer Reach 80% of Target Torque Reach Target Torque...
- Page 14 Peak Hold Mode Recorded Value Review *Note 1 Peak Hold/Track Mode Long Press *Note 2 Set Peak/Track Mode Press Auto Change *Note 3 Record No. Record Value Press Clear Record Press (Give up) (Clear) Deleted *Note4, 5, 6 Communication Press Communication (Exit) Peak Hold /Track Mode...
- Page 15 COMMUNICATION Precaution: 1. Communication function is only supported on some models. Check the model no. and its specification before using communication function. 2. Do not insert the plug of communication cable into torque wrench that does not support communication function. CONNECTING COMMUNICATION CABLE ...
-
Page 16: Maintenance And Storage
MAINTENANCE AND STORAGE ATTENTION: One-year periodic recalibration is necessary to maintain accuracy. Please contact your local dealer for calibrations. CAUTION: Over-torque (110% of Max. torque range) could cause breakage or lose accuracy. Do not shake violently or drop wrench. Do not use this wrench as a hammer.
Need help?
Do you have a question about the 266 Series and is the answer not in the manual?
Questions and answers