Advertisement
Available languages
Available languages
Quick Links
U.S. Patent # D568575, D570072, D577175 and Patents Pending
Read, Understand, Follow and Save These Instr uctions
Read, understand and follow all of these instructions and warnings (Instructions) before installing and using this product. Install and use this product only as
specified in these instructions. Improper installation or use of this product may result in property damage, serious injury, and/or death. Never allow installation
or use of this product by anyone without providing them with these instructions. You must read, understand and follow all instructions and warnings for any
product(s) to which this product is used in conjunction with or installed. Save these instructions with the product for use as a reference for any future
installation and use of the product.
WARNING
• This product must be installed and used in strict
accordance with these instructions. Purchaser/
owner must not alter or modify the product.
• Operator and bystanders should never position
any part of body under or on the path of any
portion of this product or the load being
supported, or moved.
• Fully retract and rotate jack into its stowed
position before towing.
• This product is not intended to be used as a
transport device for the implement it is attached
to. Minimize movement of implement while jack
is under load.
Installation Instr uctions
Before mounting the jack confirm that there will be no interference from the tow vehicle, tongue, ground, and any other mounted accessories while
stationary or in motion. Before installing, check for interference in all positions including handle swing and swivel positions. Check for interference
again after installation is complete. The height of the swivel mount is pre-set and torqued by the factory at a common height for most applications.
Failure to follow all warnings and instructions may result in product
failure, property damage, serious bodily injury, and/or death.
• Do not allow children to play on or around this
product or the load being supported, or moved.
• Secure the load, vehicle and trailer from rolling
(by blocking wheels) when operating jack or
coupling trailer.
• These jacks are designed for vertical loading.
Excessive side forces may cause jack failure and
must be avoided.
Adjusting Swivel Mount Height: (if necessary)
With jack removed from trailer, loosen the two swivel fasteners until the slide block moves freely along outer tube.
To access the upper bolt, be sure the swivel bracket is rotated in the horizontal (3" mounting) position as shown.
Adjust swivel mount to desired location and re-torque to 60-70 ft-lbs. After adjustment, check for proper swivel and
pin engagement.
Weld-on:
Mounting Plate is included on Weld-On
models only.
All welding must be performed by an AWS
certified welder. Recheck the position of
the mounting plate according to the
precautions listed above and as shown in
diagram below. Position the plate with the
flat surface toward trailer. Align top of
mounting plate flush with top of trailer tube
and weld completely around using a 3/16"
fillet weld. The mounting plate is finished
with SharkSkin, a corrosion resistant
coating that does not require removal prior
to welding. The threaded holes in the
mounting plate may need to be masked for
painting or re-tapped, depending on trailer
finish requirements.
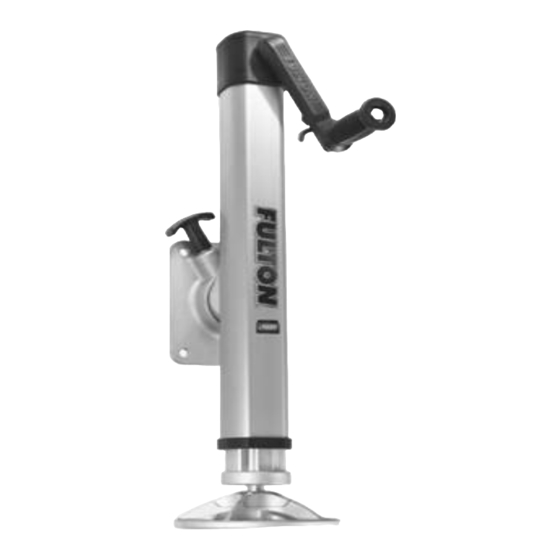
Trailer Jack
• Before manually moving trailer, crank to lowest
position.
• Lock the plunger pin into a hole in the mounting
bracket before raising or lowering the tongue.
• These jacks are not designed for mounting to
round tongues.
• Do not cut, drill, weld or modify this jack in any
manner not described in these instructions.
• All welding must be performed by an AWS
certified welder.
• Always replace bent, broken, or worn parts before
using this product.
Warning: Failure to follow all warnings and instructions may result in
product failure, property damage, serious bodily injury, and/or death.
Mounting Plate
Lock Washer
3/8-16 x 7/8 Lg bolt
F3576 (Rev-B 11899)
Advertisement

Related Manuals for FULTON F2


Summary of Contents for FULTON F2
- Page 1 Trailer Jack U.S. Patent # D568575, D570072, D577175 and Patents Pending Read, Understand, Follow and Save These Instr uctions Read, understand and follow all of these instructions and warnings (Instructions) before installing and using this product. Install and use this product only as specified in these instructions.
-
Page 2: Instructions D'installation
Vérin de remorque pour bateau U.S. Patent # D568575, D570072, D577175 and Patents Pending Veuillez lire, comprendre, observer et conserver ces instructions. Il importe de lire, comprendre et observer toutes les instructions et avertissements avant d’installer et utiliser ce produit. Installer et utiliser ce produit uniquement selon les instructions. - Page 3 Instr uctions d'installation (suite) Boulonnage : La plaque du pied: vissez la plaque dans le bas Cale de roue en option : Ce vérin peut être configuré pour un montage sur tubes du tuyau de cric. Serrer à 60-70 pi.-livres. Assembler la cale de roue en option de remorque de 3 x 3 po ou 3 x 4 po seulement.
-
Page 4: Instrucciones De Instalación
Gato para Remolques U.S. Patent # D568575, D570072, D577175 and Patents Pending Lea, entienda, siga y conser ve estas instr ucciones Lea, entienda y siga estas instrucciones y advertencias (Instrucciones) antes de instalar y usar este producto. Instale y use este producto únicamente según se especifica en estas instrucciones. - Page 5 Instr ucciones de instalación (cont.) Con perno: Base del Pie: Enroscar la base del pie en la Cuña de rueda opcional: Este gato se puede configurar para instalarse en Arme la cuña de rueda opcional como se base del tubo del gato. Ajustar a 60-70 ft-lbs. tubos de remolque de 3”...
- Page 6 Stützbock für Anhänger U.S.-Patent # D568575, D570072, D577175 und Patente angemeldet Anleitung lesen, verstehen, befolgen und aufbewahren Bitte, lesen Sie diese Anleitung, vergewissern Sie sich, dass Sie alles verstehen, und befolgen Sie alle Anweisungen und Warnhinweise, bevor Sie dieses Produkt montieren und benutzen. Montieren und benutzen Sie dieses Produkt nur gemäß dieser Anleitung. Falsche Montage oder Benutzung dieses Produkts kann zu Sachschäden, schweren Verletzungen bzw.
- Page 7 Montageanleitung (Forts.) Anschrauben: Fußplatte: Setzen Sie die Fußplatte auf das Rohr Optionaler Radkeil: Erhältlich sind nur 3x3 Zoll, 3x4 Zoll oder 3x5 Zoll- des Stützbockes auf und ziehen Sie sie bis ganz Bringen Sie den optionalen Radkeil an, Anhängerrohre. Legen Sie die Drehklammer und die U nach unten durch.
- Page 8 Aanhangwagenkrik U.S. Patent # D568575, D570072, D577175 en patents pending Deze instructies grondig lezen, begrijpen, opvolgen en bewaren Neem alle instructies en waarschuwingen (aanwijzingen) grondig door alvorens dit product te installeren en in gebruik te nemen. Installeer en gebruik dit product alleen op de wijze zoals omschreven in deze instructies.
- Page 9 (3" montage) staat, zie afbeelding. Zet de spindelbevestiging in de juiste positie en haal de bouten weer aan met momentsleutel tot 60-70 ft-lbs. Controleer na wijziging de Bevestigingsbouten montageplaat en pen op correct bevestiging. voor de spindel HITCH MOUNTS FULTON TRAILER HITCHES...
Need help?
Do you have a question about the F2 and is the answer not in the manual?
Questions and answers