Table of Contents
Advertisement
Quick Links
Item #
Model #
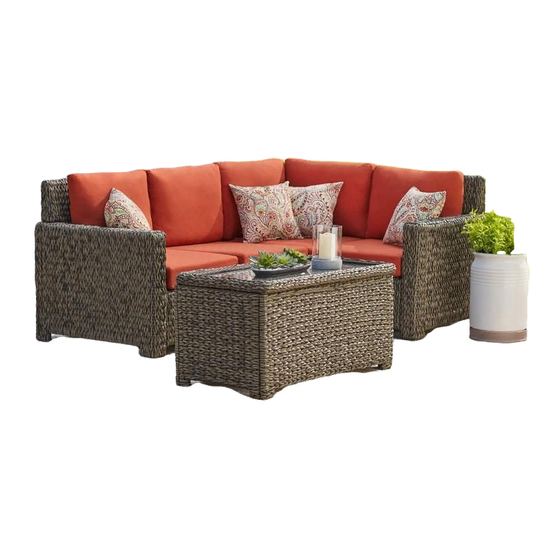
USE AND CARE GUIDE
LAGUNA POINT DEEP SEATING KD SECTIONAL SET 5 W/ CUSHION-CHAIRS
Questions, problems, missing parts? Before returning to the store,
call Hampton Bay Customer Service
8 a.m. - 6 p.m., EST, Mon day
- 1
855-HD-HAMPTON
HAMPTONBAY.COM
THANK YOU
We appreciate the trust and confidence you have placed in Hampton Bay through the purchase of this table . We strive to
continually create quality products designed to enhance your home. Visit us online to see our full line of products available for your
home improvement needs. Thank you for choosing Hampton Bay!
Advertisement
Chapters
Table of Contents

Related Manuals for HAMPTON BAY LAGUNA POINT DEEP SEATING KD SECTIONAL SET 5 W/ CUSHION-CHAIRS


Summary of Contents for HAMPTON BAY LAGUNA POINT DEEP SEATING KD SECTIONAL SET 5 W/ CUSHION-CHAIRS
- Page 1 THANK YOU We appreciate the trust and confidence you have placed in Hampton Bay through the purchase of this table . We strive to continually create quality products designed to enhance your home. Visit us online to see our full line of products available for your...
-
Page 2: Table Of Contents
Table of Contents Table of Contents............2 Pre-Assembly..............3 Safety Information............2 Planning Assembly............3 Set Up Your Furniture Properly........2 Hardware Included............3 Examine Your Furniture..........2 Package Contents..........4,5,6,7 Observe Weight Limits..........2 Assembly............8,9,10,11,12 Warranty................2 Care and Cleaning............13 What is Covered............2 What is Not Covered............2 Safety Information SET UP YOUR FURNITURE PROPERLY □... -
Page 3: Pre-Assembly
Pre-Assembly PLANNING ASSEMBLY To prevent damage, place all parts on a soft surface during assembly. Remove all protective caps before beginning assembly. HARDWARE INCLUDED Part Description Quantity Φ1/4 x40 mm Bolt Φ1/4 x20 mm Bolt Φ 6mm Washer Hex wrench U Shape connector HAMPTONBAY.COM Please contact... -
Page 4: Package Contents
Pre-Assembly (continued) PACKAGE CONTENTS (LEFT ARM) Description Quantity Part Seat Back Left Arm Side skirt Back Cushion Seat Cushion HAMPTONBAY.COM Please contact 855-HD-HAMPTON for f urther assistance. - Page 5 Pre-Assembly (continued) PACKAGE CONTENTS(RIGHT ARM) Description Quantity Part Seat Back Right Arm Side skirt Back Cushion Seat Cushion HAMPTONBAY.COM Please contact 855-HD-HAMPTON for f urther assistance.
- Page 6 Pre-Assembly (continued) PACKAGE CONTENTS(MIDDLE) Description Quantity Part Seat Back Side skirt Back Cushion Seat Cushion HAMPTONBAY.COM Please contact 855-HD-HAMPTON for f urther assistance.
- Page 7 Pre-Assembly (continued) Pre-Assembly (continued) PACKAGE CONTENTS PACKAGE CONTENTS(CORNER) Part Description Quantity Seat Right back Left back Side skirt Back cushion Seat cushion HAMPTONBAY.COM Please contact 855-HD-HAMPTON for f urther assistance.
-
Page 8: Assembly
Assembly(Left arm) Attaching the left arm to the Attaching the back seat □ □ Put the back ( B ) metal side into the hole of arm (C). Place the left arm (C) on a soft surface. □ Attach left arm (C) to the back (B),fasten bolts (AA) and Attach the seat (A) to the left arm (C) ,fasten with washer (CC). - Page 9 Assembly(Right arm) Attaching the Right arm to the Attaching the back seat □ □ Put the back ( H ) metal side into the hole of arm (I). Place the right arm (I) on a soft surface. □ Attach right arm ( I) to the back (H),fasten bolts (AA) and Attach the seat (G) to the right arm (I) ,fasten with washer (CC).
- Page 10 Assembly(Middle) Attaching the back to the seat Attaching the one side skirt □ □ Place the back (K) on a soft surface. Attach the side skirt (D) to the seat (J) by aligning holes □ Attach the seat (J) to the back (K) by aligning holes on on the seat (J) with the holes on the side skirt (D) and the back (K) with the holes on the seat (J) and inserting inserting bolts (BB) with washers (CC).
- Page 11 Assembly(Corner) Attaching the back Attaching the seat □ Place the right back (M) and the left back (N) on a soft □ □ Attach the seat (L) to the backs by aligning three holes surface. □ □ on the seat (L) to the two holes on the right back (M) and Attach the r ight back (M) t o the left back ( N ) .
- Page 12 Assembly(U shape connector) □ As photo(A) s hown, place one side of the clip to sectional base first. □ As photo (B) shown, press a nother side of the clip to sectional base. HAMPTONBAY.COM Please contact 855-HD-HAMPTON for f urther assistance.
-
Page 13: Care And Cleaning
Care and Cleaning □ Before using, wipe with a clean, dry cloth. Do not use bleach or solvents. When not in use, store furniture in a cool, dry place. □ If your set includes cushions or mesh fabric, they may be cleaned by hand with a mild solution of soap and water. Rinse cushion thoroughly and allow to drip dry. - Page 14 Questions, problems, missing parts? Before returning to the store, call Home Depot Customer Service 8 a.m. - 6 p.m., EST, Mon day-Friday 855-HD-HAMPTON HAMPTONBAY.COM Retain this manual for future use.
- Page 15 THANK YOU reciate the trust and confidence you have placed in Hampton Bay through the purchase of this table. We strive to inually create quality products designed to enhance your home. Visit us online to see our full line of products available for your...
-
Page 16: Safety Information
Table of Contents Table of Contents............2 Pre-Assembly..............3 Safety Information............2 Planning Assembly............3 Set Up Your Furniture Properly........2 Hardware Included............3 Examine Your Furniture..........2 Package Contents............4 Observe Weight Limits..........2 Assembly................5 Warranty................2 Care and Cleaning............6 What is Covered............2 What is Not Covered............2 Safety Information SET UP YOUR FURNITURE PROPERLY □... -
Page 17: Pre-Assembly
Pre-Assembly PLANNING ASSEMBLY To prevent damage, place all parts on a soft surface during assembly. Remove all protective caps before beginning assembly. HARDWARE INCLUDED Part Description Quantity Φ1/4 x 20 mm Bolt Φ1/4 x 55 mm Long Bolt Φ6 mm Locking nut Φ6 mm Washer... - Page 18 Description Quantity Part Table top Base Side skirts Front skirt t r i HAMPTONBAY.COM Please contact 855-HD-HAMPTON for f urther assistance.
- Page 19 Attaching to side skirts to the Attaching the base back skirt □ □ Put the base (B) on side skirt (C) as shown ,fasten with Place the back skirt (E) on a soft surface. □ Attach the right side skirt (C)to the back skirt (E), bolts (AA) with washers (DD).Tighten half way using the fasten Hex wrench (FF).
- Page 20 Attaching the top Completing the assembly □ □ Make the holes on (E) and top (A )in a line. Attach side skirt (C) by aligning hole on the top (A) □ with the hole on the piston. Put long bolts(BB) going through the holes and □...
-
Page 21: Care And Cleaning
Care and Cleaning □ Before using, wipe with a clean, dry cloth. Do not use bleach or solvents. When not in use, store furniture in a cool, dry place. □ If your set includes cushions or mesh fabric, they may be cleaned by hand with a mild solution of soap and water. Rinse cushion thoroughly and allow to drip dry. - Page 22 Questions, problems, missing parts? Before returning to the store, call Home Depot Customer Service 8 a.m. - 6 p.m., EST, Mon day-Friday 855-HD-HAMPTON HAMPTONBAY.COM Retain this manual for future use.
Need help?
Do you have a question about the LAGUNA POINT DEEP SEATING KD SECTIONAL SET 5 W/ CUSHION-CHAIRS and is the answer not in the manual?
Questions and answers