Advertisement
Available languages
Available languages
Quick Links
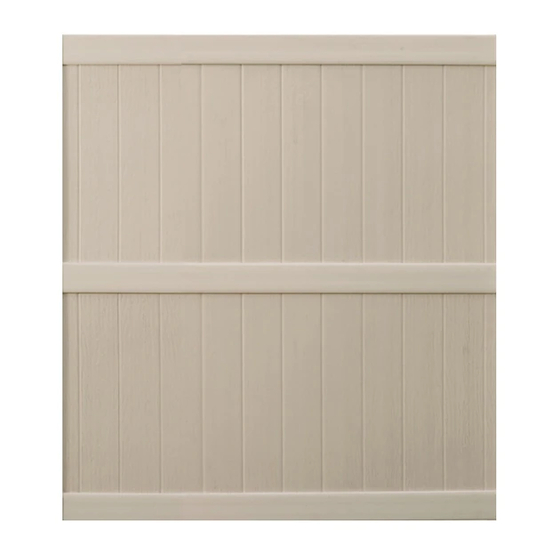
SPRINGFIELD 6X6
cat : 555519
IMPORTANT:
You must read these instructions carefully before you start to assemble this fence. Please carry out the steps in the order set out in these instructions. Keep these instructions
in a safe place for future reference.
GENERAL INFORMATION:
completion of your fence.
GENERAL ADVICE:
This is a 2 person assembly job. If it is a property line fence, you will want to confirm your property lines
before ordering your fence.The component parts should be checked and laid out in an orderly way, close at hand. Keep all small parts
(screws, etc.) in a bowl so that they do not get lost.
Please keep the tracking number which appears on the box, and refer to this number when calling the service office for questions or complaints.
CARE & MAINTENANCE:
DO NOT use acetone, abrasive cleaners or other special detergents to clean the fence.
For general support and replacement parts, please contact:
US: # 1-888-374-4262
Canada: # 1-800-661-6721
UK: # 0121-5060008
Other European Countries: # 31-1612-28301
String line
Post hole digger / power auger
Mallet
Work shoes
4 timber stakes
2"x 2"x24" (5cm x 5cm x 60cm)
Concrete / dry mix
PARTS & DIMENSIONS
RAIL (x1)
GENERAL ADVICE ON POST HOLES
Use a post hole digger, power auger, or shovel to dig a hole 12" (30 cm) in diameter
and 30" (75 cm) deep. Add 6" (15 cm) of gravel
for post drainage. Insert the post in the center
of the post hole. Level the post and press it
firmly into the hole. Fill the remainder of the hole
with concrete according to the manufacturer's
instructions.
BRACKETS ASSEMBLY
1. Attach three rail brackets (fcb) to one side of the post.
2. Do not assemble brackets on both sides of the post.
3. Place the positioning guide 68"(172 cm) from the top of the post, then place the bracket.
4. Locate all bracket screws (s18b) in the center of the elongated holes on the
bracket for expansion and contraction. The lip of the bracket should be at the bottom.
ASSEMBLY INSTRUCTIONS
The Keter Fence is easy to install. We incorporate methods and procedures used by professional installers to guide you through to the successful
When your fence needs a clean, use a mild detergent solution and rinse with cold clean water.
PANEL KIT
POST KIT
MIDDLE
PANEL
POST
s35 (x12)
(x2)
RAILS (x1)
35mm
(x2)
BOTTOM
TOP
BRACKET
RAIL (x1)
(x6)
Gravel to reduce
frost heave
Hole diameter 12" (30 cm)
TOOLS & MATERIALS
PROJECT PLANNING
1. Stake out fence from beginning to end.
2. Estimate the levelness of the ground.
s18b (x18)
3. Start at the
15mm
4. Dig holes under the post line.
the distance between the hole centers is 6'
(1.82m).
POST
CAP (x1)
For fence sections less than the
standard 6' (1.82m) center-to-center,
simply cut the rails and fence to size
using a power saw with a reinforced
metal blade.
2
POSITIONING GUIDE
A. Fold the positioning guide wings.
B. Positioning guide should be placed 68" (172 cm) from the top of the post.
C. Attach the positioning guide to the post as shown.
D. Place the bracket within the positioning guide hole.
6" (15 cm)
below frost
line
1
2
A
4
FIXING FIRST POST
Place the first post in the hole, checking that it satisfies ALL the following conditions:
HIGHEST GROUND POINT
A
fcb
up
Top of
bracket
GROUND
A. Position the first post at the highest ground point of the fence line!
B. Place 2" (5cm) timbers under the bracket to maintain the gap between the fence and the ground.
C. Check the VERTICAL angle in two directions.
D. Use dry or ready-mix concrete and let it dry for 10 minutes.
www.keter.com
highest side
of the fence line!
Make sure
B
C
B
HEIGHT
C
TIMBER
90
2"
(5 cm)
item : EN-V1
1
String/fence line to show
horizontal accuracy.
3
D
5
VERTICAL
ADD CONCRETE
D
Builder's
level.
o
o
90
Advertisement

Related Manuals for Keter SPRINGFIELD 6X6

Summary of Contents for Keter SPRINGFIELD 6X6
- Page 1 You must read these instructions carefully before you start to assemble this fence. Please carry out the steps in the order set out in these instructions. Keep these instructions in a safe place for future reference. GENERAL INFORMATION: The Keter Fence is easy to install. We incorporate methods and procedures used by professional installers to guide you through to the successful completion of your fence. GENERAL ADVICE: This is a 2 person assembly job.
- Page 2 EXTENDING THE POST FIXING THE FIRST RAIL 1. Place the lower rail in position. The post must be cast at least 12“ (30 cm) in the ground. If you have a slope that is This side up 2. Fix the rail to the post with 2 screws (s35), through the bracket over 12“...
-
Page 3: Instrucciones De Ensamblado
Siga estos pasos en el orden que se indica en las instrucciones, las cuales deberá guardar en un lugar seguro, para su futura referencia. INFORMACIÓN GENERAL: la cerca KETER es fácil de instalar. Incorporamos métodos y procedimientos empleados por instaladores profesionales para guiarlo mientras completa correctamente el armado de su cerca. - Page 4 EXTENSIÓN DEL POSTE FIJACIÓN DE LA PRIMERA BARANDA 1. Coloque la baranda inferior en su posición. El poste debe colocarse al menos a 12“ (30 cm) en el suelo. Si usted tiene una pendiente Este lado hacia arriba 2. Fije la baranda al poste con 2 tornillos s35, a través de los orificios de mayor de 12“...
-
Page 5: Instructions De Montage
Procédez aux étapes ci-dessous dans l'ordre indiqué. Conservez ces instructions dans un lieu sûr pour toute référence ultérieure. INFORMATIONS GÉNÉRALES: La clôture Keter est facile à installer. Les instructions réunissent les méthodes et procédures utilisées par des installateurs professionnels, afin de vous guider et de vous aider à réussir l'installation de votre clôture. - Page 6 RALLONGER LE POTEAU INSTALLATION DE LA PREMIÈRE TRAVERSE Le poteau doit être au moins enfoncé à 30 cm (12") dans le sol. Si la pente est 1. Mettez la traverse inférieure en place. Haut supérieure à 30 cm (12"), vous devez prolonger le poteau avec un piquet de bois 2.
- Page 7 Bewahren Sie diese Anleitung zum späteren Nachschlagen an einem sicheren Ort auf. ALLGEMEINE INFORMATIONEN: Der Keter Zaun ist einfach zu montieren. Wir verwenden Methoden und Vorgänge, die von professionellen Handwerkern verwendet werden, um Sie erfolgreich durch die Montageanleitung Ihres Zauns zu leiten.
- Page 8 VERLÄNGERN DES PFOSTENS MONTIEREN DER ERSTEN HALTEKLAMMER 1. Positionieren Sie die untere Leiste. Der Pfosten muss mindestens 30cm im Boden verankert sein und wenn Sie ein Diese Seite nach oben. 2. Befestigen Sie die Leiste mit 2 Schrauben (s35) durch die Gefälle von mehr als 30cm haben, wie dargestellt, mit einem Holzbalken Halteklammerlöcher an den Pfosten.
-
Page 9: Istruzioni Di Montaggio
Conservare queste istruzioni in un luogo sicuro per futuri riferimenti. INFORMAZIONI GENERALI: La recinzione Keter è semplice da installare. I metodi e le procedure da noi adottate sono utilizzate da installatori professionisti per guidarvi attraverso la giusta installazione della vostra recinzione. - Page 10 PROLUNGAMENTO DEL PALO FISSAGGIO DELLA PRIMA TRAVERSA 1. Mettere la traversa inferiore in posizione. Il palo dev’essere incastrato nel terreno a una profondità di almeno 30cm. Lato verso l’alto 2. Fissare la traversa al palo con 2 viti (s35), attraverso i fori della Se la pendenza è...
Need help?
Do you have a question about the SPRINGFIELD 6X6 and is the answer not in the manual?
Questions and answers