Advertisement
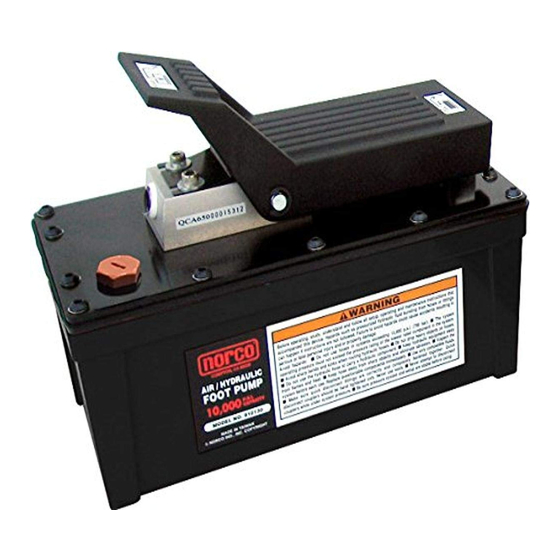
MODEL 910130 10,000 P.S.I. CAPACITY AIR/HYDRAULIC FOOT PUMP
SETUP • OPERATING • MAINTENANCE INSTRUCTIONS
Note: Revision letters (A, B, C, D etc.) after model numbers have been omitted as they do not affect the setup,
operating and maintenance instructions of a particular jack unless otherwise noted.
IMPORTANT: READ THESE INSTRUCTIONS BEFORE OPERATING
BEFORE USING THIS DEVICE, READ THIS MANUAL
COMPLETELY
AND
THOROUGHLY,
OPERATING
PROCEDURES,
MAINTENANCE REQUIREMENTS. FAILURE TO DO SO COULD
CAUSE ACCIDENTS RESULTING IN SERIOUS OR FATAL
PERSONAL INJURY AND/OR PROPERTY DAMAGE.
The use of air/hydraulic foot pumps is subject to certain hazards
that cannot be prevented by mechanical means, but only by the
exercise of intelligence, care, and common sense. It is therefore
essential to have owners and personnel involved in the use and
operation of equipment who are careful, competent, trained, and
qualified in the safe operation of the equipment and its proper use.
Hazards such as pressurized hydraulic fluid bursting from hoses or
fittings can happen resulting in loss of load, uncontrolled lowering
or dropping of load if instructions are not followed. Failure to avoid
•
Do not use hoses in systems exceeding 10,000 psi (700 bar).
•
The system operating pressure must not exceed the pressure
rating of the lowest rated component in the system.
•
Avoid sharp bends and kinks when routing hydraulic hoses.
•
Do not drop heavy objects on hose.
•
Do not use the hydraulic hose to carry a hydraulic component.
•
Keep hydraulic equipment away from flames and heat.
•
Keep hose away from sharp objects and eliminate abrasion.
1.
Remove the large allen socket pipe plug in the end of the black
elbow fitting that is installed in the side of the foot pump manifold.
Remove any remnants of teflon tape that may still be in the threads
of the elbow fitting.
2.
Determine if your system will require a poppit valve to restrict
the return flow of oil back to the pump's reservoir. Consult
the "OPERATING INSTRUCTIONS" portion of this manual to
determine if your system requires a poppit valve. If your system
does require a poppit valve, install the tapered end of the poppit
valve into the threaded hole at the end of the elbow fitting. Make
sure the poppit valve is inserted all the way until it bottoms out on
the seat at the bottom of the threaded hole.
3.
Make sure the hose fitting threads are not crossthreaded.
Use at least 1-1/2 wraps of teflon tape (or suitable sealant) on
the threads. Make sure the first complete thread is free from tape
or sealant so they do not enter and contaminate the hydraulic
system.
PROFESSIONAL LIFTING EQUIPMENT
UNDERSTAND
SAFETY
WARNINGS AND
WARNING
BEFORE OPERATING
®
hazards could cause accidents resulting in serious or fatal personal
ITS
injury and/or property damage.
It is the responsibility of the owner to make sure all personnel read
this manual prior to using this device. It is also the responsibility
of the device owner to keep these instructions intact and in a
convenient location for all to see and read. If these instructions
are lost or not legible, contact Norco for a free replacement. If the
operator is not fluent in English, the product and safety instructions
shall be read to and discussed with the operator in the operator's
native language by the purchaser/owner or his designee, making
sure that the operator comprehends its contents.
This product is covered by a Limited Lifetime Warranty. For details
see the back cover of Norco's product catalog.
•
Inspect the system before each use. Replace questionable
components immediately.
•
Use only compatible fluids.
•
Make sure quick disconnect fittings are correctly and
completely fastened together. Quick disconnect couplers
should be hand tightened only. Never use tools.
•
Never attempt to disconnect couplers while under system
pressure.
•
Be sure pressure system and setup are stable before using.
4.
If tubing is used instead of hose, make sure the tubing is
supported. Unsupported tubing can lead to premature fitting
failure. Always hard mount valves and gages and never allow
tubing to support them. Place tube supports 4 to 7 inches behind
the fitting.
5.
The air quick disconnect configuration of your choice can be
installed in the threaded hole underneath the foot pedal labeled
"PUMP". Prepare the threaded hole in the pump and air quick
disconnect threads in the same manner as described in steps 1
and 3 of this section titled "BEFORE OPERATING".
6.
The top forward section of the pump includes an air vent stem
which must be grabbed with thumb and forefinger and lifted up
to the air vent position. The pump will not work to its maximum
efficiency unless this air vent is opened. Close the air vent when
not using or transporting the pump.
7.
An in-line filter/regulator/lubricator should be installed close to
pump. Add a few drops of SAE 30 oil to the air intake weekly if no
lubricator is used or when pump will be idle for a long time.
WARRANTY
Advertisement
Table of Contents

Related Manuals for Norco 910130


Summary of Contents for Norco 910130
- Page 1 If these instructions The use of air/hydraulic foot pumps is subject to certain hazards are lost or not legible, contact Norco for a free replacement. If the operator is not fluent in English, the product and safety instructions that cannot be prevented by mechanical means, but only by the exercise of intelligence, care, and common sense.
- Page 2 Hang the hoses. manufacturer. REPAIR SERVICE It will be necessary to provide the Norco Authorized Service Center If your Norco product requires service or repair, contact the Norco Customer Service Department for the location of the nearest Norco with a copy of the bill of sale if requesting warranty repair.
Need help?
Do you have a question about the 910130 and is the answer not in the manual?
Questions and answers