Advertisement
Table of Contents
- 1 Lock Assembly & Handing
- 2 STEP 2: Orient Lock Assembly as Shown.
- 3 STEP 3: Check to Confirm Proper Placement of the Lock.
- 4 STEP 4: Ensure Lock Drive Hubs Align with Panel Face Bores.
- 5 STEP 5: Secure Lock with Installation Screws.
- 6 STEP 9: Tighten Screw to Secure Latch in Place.
- 7 STEP 10: Check Lock Function.
- Download this manual
PanoLock
™
Multi-Point Lock Instructions
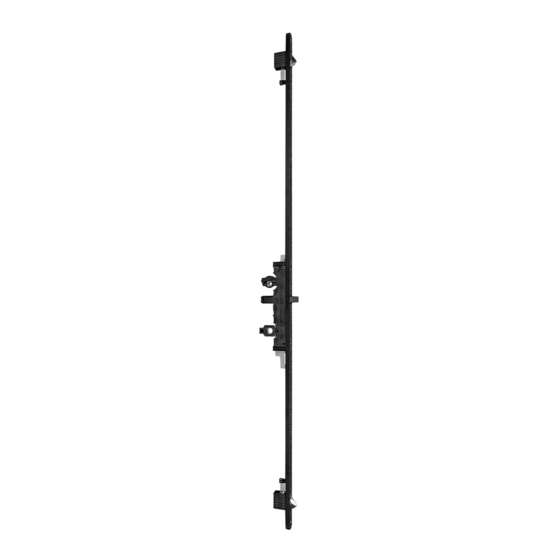
Lock Assembly & Handing
STEP 1
Ensure lock mortise in panel edge is clear
of dust and debris.
STEP 3
Place lock assembly in mortise pocket.
PanoLock
- Lock Assembly & Handing
™
STEP 2
Top end of lock
Orient lock assembly as shown.
STEP 4
8817 West Market Street
Colfax, NC 27235 | 800.334.2006
www.enduraproducts.com
Latch
Spring
Adjuster
Screw
Check to confirm proper
placement of the lock.
Ensure entire length
lock face plate is flush
with edge face of panel.
If lock does not sit flush,
remove lock and check
for debris in pocket. It
may be necessary to
verify mortise pocket
dimensions if no debris or
contamination is present.
Ensure lock drive hubs
align with panel face bores
1
Advertisement
Table of Contents

Subscribe to Our Youtube Channel
Related Manuals for Endura PanoLock

Summary of Contents for Endura PanoLock
- Page 1 PanoLock ™ Multi-Point Lock Instructions Lock Assembly & Handing 8817 West Market Street Colfax, NC 27235 | 800.334.2006 STEP 1 STEP 2 www.enduraproducts.com Top end of lock Latch Spring Adjuster Screw Ensure lock mortise in panel edge is clear Orient lock assembly as shown.
- Page 2 STEP 6 STEP 7 Lock Handing - The angled surface of the latch faces To rehand the lock, loosen the latch screw with a the strike plate. 9/64" allen wrench. PanoLock - Lock Assembly & Handing ™...
- Page 3 Lift latch away from lock, rotate 180 degrees, place back into lock. Slots on back of latch must align with ribs at bottom of latch hole. Note placement of roller sleeve, latch and screw. STEP 9 Tighten screw to secure latch in place. PanoLock - Lock Assembly & Handing ™...
- Page 4 Push down on the center latch. The latch The latch should remain extended. should remain extended. Move the pin button back to the starting position to disengage the upper, lower, and center latches. PanoLock - Lock Assembly & Handing ™...
Need help?
Do you have a question about the PanoLock and is the answer not in the manual?
Questions and answers