
Related Manuals for BMC BPAP Series


Summary of Contents for BMC BPAP Series
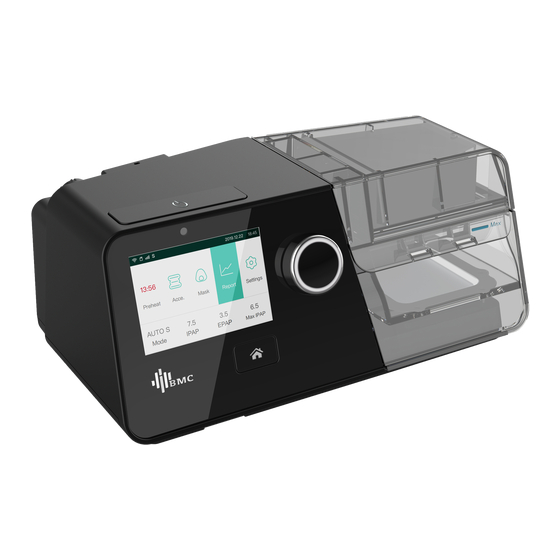
- Page 1 User Manual BPAP System G3 B20A / G3 B25S / G3 B25A / G3 B25VT / G3 B30VT / G3 B30SV / G3 LAB...
-
Page 2: Table Of Contents
BPAP Series User Manual V1.0 Table of Contents 1. Symbols·············································································· 1 1.1 Control Buttons ····························································· 1 1.2 Device Symbols ····························································· 1 2. Warning, Caution and Important Tip ··········································· 3 3. Intended Use ······································································· 3 4. Contraindications ··································································· 4 5. Specifications ······································································· 5 6. - Page 3 BPAP Series User Manual V1.0 15.1 Connecting to Cellular Network ······································· 27 15.2 Connecting to WiFi Network ··········································· 28 16. Navigating the Patient Menu··················································· 31 16.1 Steps to Navigating the Patient Menu ································ 31 16.1.1 Accessing the Main Interface ································· 31 16.1.2 Bringing up the Initial Setup Interface ······················...
-
Page 4: Symbols
BPAP Series User Manual V1.0 1. Symbols 1.1 Control Buttons Home Button Start / Stop Button Knob 1.2 Device Symbols Follow Instructions for Use Operating Instructions Type BF Applied Part (mask) Class II (Double Insulated) For indoor use only AC Power... - Page 5 BPAP Series User Manual V1.0 Do not use the product if the package is damaged Disassembly is prohibited Maximum water level European CE Declaration of Conformity Product is intended for use by a single patient only Lot number Non-Ionizing Radiation...
-
Page 6: Warning, Caution And Important Tip
• The instructions in this manual are not intended to supersede established medical protocols. • To ensure that you receive the safe, effective therapy prescribed for you, use only BMC accessories. • Do not bring the device or accessories into a Magnetic Resonance (MR) environment as it may cause unacceptable risk to the patient or damage to the device or MR medical devices. -
Page 7: Contraindications
BPAP Series User Manual V1.0 • Do not use the device or accessories in an environment with electromagnetic equipment such as CT scanners, Diathermy, RFID and electromagnetic security systems (metal detectors) as it may cause unacceptable risk to the patient or damage to the device. Some... -
Page 8: Specifications
BPAP Series User Manual V1.0 IMPORTANT TIPS! • An irregular sleep schedule, alcohol consumption, obesity, sleeping pills, or sedatives may aggravate your symptoms. • Please use a mask which meets ISO 17510: 2015. 5. Specifications Device Size Dimensions (L x W x H): 265 mm × 145 mm × 114 mm Weight: 1.7 kg... - Page 9 BPAP Series User Manual V1.0 Main device input 24V, 3.33A Device offer to Heated Tubing Communications Port 24 V 18 W Type of Protection against Electric Shock Class II Equipment Degree of Protection against Electric Shock Type BF Applied Part...
- Page 10 BPAP Series User Manual V1.0 Maximum Flow Test Pressures (hPa) Measured Pressure at the Patient Connection Port (hPa) Average Flow at the Patient Connection Port (L/min) Range: 35% ~ 100% The margin of error for SpO between 70% and 100% is ± 3%. No strict accuracy requirements for SpO below 70%.
-
Page 11: Available Therapies
BPAP Series User Manual V1.0 6. Available Therapies The device delivers the following therapies: CPAP – Delivers Continuous Positive Airway Pressure; CPAP maintains a constant level of pressure throughout the breathing cycle. If your health care professional has prescribed ramp for you, you can turn the Knob... -
Page 12: Glossary
BPAP Series User Manual V1.0 7. Glossary Apnea A condition marked by the cessation of spontaneous breathing. AutoCPAP Adjust CPAP pressure automatically to improve patient comfort based on monitoring of sleep events, such as apnea, hypopnea etc. Auto Off When this feature is enabled, the device automatically discontinues therapy whenever the mask is removed. - Page 13 BPAP Series User Manual V1.0 iCode A feature that is intended to give access to compliance and therapy management information. The ―iCode‖ consists of six separate codes displayed in the Patient Menu, each code is a sequence of numbers. The ―iCode QR‖ and ―iCode QR+‖ display two-dimensional codes.
-
Page 14: Model
BPAP Series User Manual V1.0 8. Model Product Contents Maximum Work Model Work Mode Pressure Main Device Optional Accessory (hPa) Main device Tubing (optional), CPAP, S, G3 B20A Mask (optional), (3.5-inch TFT) AutoS Kit (optional), Main device Finger clip Pulse... -
Page 15: Package Contents
• This device should only be used with the mask and accessories manufactured or recommended by BMC or with those recommended by your prescribing physician. The use of inappropriate masks and accessories may affect the performance of the device and impair the effectiveness of therapy. -
Page 16: System Features
BPAP Series User Manual V1.0 • Do not connect any equipment to the device unless recommended by BMC or your health care provider. • Please contact BMC to obtain an SD card if needed. IMPORTANT TIPS! • If any of the above parts are missing, contact your home care provider. - Page 17 BPAP Series User Manual V1.0 Heated Tubing Port Kit Port Air Outlet DC Inlet Filter Cap (Air Inlet) Fig. 10-2 Name Function Air Outlet Deliver pressurized air; connects to the tubing Kit Port Connected to SpO Kit (Not for connection to un-recommended...
-
Page 18: First Time Setup
BPAP Series User Manual V1.0 11. First Time Setup 11.1 Placing the Device Place the device on a firm, flat surface. WARNINGS! • If the device has been dropped or mishandled, if the enclosure is broken, or if water has entered the enclosure, disconnect the power cord and discontinue use. -
Page 19: Connecting To Power
BPAP Series User Manual V1.0 Fig. 11-2 (3) Change the air filter and filter cap to the PM2.5 filter, as shown in Fig. 11-3. PM2.5 Filter Fig. 11-3 CAUTION! • The air filter or the PM2.5 filter must be in place when the device is operating. -
Page 20: Connecting To Power Cord Locker
BPAP Series User Manual V1.0 WARNINGS! • The device is powered on for use when the power cord and power adapter is connected. The Knob turns the blower On / Off. • Use of the device at an AC voltage beyond the stated range (see Section 5 ―AC Power Consumption‖) may damage the device or cause device failure. -
Page 21: Assembling The Tubing / Heated Tubing And Mask
BPAP Series User Manual V1.0 11.5 Assembling the Tubing / Heated Tubing and Mask (1) Connect one end of the tubing to the air outlet of the device, as shown in Fig. 11-7. Air Outlet Tubing Fig. 11-7 (2) Connect the heated tubing joint to the air outlet of the device, and then insert the power plug into the heated tubing port on the back of the device, as shown in Fig. -
Page 22: Using Oxygen With The Device
- Use the accompanying tubing and mask provided by BMC. - Do not wear the mask for more than a few minutes while the device is not operating. - Use only masks with vent holes. Do not block or try to seal the vent holes in the exhalation port. -
Page 23: Inserting The Sd Card
BPAP Series User Manual V1.0 • Turn on the device before turning on the oxygen. Turn off the oxygen before turning off the device. Explanation of Warning: When the device is turned off, but the oxygen flow still exists, oxygen may accumulate within the device's enclosure and pose a fire hazard. Turning off the oxygen before turning off the device will prevent oxygen accumulation in the device and reduce the risk of fire. -
Page 24: Starting Treatment
• Be sure to follow your physician’s instructions on adjusting the settings! To order any accessories not included with this device, contact your equipment supplier. • DO NOT connect any ancillary equipment to this device unless recommended by BMC or your physician. If you suffer from chest discomfort, shortness of breath, stomach bloating, or severe headache when using the device, contract your physician or qualified medical personnel immediately. -
Page 25: Using The Ramp Feature
BPAP Series User Manual V1.0 12.5 Using the Ramp Feature Every time the feature is enabled, the pressure will drop to the initial pressure, and then gradually rise to the prescribed treatment pressure according to the preset ramp time, so as to make the patient fall asleep easily. -
Page 26: Heated Humidifier
BPAP Series User Manual V1.0 13. Heated Humidifier The humidifier is available from your home care provider. The humidifier may reduce nasal dryness and irritation by adding moisture (and heat if applicable) to the airflow. 13.1 Filling the Water Chamber 13.1.1 Removing the Water Chamber... -
Page 27: Returning The Water Chamber
BPAP Series User Manual V1.0 (2) Open the cap, and fill the water chamber with approximately 360 ml of water, as shown in Fig. 13-4. Make sure that the water does not exceed the maximum water level line. Fig. 13-4 WARNING! •... -
Page 28: Emptying The Water Chamber
BPAP Series User Manual V1.0 WARNING! • For safety purposes, the device must be placed on a flat surface at a level lower than the patient's head on a bed, so that the condensation flows back to the water chamber rather than remain in the tubing causing rainout. -
Page 29: Using The Spo 2 Kit
BPAP Series User Manual V1.0 Fig. 13-8 WARNING! • Do not touch the heater plate of the device when it is working, otherwise you may get burned. Turn off the heat when the heated humidifier is not in use. CAUTIONS! •... -
Page 30: Using The Cellular Module And The Wifi Kit
BPAP Series User Manual V1.0 15. Using the Cellular Module and the WiFi kit 15.1 Connecting to Cellular Network (1) Insert the Cellular Module into the device, and turn on the device. The device screen displays the Main Screen shown in Fig. 15-1. -
Page 31: Connecting To Wifi Network
BPAP Series User Manual V1.0 The device screen will not show the signal icon, if the Cellular Module is connected to the device improperly or if the Module is not working properly. WARNING! • To ensure successful data transmission through the Cellular Module, computers, televisions, radios or similar devices should not be placed near the Cellular Module. - Page 32 BPAP Series User Manual V1.0 Fig. 15-6 (3) The ―WiFi‖ setup interface displays a certain number of available WiFi networks in a random order, as shown in Fig. 15-7. If a page turning symbol appears below the WiFi network list, it indicates that when the cursor is on the last WiFi network on that page, the...
- Page 33 BPAP Series User Manual V1.0 Fig. 15-9 (4) After the desired WiFi network is found, press the Knob , turn the Knob select this WiFi network. Press the Knob to access the WiFi password input interface. The password is at least 8 characters in length, and can contain uppercase and lowercase English letters and digits 0 ~...
-
Page 34: Navigating The Patient Menu
BPAP Series User Manual V1.0 Fig. 8-13 Fig. 8-14 To switch from one successfully connected WiFi network to another, select the desired new network and enter the correct password to connect to it. If the desired WiFi network is a public network that does not require a password, turn the... -
Page 35: Bringing Up The Initial Setup Interface
BPAP Series User Manual V1.0 Fig. 16-2 Fig. 16-3 Note: The above interface only applicable to the device does not activate the SmartC, SmartA or SmartB. If the SmartC, SmartA or SmartB is enabled, and the symbol will appear in the status bar at the top of the screen, as shown in Fig. 16-4. -
Page 36: Accessing The Setup Interface
BPAP Series User Manual V1.0 Fig. 16-5 Note: The Heated Tubing option can only be adjusted when the device is connected to the Heated Tubing, as shown in Fig. 16-6. Fig. 16-6 16.1.3 Selecting Options As you turn the Knob clockwise, the cursor moves downwards from one option to another. -
Page 37: Confirming Adjustments
BPAP Series User Manual V1.0 Fig. 16-8 16.1.5 Confirming Adjustments Confirm your adjustment to an option by pressing the Knob . The option is then displayed in white, as shown in Fig. 16-9. Fig. 16-9 16.1.6 Turning Pages When the cursor is on Work screen saver, the last option shown in Fig. 16-9, the remaining... -
Page 38: Options Of The Patient Menu And Corresponding Descriptions
BPAP Series User Manual V1.0 16.2 Options of the Patient Menu and Corresponding Descriptions Option Range Description There are six humidity levels available. As the Off, Auto, Humidifier numbering increases, the humidity rises accordingly. 1 ~ 5 ―Off‖ means the humidifier is turned off. - Page 39 Mask Type Nasal; Pillow; (nasal pillow mask). When selecting masks other Other than the above three types of BMC masks, the patient can identify the masks as other. Test whether the mask is worn correctly,the screen Start the Mask Fititing will display the "great"...
-
Page 40: Alarm
BPAP Series User Manual V1.0 17. Alarm This chapter describes device alarms and the responses operators make to different alarms. After running, disconnect the device from the power supply by unplugging the power cord, an audible alarm sounds like ―beep beep beep, beep-beep, beep beep beep, beep-beep‖, which means the alarming system of the device works normally. -
Page 41: Auditory Alarming
BPAP Series User Manual V1.0 17.3 Auditory Alarming In the case of alarming, the alarming sounds at different grades will occur and are described as follows: Grade Auditory Description beep beep beep beep-beep High beep beep beep beep beep Intermediate... -
Page 42: Alarming Information And Description
BPAP Series User Manual V1.0 17.5 Alarming Information and Description Alarm Alarm Alarm Message Description Priority Type An audible alarm will sound in 6s if the device is accidentally disconnected from power when it is delivering air. Alarming duration time is no less than 30s. - Page 43 BPAP Series User Manual V1.0 When the airflow is on, an audible alarm will sound if the airway pressure is below the warning limen; the screen will display ―Low Pressure!!‖. Note: The limens for different models: Middle Function Low Pressure!! Off,3 ~...
- Page 44 BPAP Series User Manual V1.0 ―1 L/min‖ If the voltage supplied by power adaptor Middle Technology Low Input is lower than 22V, an audible alarm will Voltage!! sound and the screen will display ―Low Priority Alarm Input Voltage!!‖ When the airflow is on, an audible alarm will sound if the respiratory rate exceeds the threshold;...
-
Page 45: Reposition Of Alarming
BPAP Series User Manual V1.0 17.6 Reposition of Alarming After the elimination of the alarming faults, the residual alarming information still exists (alarming information is shown on the top of the screen without any visual and auditory alarming), and turn the button leftwards or rightwards to reduce the residual alarming information. -
Page 46: Cleaning And Disinfection
BPAP Series User Manual V1.0 (2) Press the home button and it will become silent for 100 to 120 seconds. If the alarm state has not been eliminated, and then the alarm sounds again immediately after the end of the silence. -
Page 47: Cleaning The Mask And Headgear
BPAP Series User Manual V1.0 • Do not use solutions containing chlorinated lime, chlorine, or aromatic to clean the device and its accessories. Liquid soap containing moisturizing agents or antimicrobials should not be used either. These solutions may harden cleaned materials or reduce their lifespan. -
Page 48: Cleaning The Transfer Box
BPAP Series User Manual V1.0 • It is recommended to do daily cleaning of the water chamber. 18.4 Cleaning the Transfer Box (1) Removing the Transfer Box: First remove the water chamber from the device, and then remove the transfer box, as shown in Fig. 18-2. -
Page 49: Replacing The Air Filter / Pm2.5 Filter
BPAP Series User Manual V1.0 CAUTION! • It is recommended to clean the tubing once a week. 18.7 Replacing the Air Filter / PM2.5 Filter Attach the air filter to the filter cap, as shown in Fig. 18-4. Air Filter Filter Cap Fig. -
Page 50: Disinfection
BPAP Series User Manual V1.0 18.8 Disinfection Generally speaking, if you have strictly followed the above cleaning instructions, you do not have to disinfect the device and / or water chamber. If the device is contaminated or used in clinical trials, you may purchase disinfectants from a home medical equipment company to disinfect the device. -
Page 51: Traveling With The Device
• If the device is used when the atmospheric pressure is out of the stated range (See Section 5), the accuracy of the leakage alarm will be affected. (1) Use the BMC carrying case to carry the device and accessories along with you. Do not put them in your checked baggage. -
Page 52: Transferring The Device To Another Patient
22. Technical Support Please contact BMC directly if you need the circuit diagram of the device and the list of components for certain purposes such as maintenance or connection to other equipment. BMC will provide the circuit diagram and / or other technical documents in whole or in part according to your needs. -
Page 53: Troubleshooting
BPAP Series User Manual V1.0 24. Troubleshooting The table below lists common problems you may have with the device and possible solutions to those problems. If none of the corrective actions solve the problem, contact your home care provider. 24.1 Common Problems in Patients and Corresponding... - Page 54 BPAP Series User Manual V1.0 Contact your physician equipment supplier. The patient is allergic to the Use a mask which is not made with materials of the mask natural rubber latex. Place a lining between the skin and mask Turn the humidity setting down, or raise the room temperature.
-
Page 55: Common Problems In The Device And Corresponding Solutions
BPAP Series User Manual V1.0 24.2 Common Problems in the Device and Corresponding Solutions Problem Possible Cause Solution(s) Take a few deep breaths with the The Auto On / Off feature is mask on, and the device will start enabled... -
Page 56: Emc Requirements
BPAP Series User Manual V1.0 25. EMC Requirements Guidance and manufacturer's declaration - electromagnetic emissions The device is intended for use in the electromagnetic environment specified below. The user of the device should ensure that it is used in such an environment. - Page 57 BPAP Series User Manual V1.0 Guidance and manufacturer's declaration - electromagnetic immunity The device is intended for use in the electromagnetic environment specified below. The user of the device should make sure that it is used in such an environment.
- Page 58 BPAP Series User Manual V1.0 Guidance and manufacturer's declaration - electromagnetic immunity The device is intended for use in the electromagnetic environment specified below. The user of the device should make sure that it is used in such an environment.
- Page 59 BPAP Series User Manual V1.0 Recommended separation distances between portable and mobile RF communications equipment and the device The device is intended for use in an electromagnetic environment in which radiated RF disturbances are controlled. The customer or the user of the device can help prevent...
- Page 60 BPAP Series User Manual V1.0 Recommended separation distances between wireless communications equipment The device is intended for use in an electromagnetic environment in which radiated RF disturbances are controlled. The customer or the user of the device can help prevent...
-
Page 61: Limited Warranty
(1) year for main unit and three (3) months for all accessories from the date of sale by BMC Medical Co., Ltd. to the dealer. If the product fails to perform in accordance with the product specifications, BMC Medical Co., Ltd. will repair or replace, at its option, the defective material or part. - Page 62 391170...
Need help?
Do you have a question about the BPAP Series and is the answer not in the manual?
Questions and answers