Advertisement
Quick Links
Advertisement

Related Manuals for Triton advanced LADOGA 2 ADVANCED

Summary of Contents for Triton advanced LADOGA 2 ADVANCED
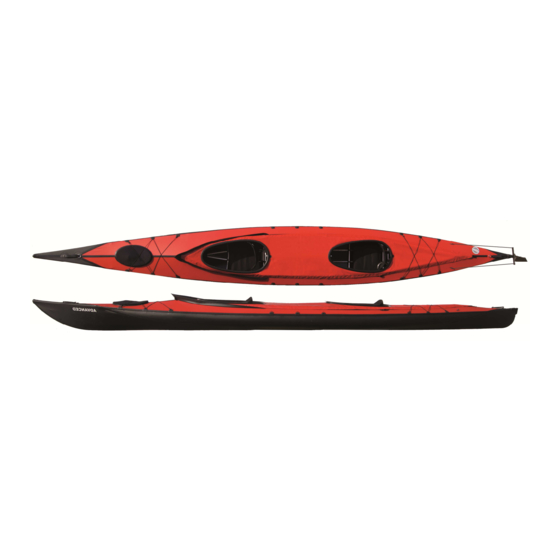
- Page 1 SSEMBLING NSTRUCTION RITON ADOGA ADVANCED Touring and sea kayak Assembly video:...
- Page 2 “Kanu-Magazin” with the "Super Tip". The Ladoga 2 advanced has been one of the best-selling folding kayaks in Europe in recent years. The body stiffness results from the high structural performance of the frame; on the other hand the hull is designed to fit the frame perfectly.
- Page 3 1) 8x Stringer element with lock: 2) 13x Stringer element without lock 3) 4x Sleeves, small 4) Keel ladder with riveted half tube 5) Keel rod (with 2x clips) 6) Keel fork (one with open end, one 10 a) with hemispherical end) 7) 2x Bent coaming rod (wider diameter) 8) 4x Coaming rod (2x of them with D- rings;...
- Page 4 Assembling Bow 1x Bow segment 9x Stringer element without lock 4x Stringer element with lock 1x Keel rod (with 2x clips) 1x Keel fork with hemispherical end 1x Ridge bar 1x Cross rib #1 1x cross rib #2 with steel hooks on top First clip a stringer element without lock on each of the five elements at the bow segment.
- Page 5 Then clip the stringer elements into the C- clips of the cross rib. Also clip in the centered stringer element (arrow) on top of the cross rib. This will use as an extension to the ridge bar Now insert another stringer element without lock to each of the side stringer (4x), and then again one stringer element with lock snap button...
- Page 6 The connection of the cross rib #2 and the insertion of the ridge bar into the extension element have to be done simultaneously. Then clip the extension element on the upper clip of cross rib #1 Ensure, that all snap buttons face inside the kayak: snap button The bow element is fully assembled and...
- Page 7 The cross rib #6 is inserted similar to the cross rib #2. Which means, that the remaining ridge bar is joined to the cross rib and then, while pushing it to the pickup element on the keel rod, it is inserted to the pickup at the stern segment.
- Page 8 Try to orientate at the ridge bar and the reinforcement strip on the deck to insert the frame centrally. Also, a look through the hatch can help. Push the frame firmly into the bow as far as you can. Make sure, the two pickup elements at the ridge bar are pointing towards the center of the kayak (this is where the coaming is inserted later on).
- Page 9 That means pulling up stern and bow ("stern over bow"). Hang the keel fork under the keel ladder (with the riveted half-tube) and gently push the whole thing down. IMPORTANT: Prior to this operation take the stringer elements out the skin. This will relieve the keel and will avoid any blockage.
- Page 10 Installation of the hanging seat The filling tube to inflate the seat always faces forwards, towards the bow. The front seat is a bit more narrow in the front seat back seat front, than in the back. The back seat (the other way around) wider in the front than in the back.
- Page 11 Note: You can connect the stringer elements both by pushing them into the boat, or by pulling them into the boat from the opposite side. Give it a try, what suits you better. Work your way from the bottom up. Start with the lower stringer elements.
- Page 12 Then slide the sleeve over the connection. Repeat the process with the remaining 3 stringer elements, from bottom to top. Especially at the beginning you have to practice a bit until you find the right way. But then it is surprisingly easy. The gratitude is an extremely stiff and strong connection that contributes a lot to the performance of your folding kayak.
- Page 13 It is much easier to push the coaming rod “from the inside of the boat”, rather than “from above”. This creates a “straight line” and prevents jamming inside the channel. Thus, the rods are much easier to push into the channel! Then connect the coaming rod with the pickup element in the bow by sliding it onto it.
- Page 14 Align both locks exactly on another. Then press the rods slightly downward or upward - depending on how the connection works better. Snap the locks and return rods. Then slide the sleeve over it. Important: Again, it is crucial to form a straight line and then slide the sleeve over the locks.
- Page 15 5) Installation of the cockpit cross ribs and final installation of the seats Please also follow the exact order in the next step! At the top you see cross rib #5, which is the lowest one and sits behind the back seat.
- Page 16 Pull the seat backwards. Grab from behind to the front part of the seat (as on the picture). Pull as far until the seat is located approximately 8 cm in front of the cross rib #3. (you will find out, what position suits you best quickly).
- Page 17 If this is a bit difficult, "push" the coaming with your palm over the cross rib. (as shown in the left picture) Now take the two half cross ribs. They use as support for the seats and ensures that half cross rib for the weight of the paddler does not press the back seat on the stringer element.
- Page 18 Now install the back rest. Lead the upper strap through the D-ring on the coaming, then lead it back through the clip. Set the desired position. The lower straps are fixed on the cross rib behind the seat. Now inflate the sponsons by using the filling tubes.
- Page 19 6) Deck lining / Deck / Rudder system In the repair kit you will find the deck lining and other parts for the rudder system. The deck lining can be installed in different ways. One suggestion is, to form a loop, lead it through the middle D-ring and lead the two ends back through the loop.
- Page 20 ...and then the whole cover through it. Now the hatch cover is securely connected to the lining and stays on board. Now attach the deck. The deck is attached by Velcros. Begin at the top of the cockpit fix it. You can also paddle your Ladoga 2 advanced "open", if you like.
- Page 21 Multifunctional attachment: Your kayak comes with an already mounted multifunctional attachment on the bow. So it is "ready for flat earth". Flat earth is a very effective and light (<1kg) sailing system for your kayak. (see picture below) You can also use it for an all round light from "Navisafe".
- Page 22 Folding the hull Before folding the skin, spread it out flatly, then fold it lengthwise. Fold in one top (on the picture below the left side) about 25cm. Then fold the bow and the stern to the middle (app. one length of the packing bag): Then fold from the stern again to the middle (app.
- Page 23 Care, Safety, Storage and further Information: Salt water: If you want to use your boat in the brackish water / salt water, the treatment of the rod with "CorroFilm" is absolutely recommended. Ask your local Dealer for it! CorroFilm can be sprayed onto (and if necessary also in) the rods and generates a transparent, dry protective film which protects the aluminum perfectly against the "attack"...
- Page 24 More useful accessories for your boat: • Spray skirt Nylon • Spray skirt Thermal PU (instead of neoprene) • Hatch cover for the cockpit • Sea sock Thermal PU • CorroFilm corrosion protection spray • Sailing system with outrigger • Flat earth Sails •...
Need help?
Do you have a question about the LADOGA 2 ADVANCED and is the answer not in the manual?
Questions and answers