Table of Contents
Advertisement
Advertisement
Table of Contents

Related Manuals for Merida PowerCycle


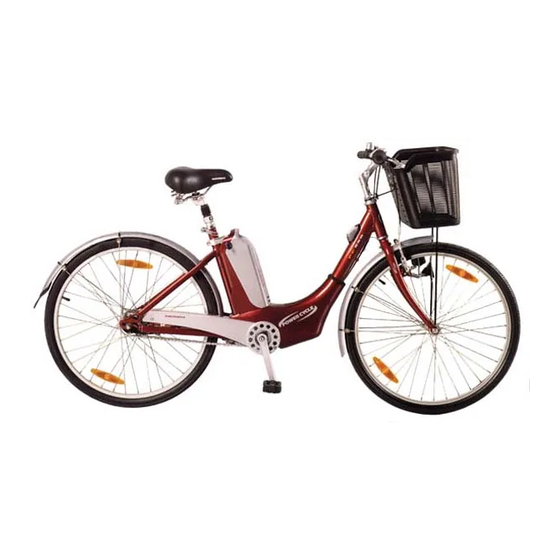
Summary of Contents for Merida PowerCycle
-
Page 2: Table Of Contents
Table Of Contents MERIDA PowerCycle™ Section 1 - INTRODUCTION G. Bicycle Suspension ......15 A. About This Manual ......2 H. -
Page 3: Section 1 - Introduction
1d. A SPECIAL NOTE TO PARENTS • Ensure the charger voltage switch, on the end of the The MERIDA PowerCycle™ is intended for use by adult rid- charger, is set to the correct position: 115V for U.S.A. ers only. As a parent or guardian, you are responsible for or 230V for most European countries. -
Page 4: Section 2 - Basic Instructions
Before letting any child ride the sure that your child understands that a bicycle helmet is PowerCycle™, review with them all warnings as well as the for bicycling only, and must be removed when not riding. information on the proper usage of your battery pack, A helmet must not be worn while playing, in play areas, charger and bicycle. -
Page 5: Mechanical Safety Check
4. Quick Releases: Make sure seat post quick release is prop- the suspension responds to brake application and rider erly adjusted and in the locked position. weight shifts. 5. Handlebar and saddle alignment: Make sure the saddle Page 4 MERIDA USERS MANUAL... -
Page 6: Riding An Electric Bike
8. Never ride with headphones. They mask traffic sounds pedals and cranks; and the spinning wheels of your bicycle. and emergency vehicle sirens, distract you from concen- MERIDA USERS MANUAL Page 5... -
Page 7: Off Road Safety
Bicycle reflectors are designed to pick up and reflect traffic. streetlights and car lights in a way that may help you • Avoid road hazards. to be seen and recognized as a moving bicyclist. • If possible, ride on familiar routes. Page 6 MERIDA USERS MANUAL... -
Page 8: Changing Components Or Adding Accessories
- go be if you were straddling the bike and standing half way see your MERIDA Dealer. between the saddle and the handlebars. To check for cor- MERIDA USERS MANUAL... -
Page 9: Handlebar Height And Angle
4e. BRAKE REACH 4c. HANDLEBAR HEIGHT AND ANGLE Your PowerCycle™ has brake levers that can be adjusted Your bike is equipped either with a “threadless” stem (550 for reach. If you have small hands or find it difficult to... -
Page 10: Section 5 - How Things Work
If you have difficulties with shift- Twist grip gear selector ing, the problem could be mechanical adjustment. See The PowerCycle™ uses a Shimano Nexus twist grip (figure your dealer for help. 2B & 3B) to shift gears. The 4 speed gears are part of the To shift to a higher gear, twist the shifter rearward (coun- rear internal gear hub. -
Page 11: Left Hand Controls
2. With a 15-mm box wrench, loosen the two axle nuts (fig- 5c. POWER ASSIST ure 5A & 5B). Your PowerCycle™ is a pedal assist bike. That is, the motor supplies additional power to the rear wheel while you are pedaling. A computerized sensor measures both speed and torque to determine the amount of assist to provide. - Page 12 Removing a bolt on rear wheel 1. Stabilize the bike using its support stand. 2. Shift the PowerCycle™ into (#1) first gear. 3. With a #2 Philips screwdriver and 8-mm box wrench, loosen and remove the rear brake arm retainer screw and nut (figure 6,A).
-
Page 13: Brakes
The right brake lever controls the rear brake. shift arm guides, (figure 8B) and release the shift arm. The braking action of a PowerCycle™ is a function in the 8. Pull the rear wheel rearward so the axle slides into the rear of the rollers on the disc or in the front of the brake rear dropouts. - Page 14 In the case of #1 and #2, the cause might be not enough is even more important on steep descents, because de- brake grease, so ask your MERIDA Dealer to grease the scents shift weight forward. mechanism with special Shimano roller brake grease.
-
Page 15: Seat Post Quick Release
(figure 14B). 3. Test brake function before riding bike. 5f. SEAT POST QUICK RELEASE PowerCycle's™ are equipped with a quick-release seat post Brake cable free play adjustment (Front binder. While a quick release looks like a long bolt with a... -
Page 16: Bicycle Suspension
SUSPENSION SEAT POST the palm of your hand, the tension is insufficient. Open Your PowerCycle™ comes equipped with a suspension seat the lever; turn the tension-adjusting nut clockwise a post to maximize your comfort. You will find several Allen quarter turn;... -
Page 17: Pedals
2. Understand and apply the correct technique for clamping your seat post quick release. mation, which is most important to you, is Tire 3. Before you ride the PowerCycle™, first check that the Pressure. seat post is securely clamped. Figure 23... -
Page 18: Lighting System
Instead, use a high quality 5j. LIGHTING SYSTEM dial gauge. Your PowerCycle™ comes equipped with a generator-pow- ered headlight and taillight. To use the lighting system press Ask your dealer to recommend the best tire pressure for down on the bull’s eye (figure... -
Page 19: Section 6 - Battery Management
6. BATTERY MANAGEMENT ing. • Your PowerCycle™ utilizes a Lead Acid (LA) or Nickel 3. For the NiMH battery pack, be sure the cooling fan vents Metal Hydride (NiMH) battery. Please read the instruc- (on bottom of battery pack) are unrestricted when tions below to maximize your battery’s life and perfor-... -
Page 20: Charging Instructions
O (OFF), and disconnect the charger cords from the electrical socket and the battery pack. Figure 28 10. Install the battery into the PowerCycle™ as described 3. Be sure the charger switch is turned to O (OFF) in section 6h. -
Page 21: Charge Times
1. Leave charger plugged into battery pack for 10 hours. PowerCycle™. 2. There is a problem with your charger and/or battery pack. Turn off charger, unplug and see your local MERIDA CAUTION: When leaving MERIDA dealer for service. PowerCycle™ unattended, turn Battery •... -
Page 22: Battery Pack Installation And Removal
6h. BATTERY PACK INSTALLATION AND REMOVAL Caution: The PowerCycle’s™ electronic components will retain a small bit of energy, even when the battery has been removed. To avoid electric shock, turn the Battery Key Switch to the“ON” position to discharge any... -
Page 23: Battery Pack Storage
Remove the battery pack before washing your PowerCycle™. WARNING: Before each ride you need to verify that the Clean the PowerCycle™ with a mild soap and a sponge. DO battery pack is securely attached to your bicycle. If the NOT use a power hose or washer. Gently rinse with water. -
Page 24: Battery Disposal
Hydride batteries, and we encourage you to find one and about the best lubricants and the recommended lubri- use it. Your MERIDA Dealer is also equipped to dispose of cation frequency for your area. the battery according to local and other laws. For additional 4. -
Page 25: If Your Bicycle Sustains An Impact
Every 3 Months Check wheels for alignment – bring to your MERIDA dealer if adjustment is required Check brake pads for wear - bring to your MERIDA dealer if replacement is required Clean bike and all moving parts Lubricate moving parts: cables, chain, rear brake, shift levers, derailleur, etc. -
Page 26: Section 8 - Important Stuff
8c. WARRANTY REGISTRATION CARD The Merida aluminum frame is warranted for five years. The bi- Please fill out your warranty registration card and return it cycle components, including aluminum rims and spokes, are to EWI within 30 days from the date of purchase: warranted for one year. -
Page 27: Recording Your Key Number
These numbers are required for warranty and replacement and you qualify for a 10% discount on Merida battery re- parts purposes. placements after the warranty period ends. 8f. RECORDING YOUR KEY NUMBER (figure 41 A) 8h. RECORDING YOUR DEALER INFORMATION Your Battery Pack Keys have numbers stamped into them. -
Page 28: Notes
8i. NOTES Use this space to record notes about your MERIDA PowerCycle™ MERIDA USERS MANUAL Page 27... - Page 29 Electric Wheels International 2240 Quimby Road San Jose, CA 95122 info@electricwheelsintl.com. Page 28 MERIDA USERS MANUAL...
Need help?
Do you have a question about the PowerCycle and is the answer not in the manual?
Questions and answers